Appearance
Exercise 1 - Create a Targeted Marketing Campaign with AI
The goal of this exercise is to build a cutting-edge marketing campaign with the help of intelligent tools. This exercise will cover two key steps:
- Intuitive Audience Targeting: We'll show you how to define and create a highly specific target audience segment.
- Journey Mapping Made Simple: We'll conclude by diving into agentforce, where you will experience how easy it is to design and visualize a sophisticated customer journey.
Step 1a: Segment Creation with AI
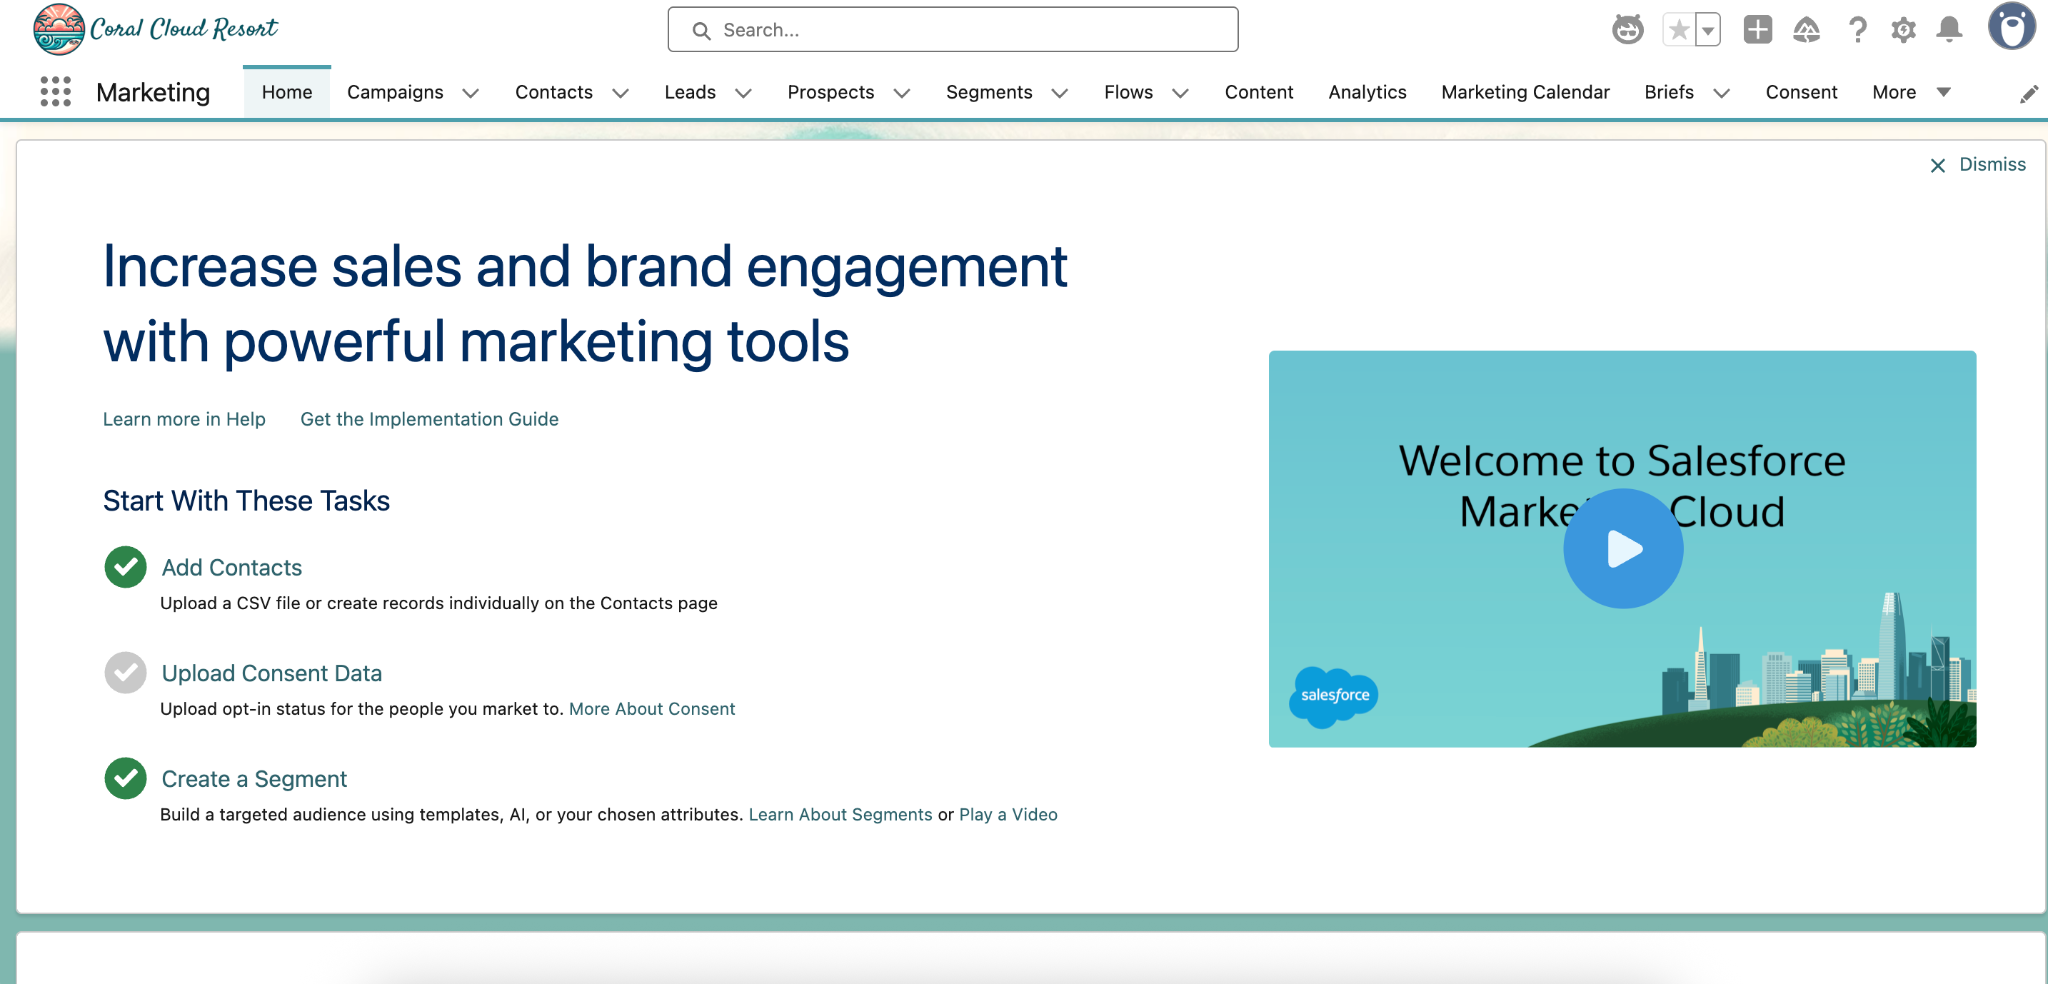
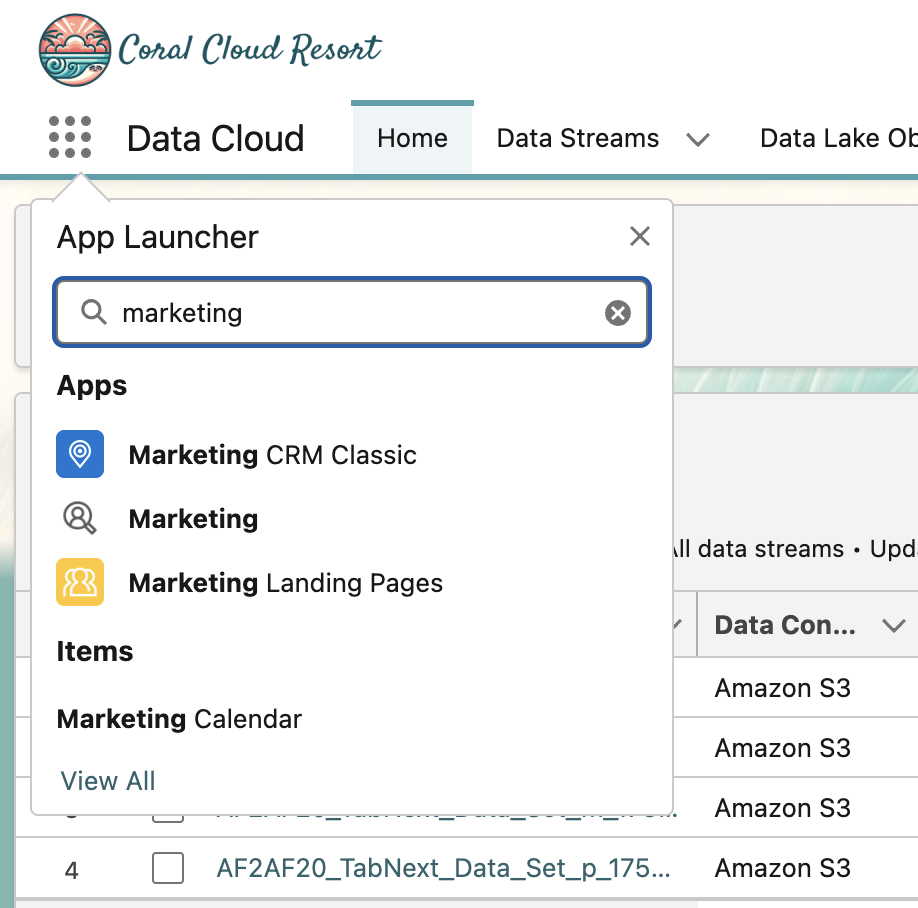
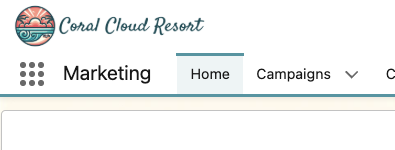
Click the App Launcher (9-dot icon below the Coral Cloud Resort logo at the top left), type Marketing, and then select Marketing.

Under Home, you will see a few tasks to start with. Let’s find and click on Create a Segment.
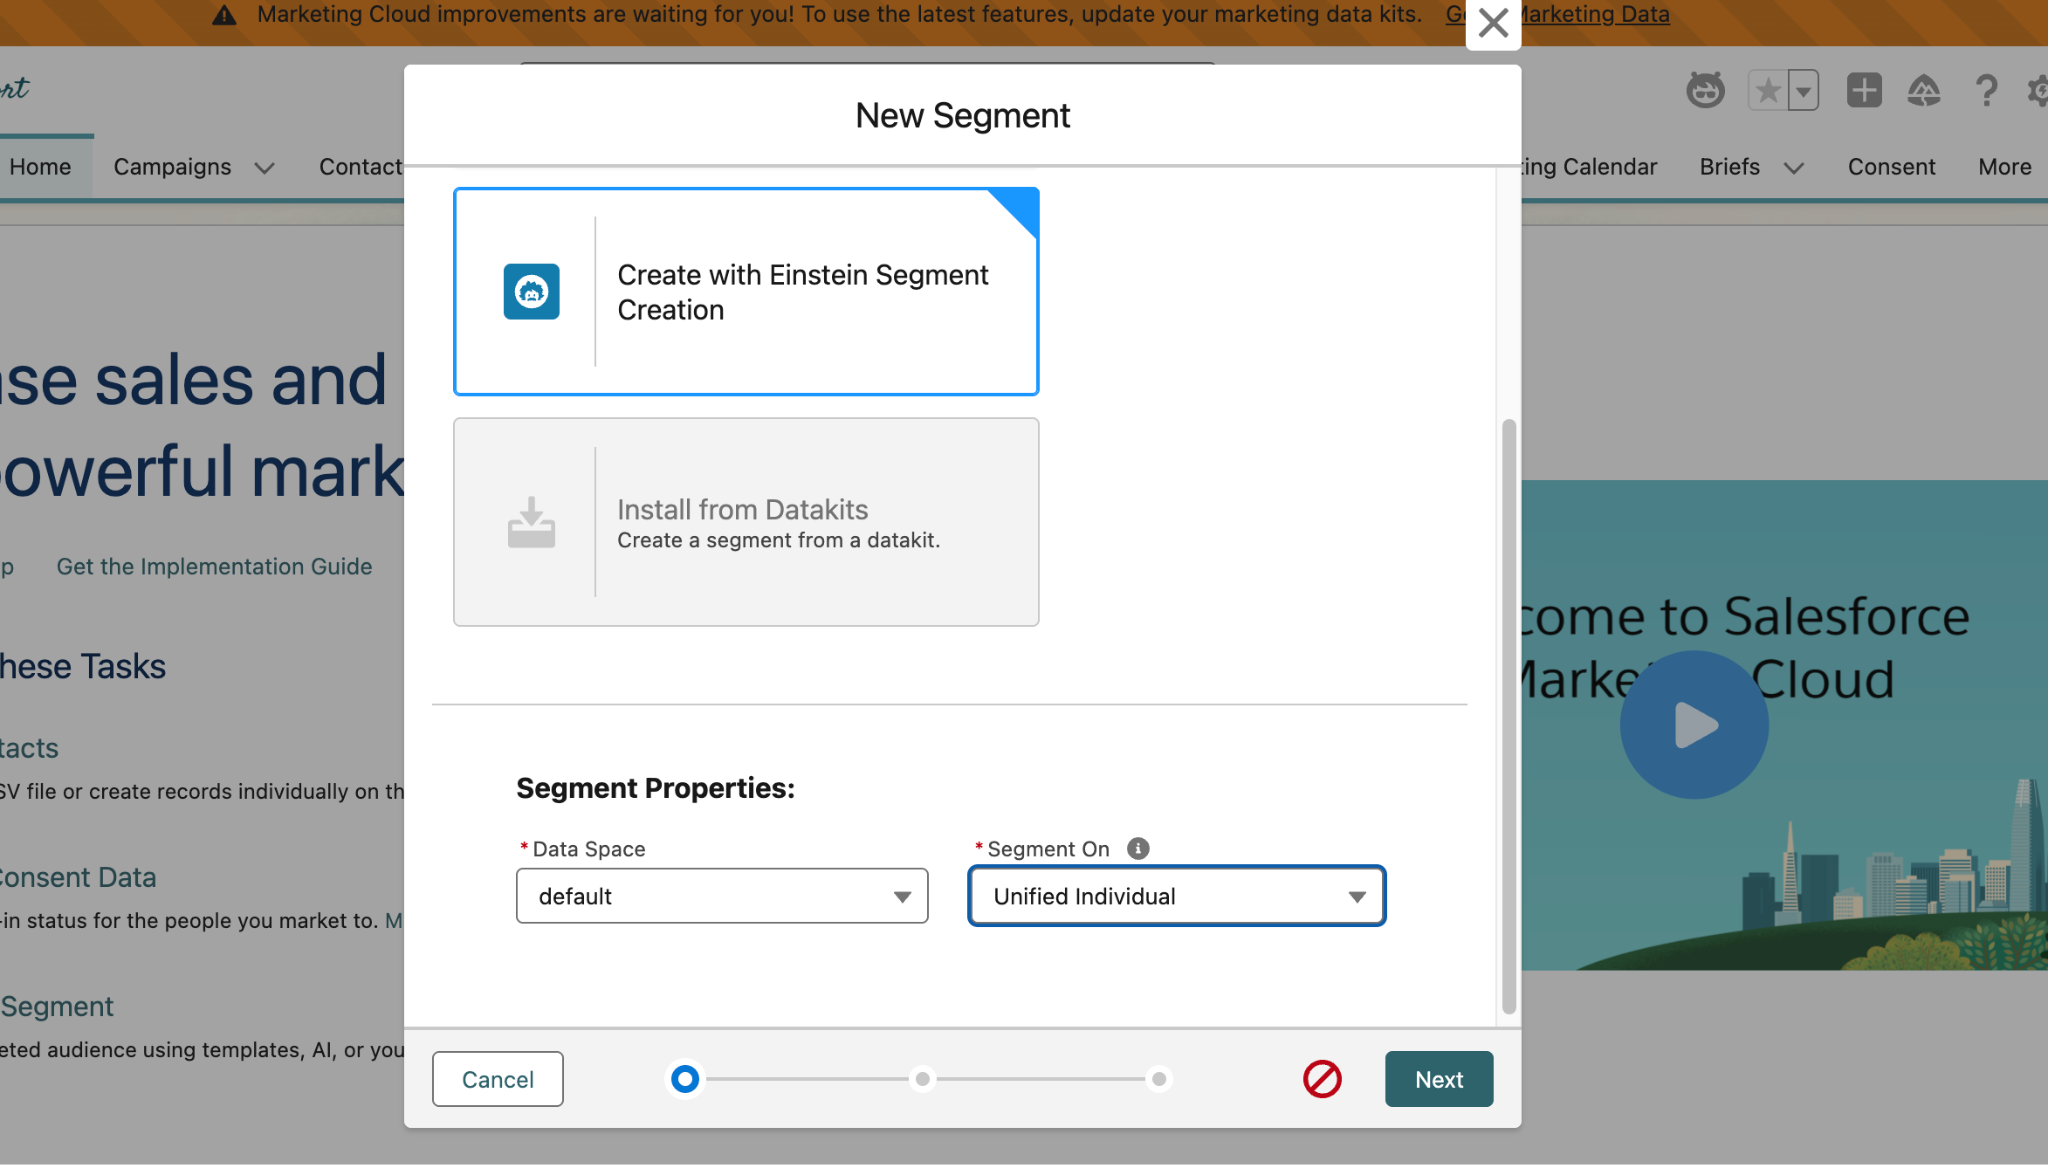
Once you select Create a Segment, In the pop-up window you will see several different options to create your segment.
For our exercise, choose Create with Einstein Segmentation under the generative AI options.
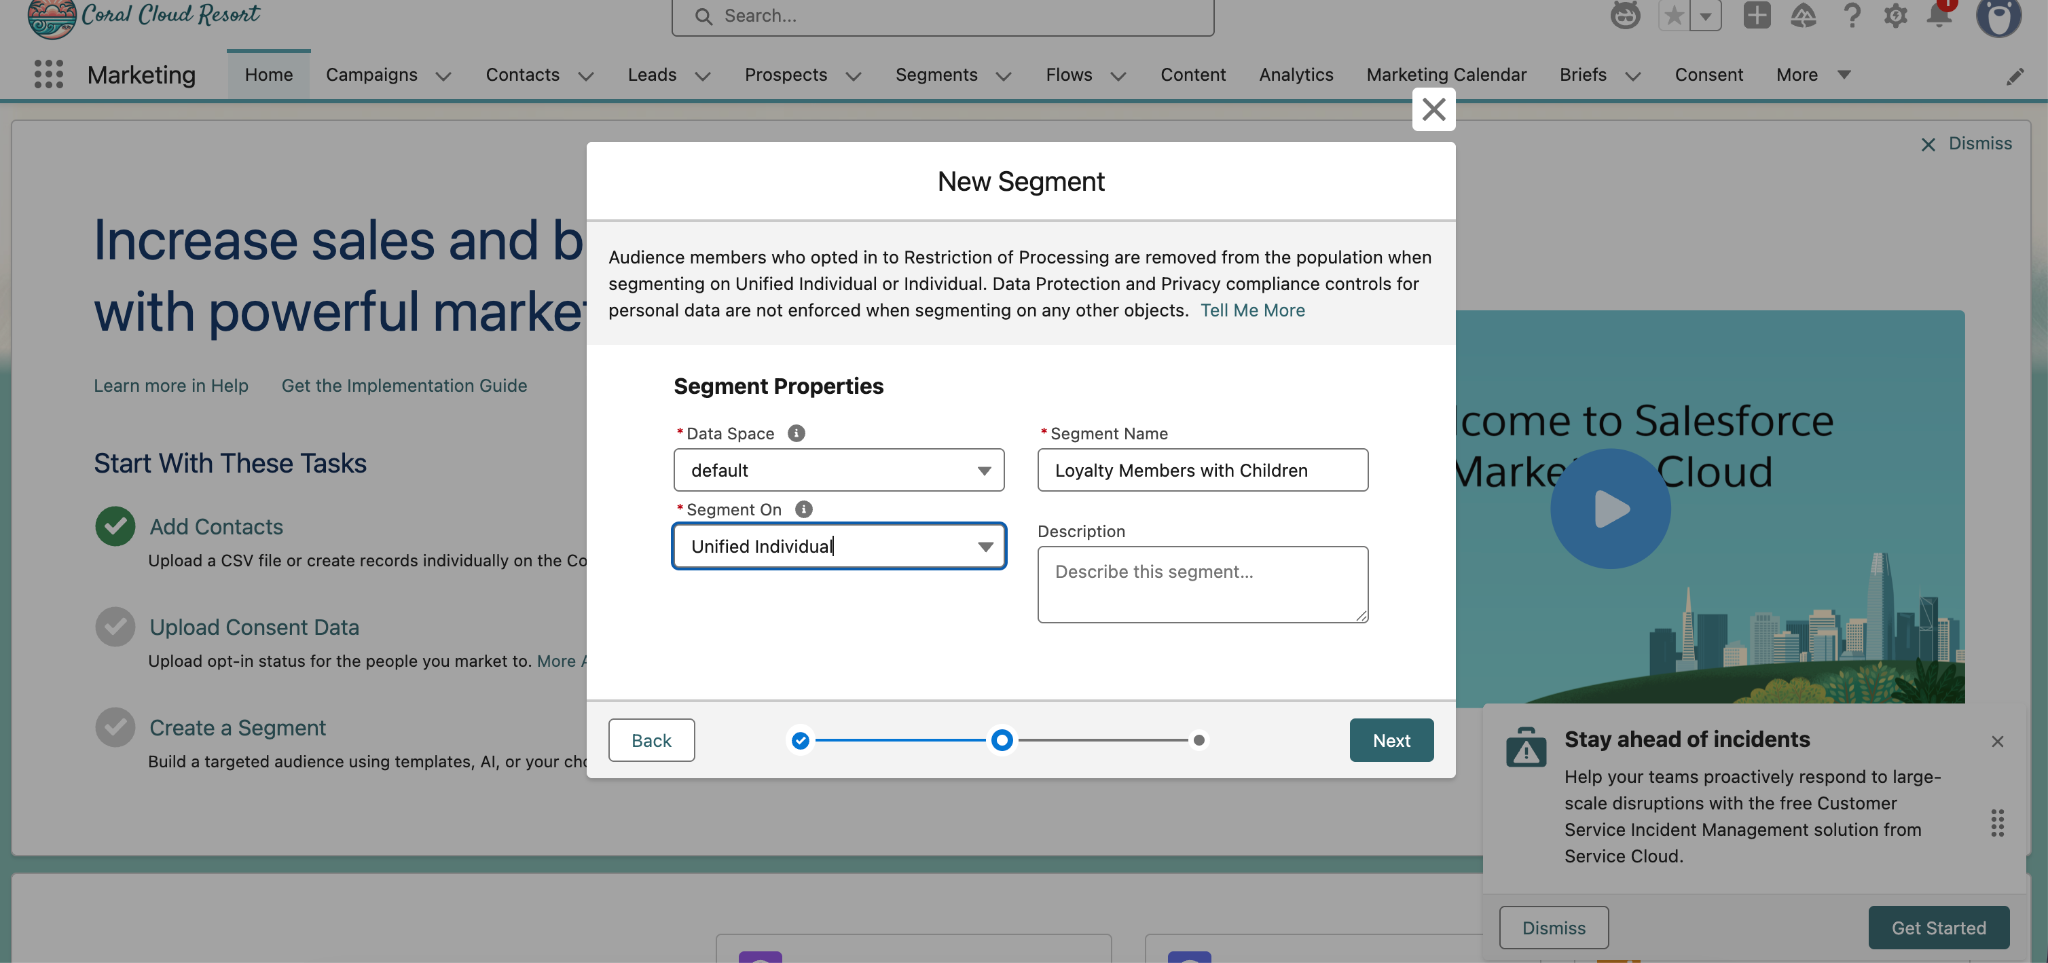
Scroll down to Segment On and select Unified Individual from the dropdown menu, then click Next.
After you click Next, if you see You’re About to use Einstein click the Got It button and close any other Gen AI warnings.
On the right hand side of your screen, you will see a chat window where you can input directions to build your segment. In this chat box, describe your segment: Copy and paste the following prompt into the chatbox and click the arrow to send.
Create a segment of people who have children and are Loyalty membersFrom here, we could continue to refine our segment by continuing the conversation with Einstein. 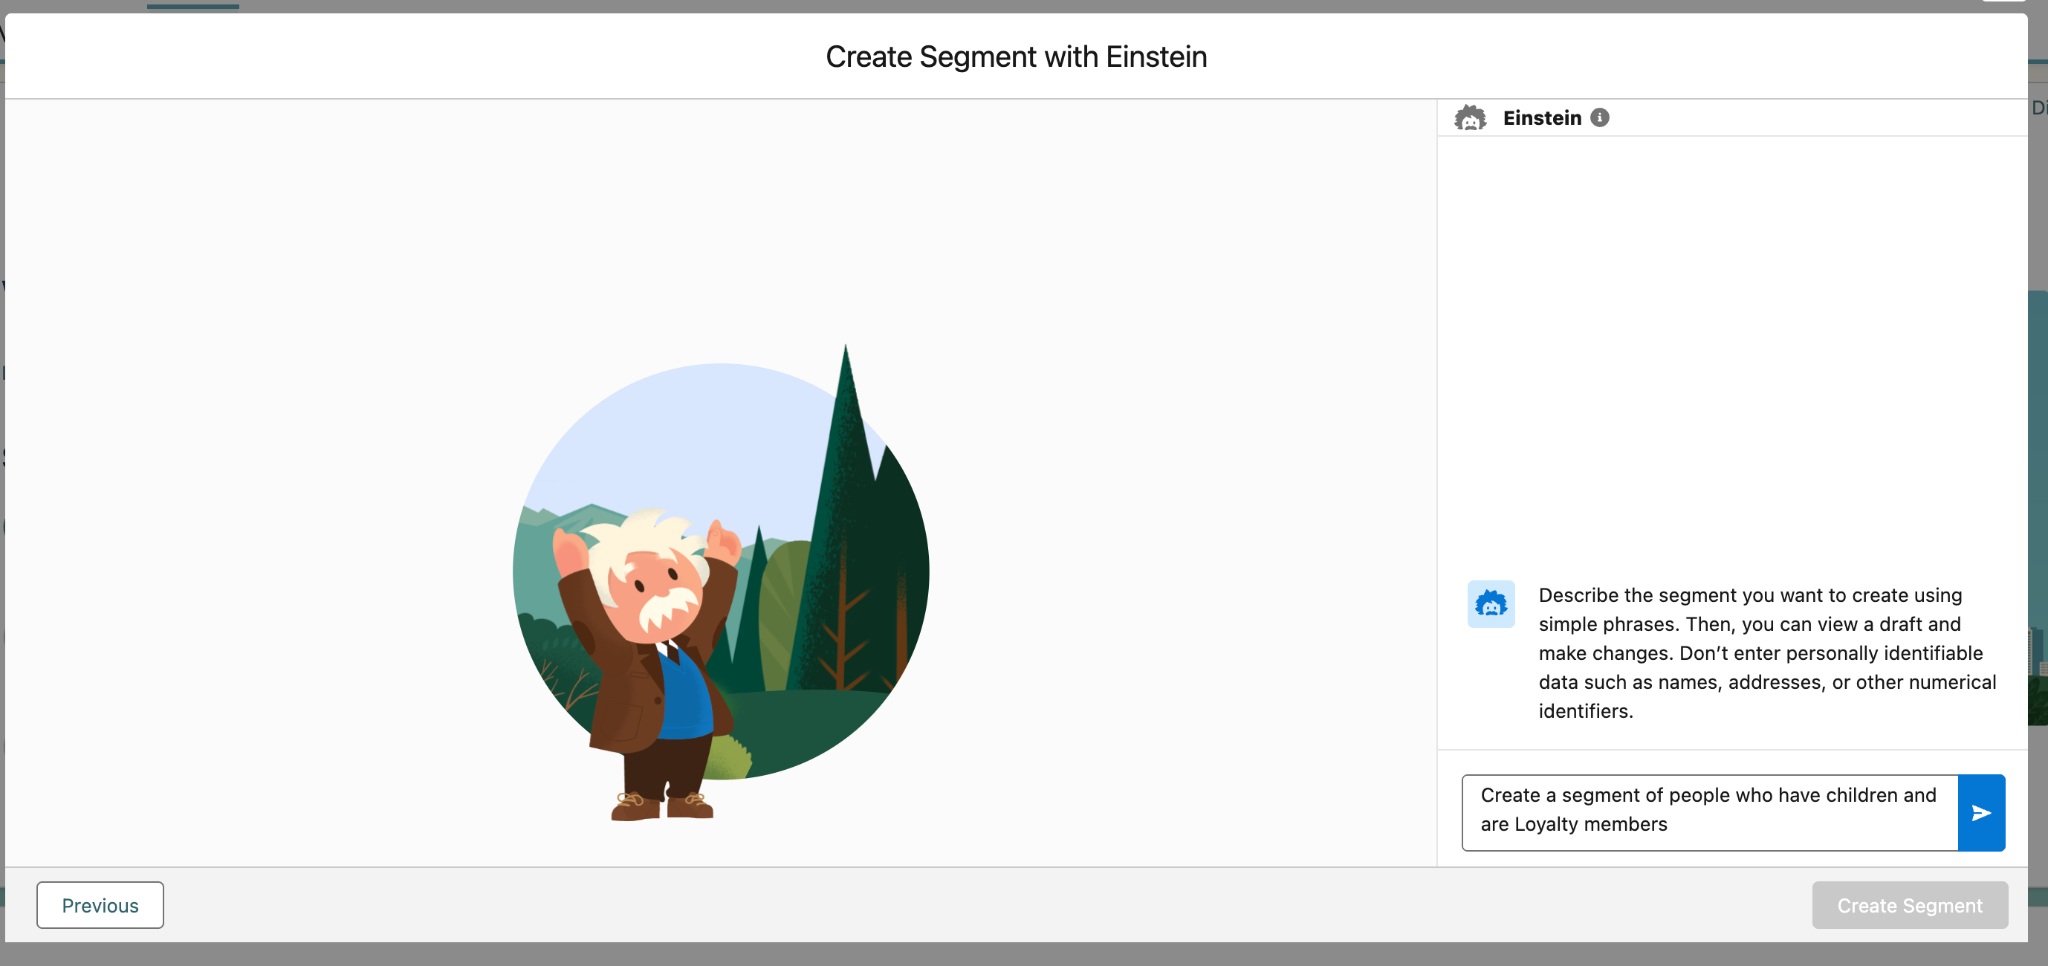
Once your segment has been created, confirm that the attributes brought in are the same as the screenshot below. If they are not, uncheck any attributes that may not be needed.
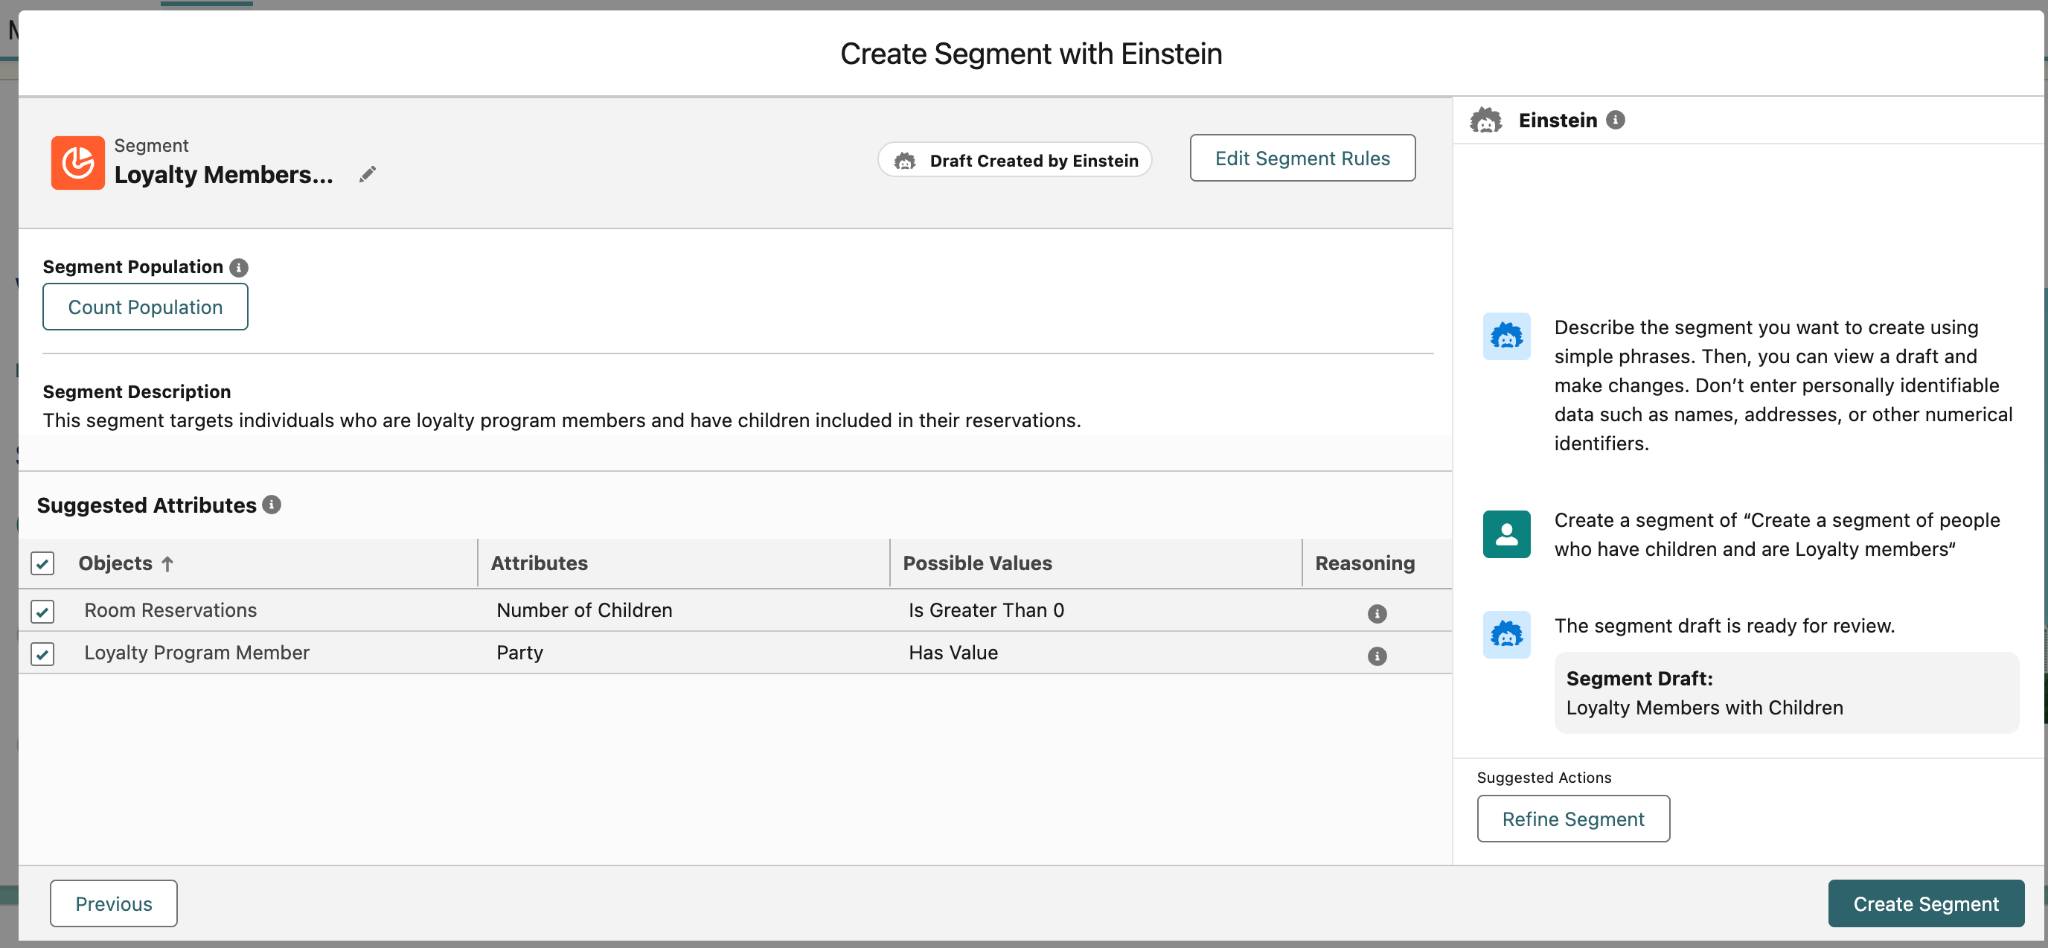
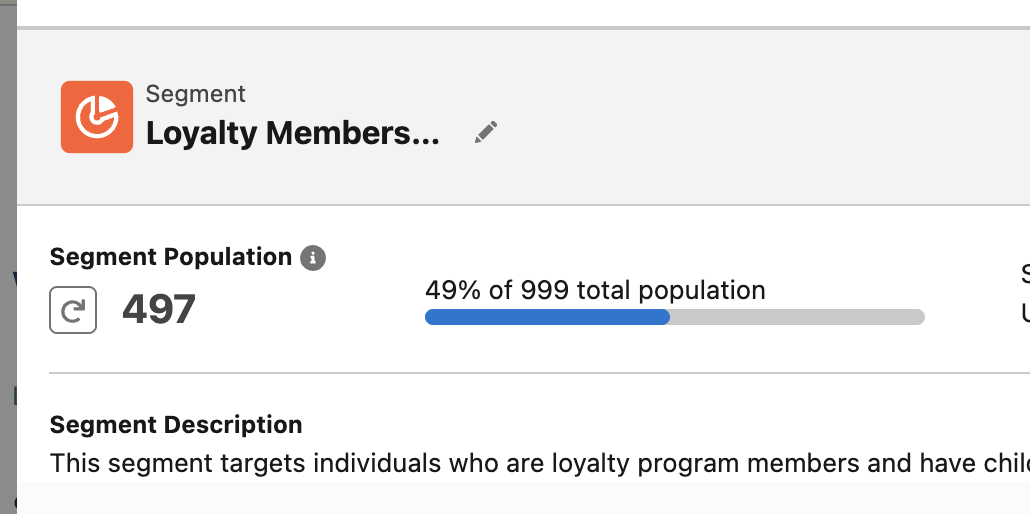
Next, find and click the Count Population button in the top right of the window. Please note, your population count may vary slightly, but should reflect a number close to the one shown in the screenshot below.
Confirm that the correct attributes have been brought into your segment, then click on Create Segment in the bottom right.
Please note: Because this is generative AI your segment name may vary slightly than what is shown in the workshop. That is completely fine.
Congratulations, you have now created a segment! Next, we'll use Agentforce to leverage this segment.
NOTE: Please skip step 1b if you’ve completed 1a, and move directly to step 2.
Step 1b: Segment Creation using Visual Builder
Skip this exercise if you completed 1A.
Click the App Launcher (9-dot icon below the Coral Cloud Resort logo at the top left), type Marketing, and then select Marketing.
Under Home, you will see a few tasks to start with. Let’s find and click on Create a Segment.

From the pop up window that appears, select Use a Visual Builder and click next.

In the next window, leave the data space as default. Select Unified Individual from the Segment On drop down. Name the segment Loyalty Members with Children. Click Next.
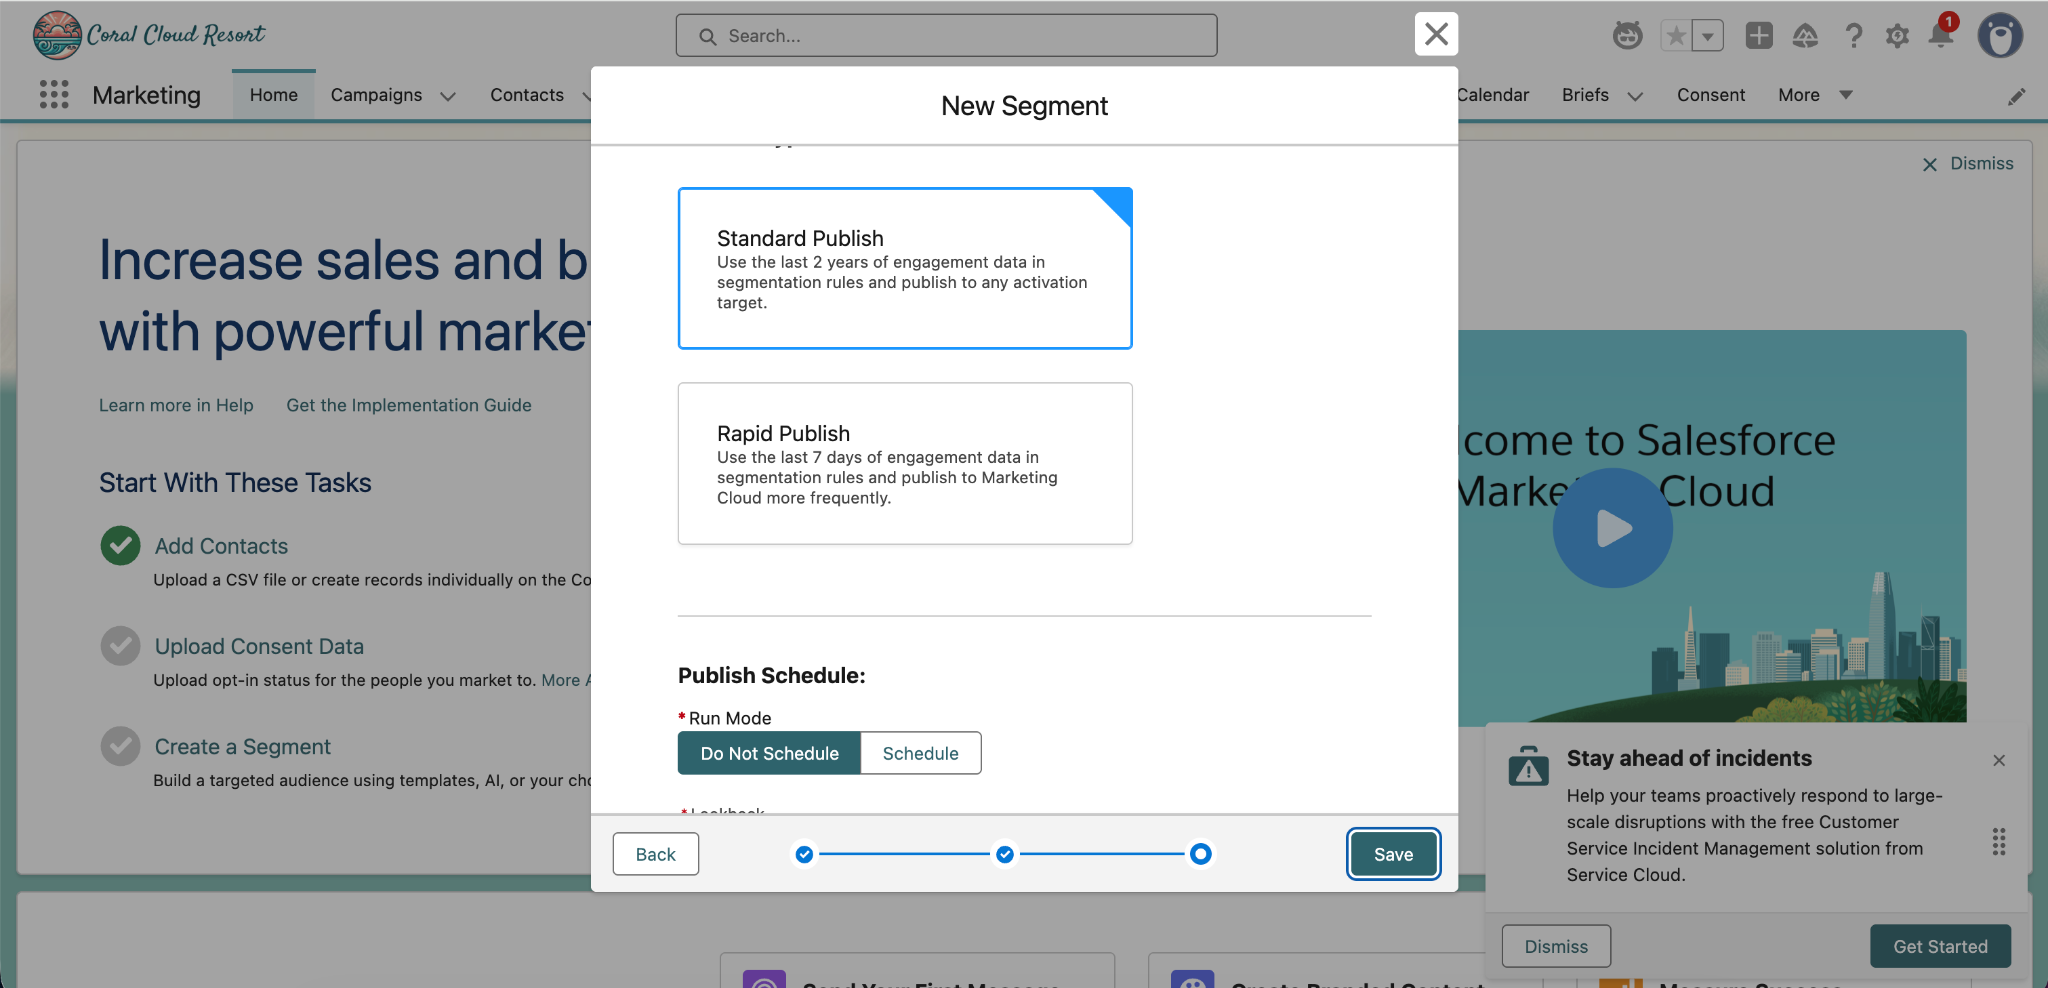
In the next window, select standard publish, leave the publish schedule as do not publish, and click Save.
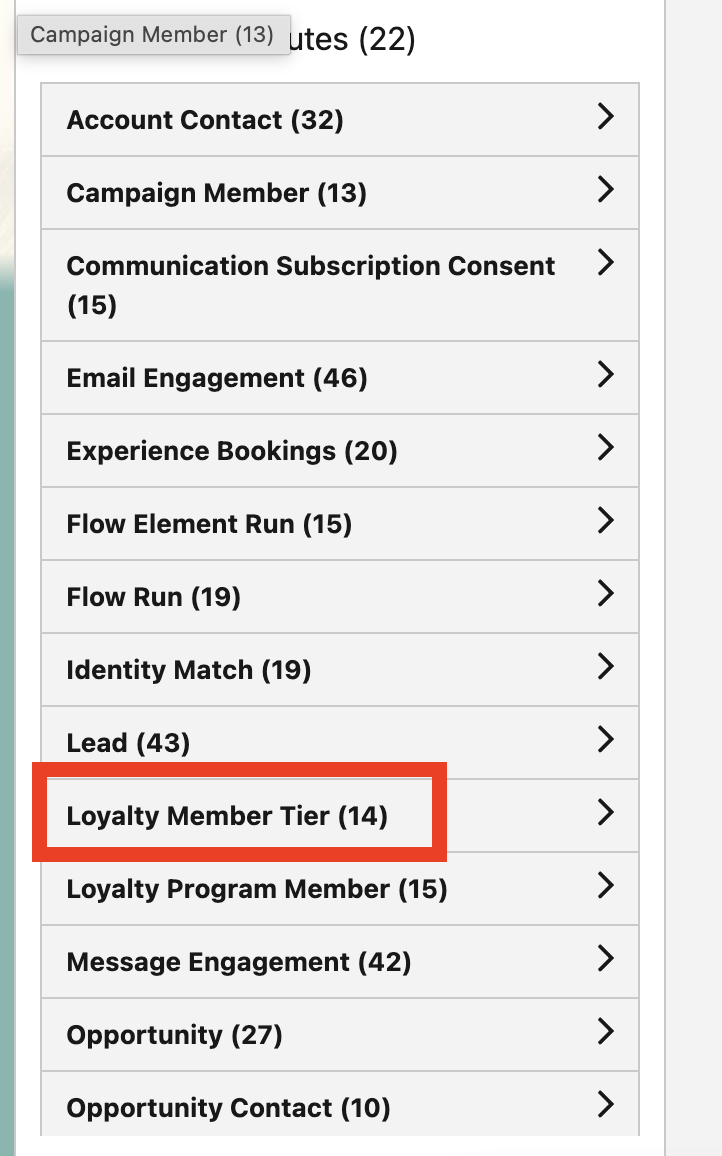
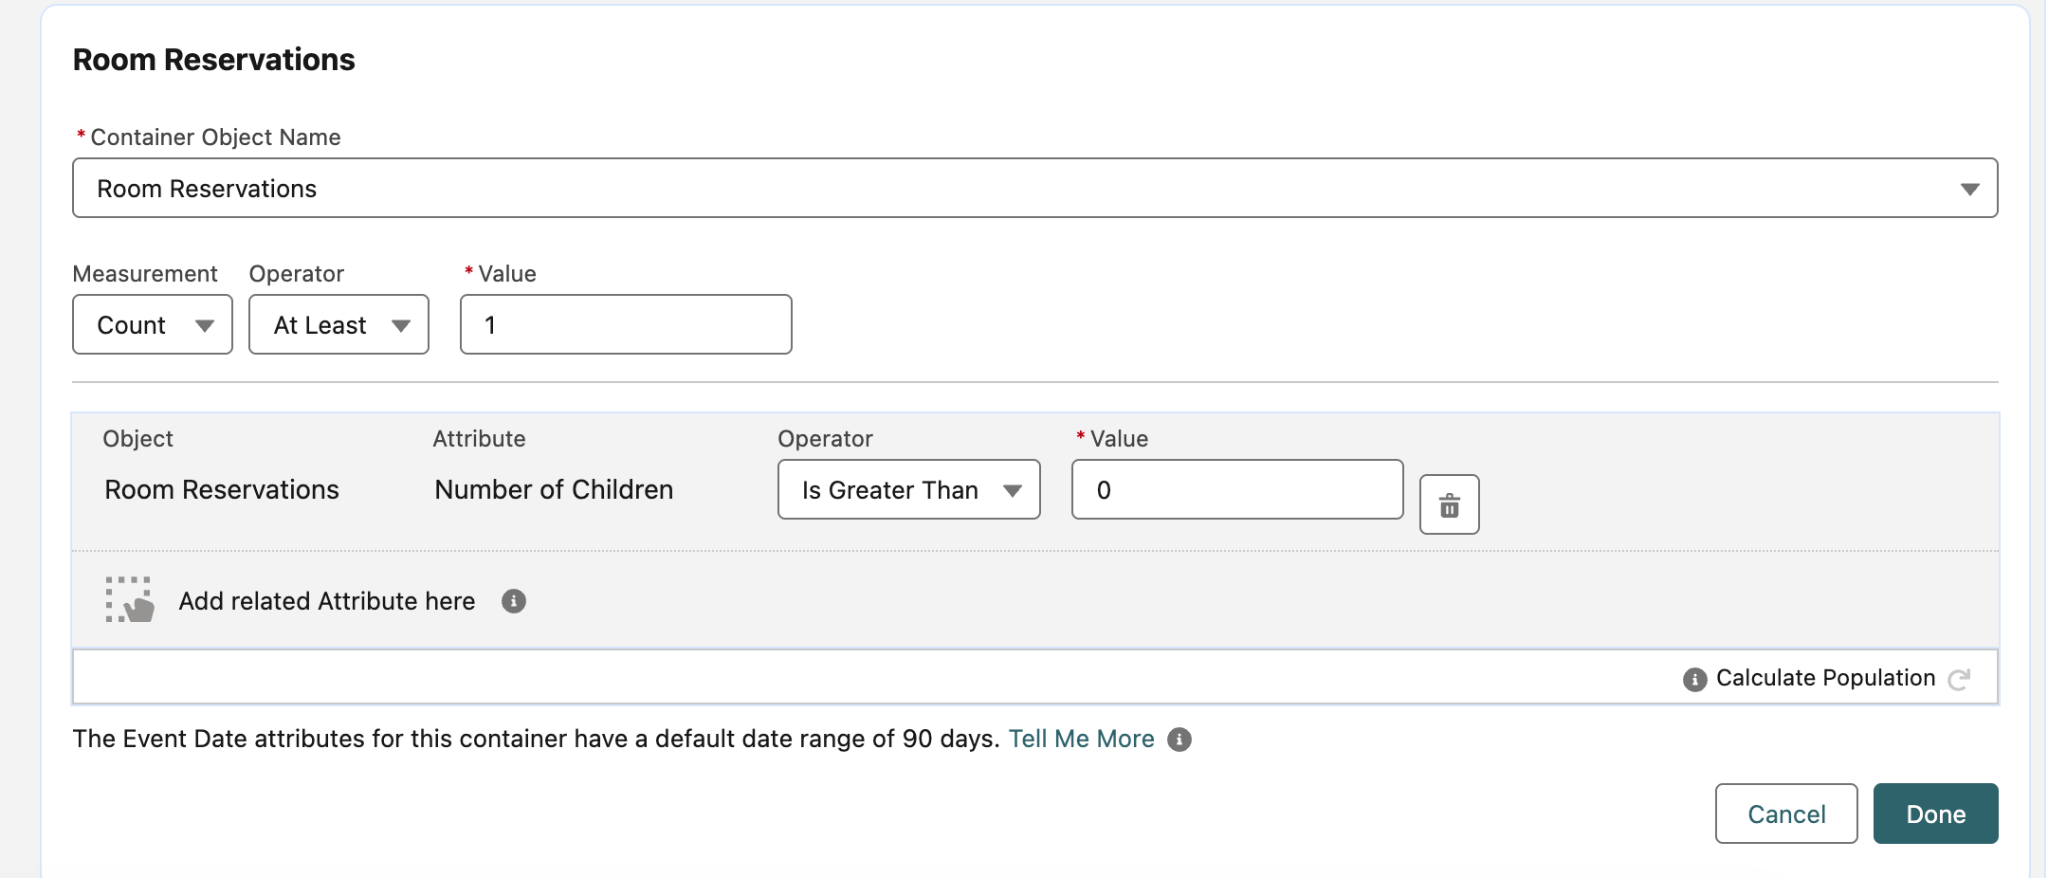
You will now see a blank Canvas appear, with attributes to use in our segment build on the left side. Click on Related Attributes, and scroll down to Loyalty Member Tier. Click on this.
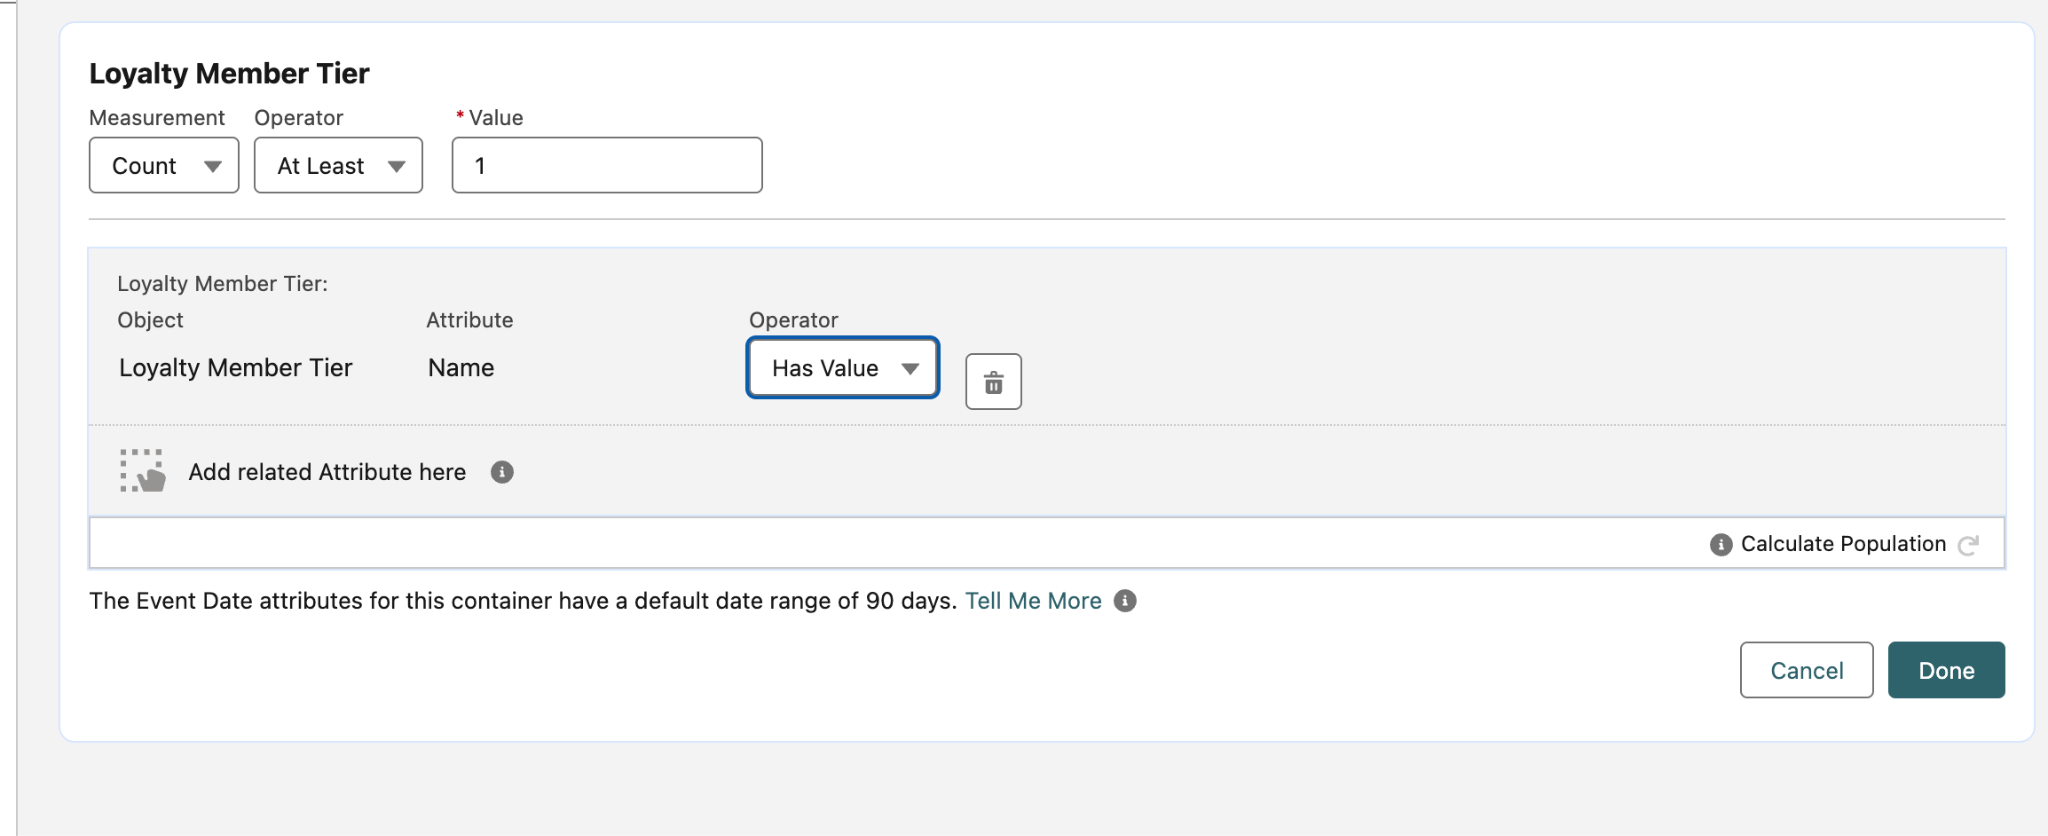
From here, scroll to the very bottom of the list, where you will see Name as an available field. Drag and drop this onto the Canvas. Change the operator to Has Value. Click Done.
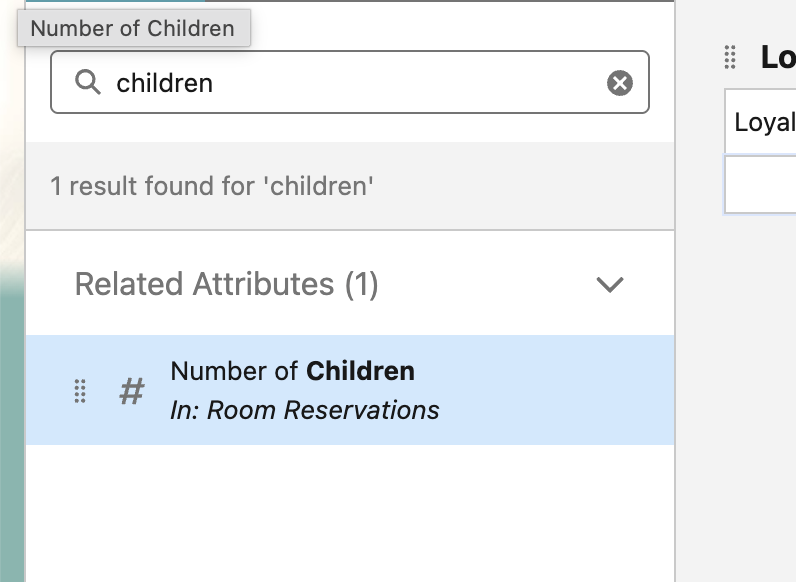
Next, using the search bar above the attributes, search for Children. You will see Number of Children as an available field.
Drag and drop the Number of Children field onto the canvas. Change the operator to Is Greater Than and set the value to 0. Click done.
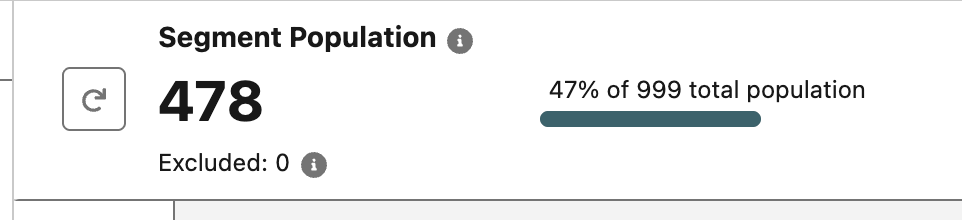
Click on the circular arrow icon next to the segment number at the top of the Canvas. You can now see our segment count has decreased significantly to a more curated portion of the entire unified individuals. Please note your number may vary slightly from the one shown in the screenshot.
NOTE: You can disregard step 1b if you have completed this section. Please move directly to Step 2 of Exercise 1.
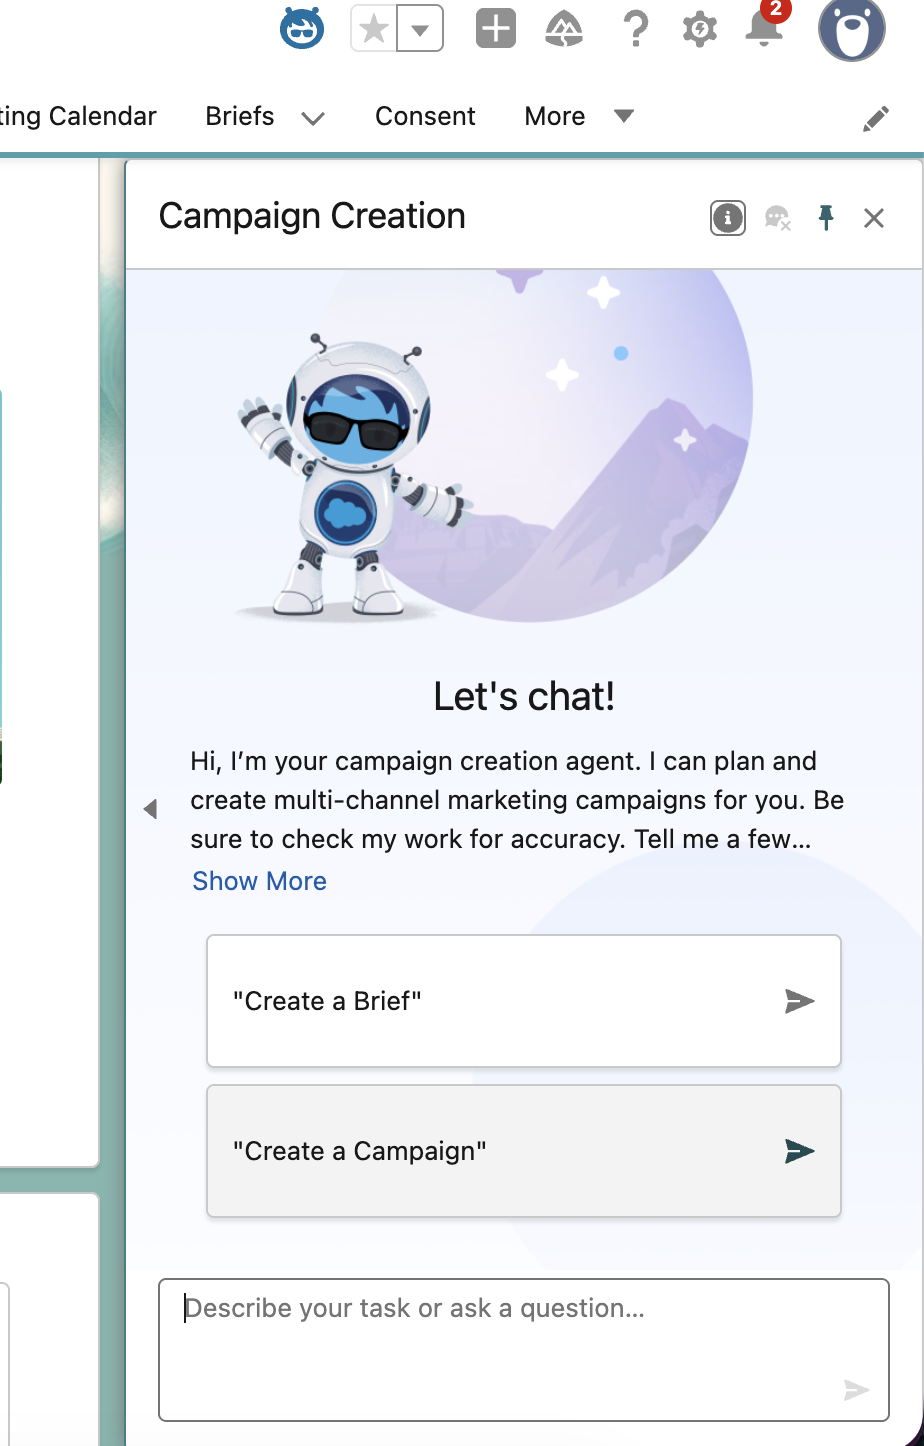
Step 2: Create a Campaign using Agentforce
- Just like at the start of this exercise, select the Home tab in the Marketing app to navigate back to home.
- On the top of the screen, find and select the agentforce icon located near the setup icon. This should cause an agentforce chat window to appear.
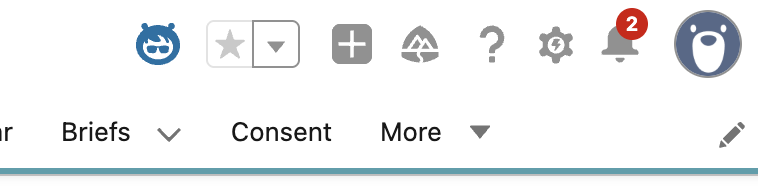
- In the Agent chat window that appears, first pin your agent chat window so it does not cover anything else on the page. To do so click on the pin icon next to the agent name in the top right corner, as shown below.

- You will see a suggested action that says “Create a Campaign”. Click on this action.
- Once you click the Create a Campaign, the agent will ask to describe the campaign objective. Enter the following Campaign Brief Prompt then send:
Draft a marketing campaign for Loyalty members with children to visit our newly opened Kids Camp.- The first thing you will be asked is if you would like to make this a 2 way email campaign. DO NOT select any recommendations. Instead, type the following and send:
Draft a brief for a two-way email campaign. Stop here and wait for my confirmation before saving or generating a preview.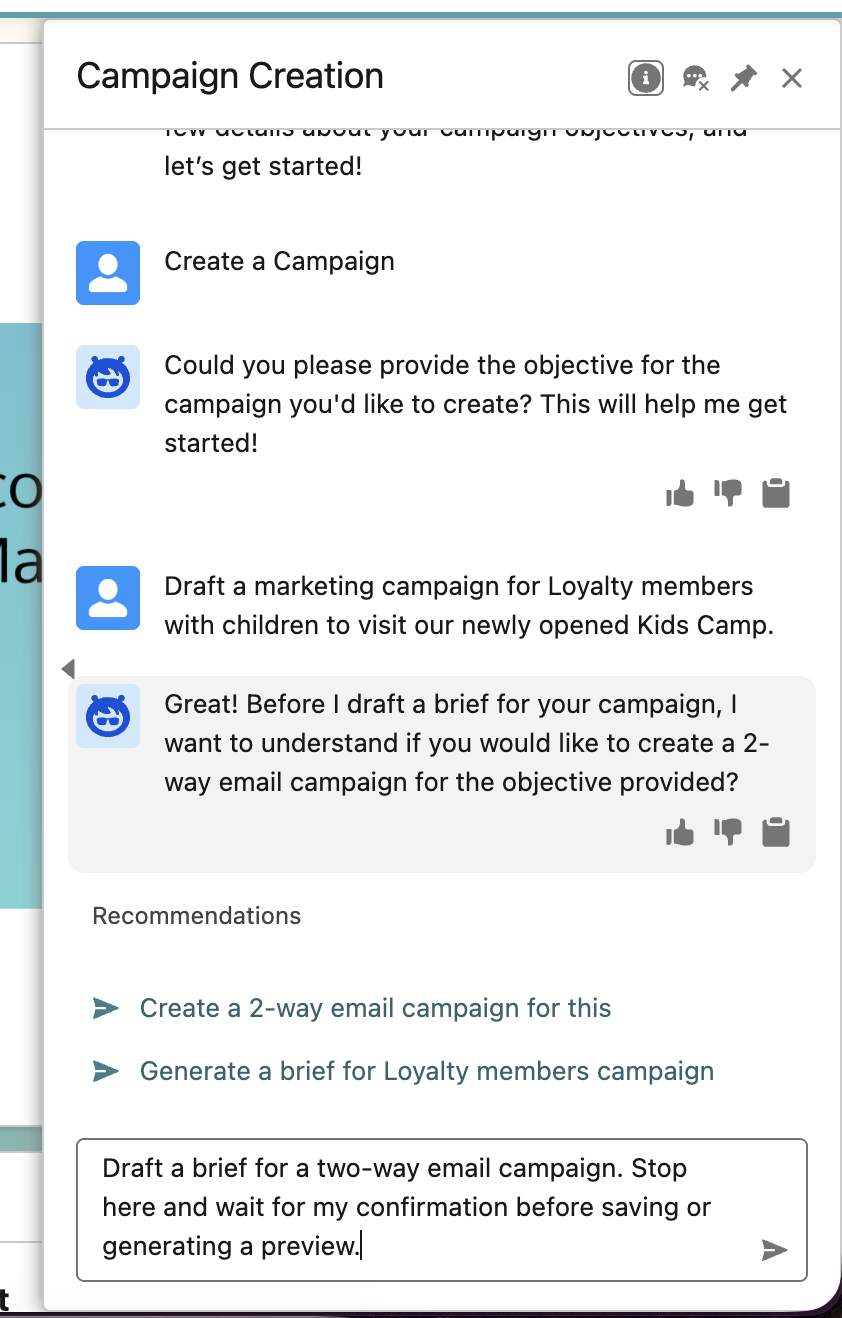
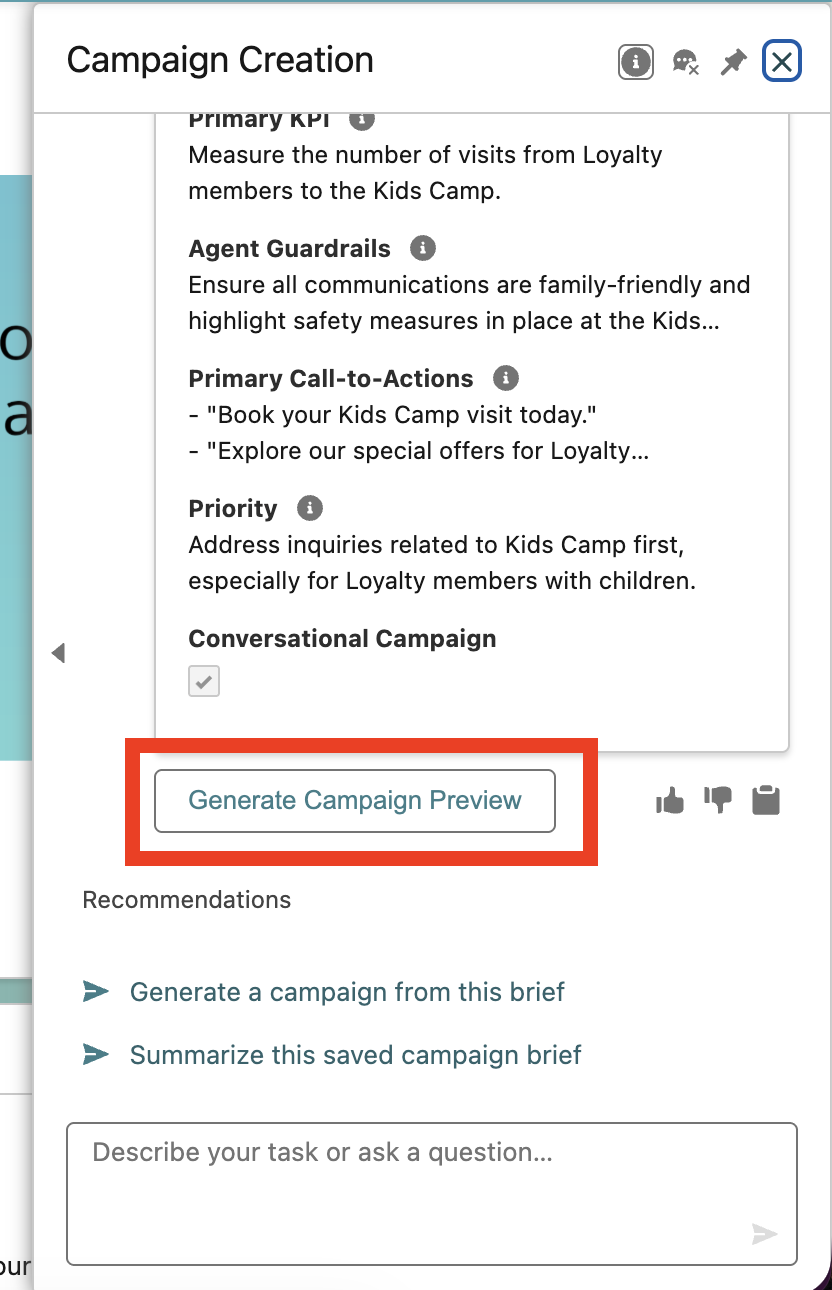
- Review the Campaign Brief that was just generated. Then click the button Save Brief that appears within the chat below the preview. Once again, disregard the recommendations and click the button.

- Once you click this button, you will see a confirmation message, followed by another button that says Generate Campaign Preview. Click on this button. Once again, disregard the recommendations and click the button.
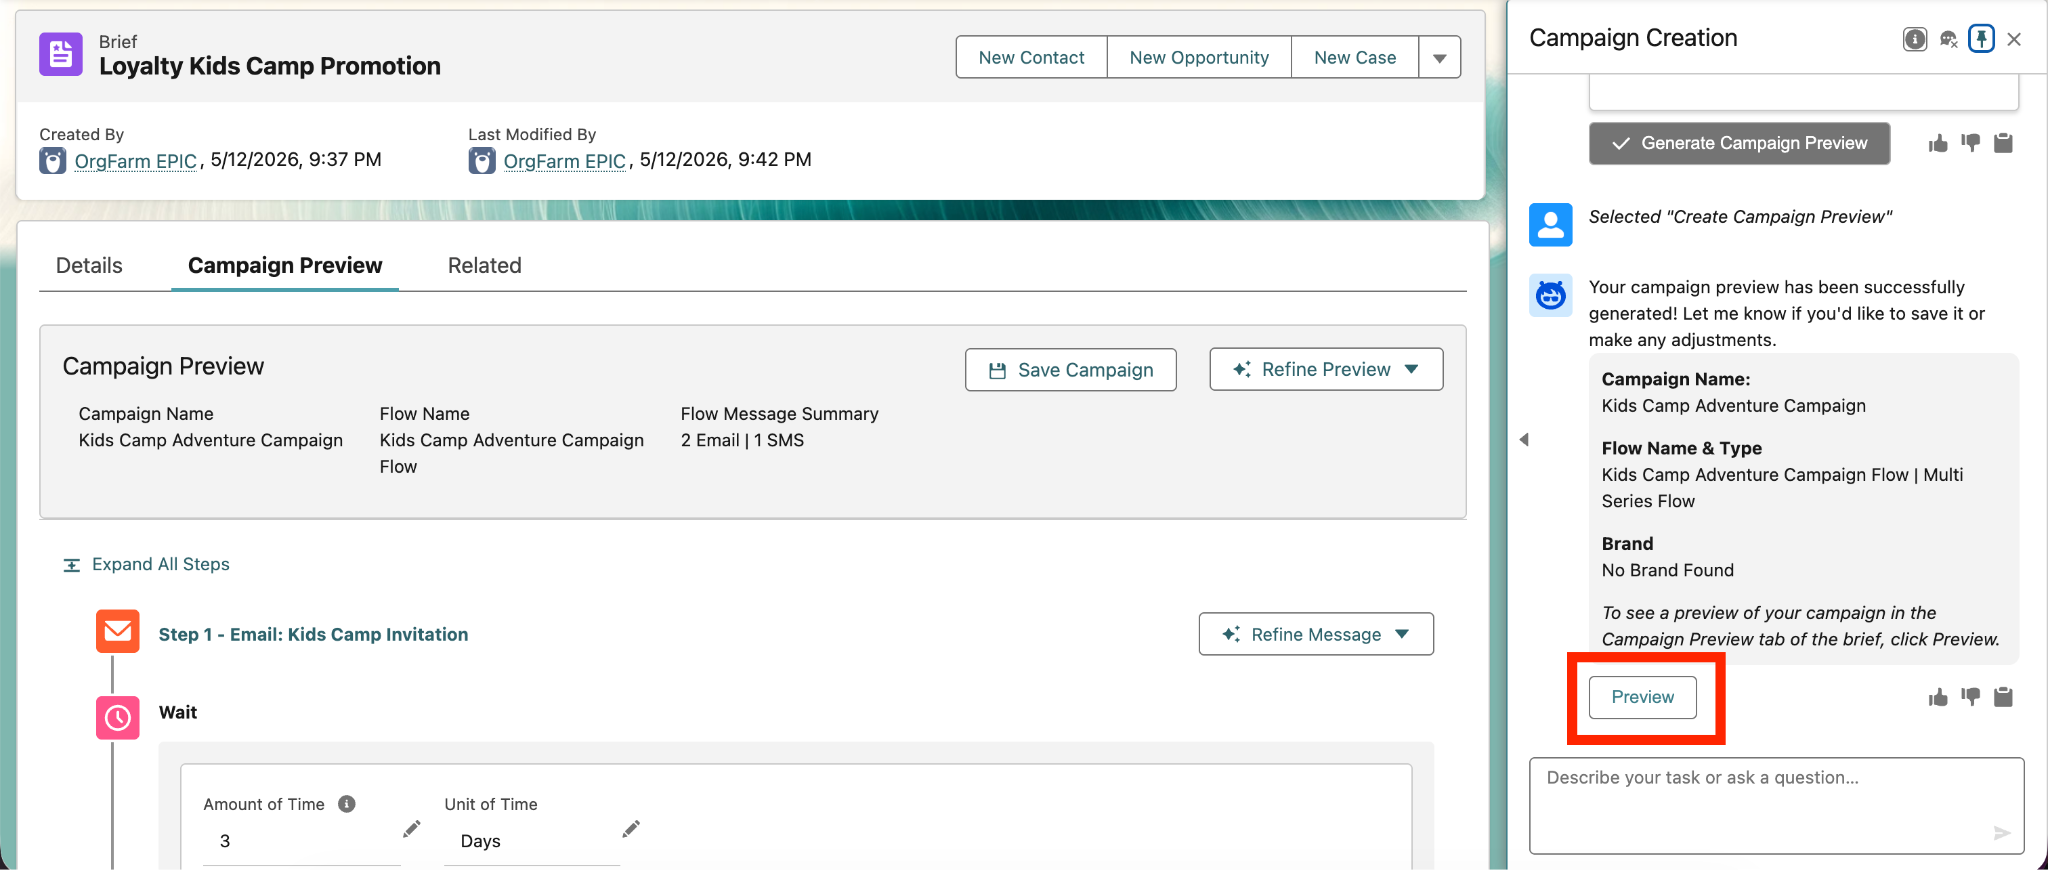
- After clicking this button, you will see a confirmation message confirming that your campaign preview has been generated. Below this, another button will appear that says preview. Click on this to open the campaign preview. This will lead you to the screen that shows your campaign preview. Keep your agent open, do not close it.
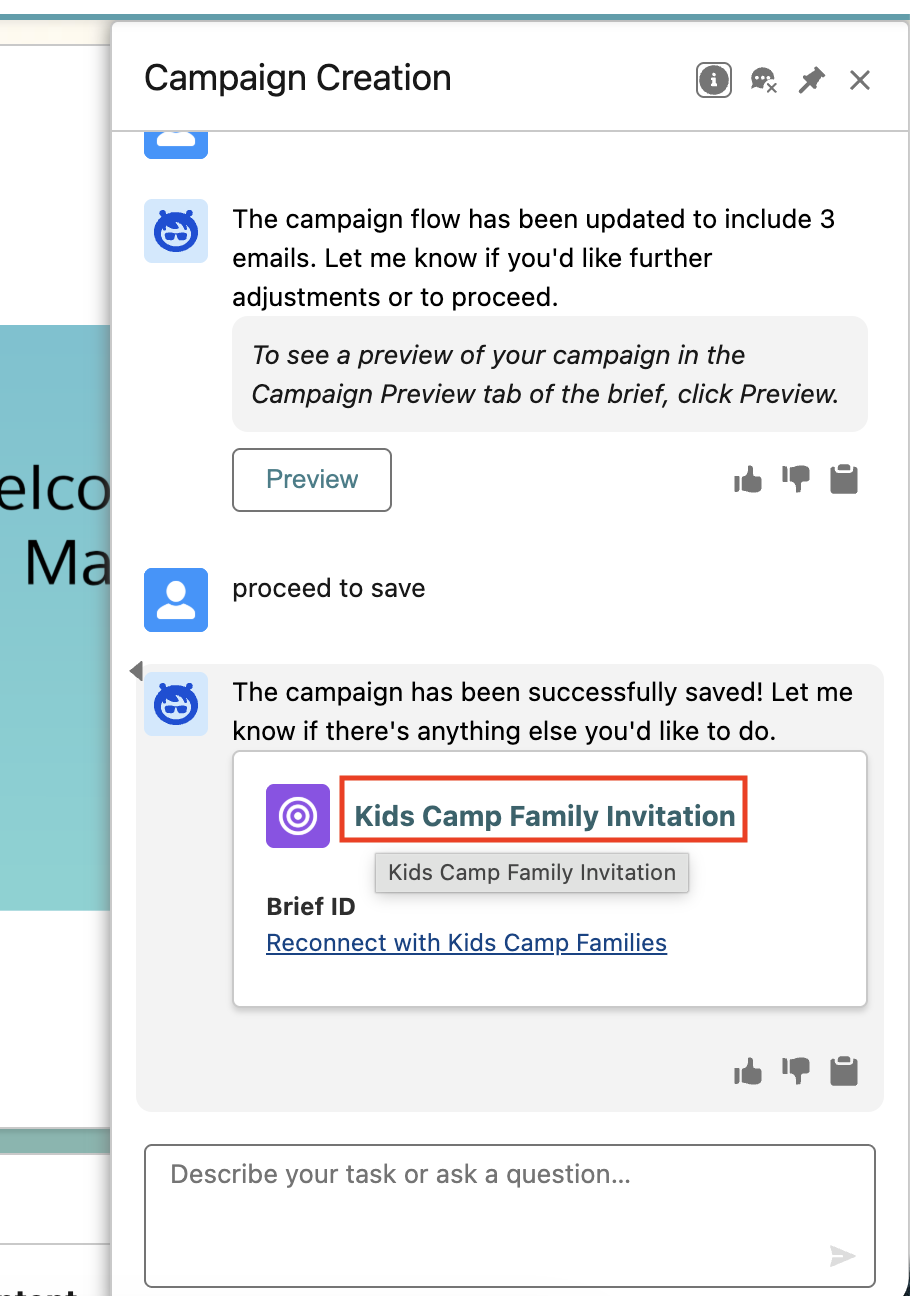
- Scroll and observe the campaign preview. It will have multiple touchpoints as expected for a marketing campaign. We will revise this. In your agent builder, Type and send “revise flow to 1 email” to the agent. You will see the campaign preview change live in response to your agent prompt to only 1 email.
revise flow to 1 email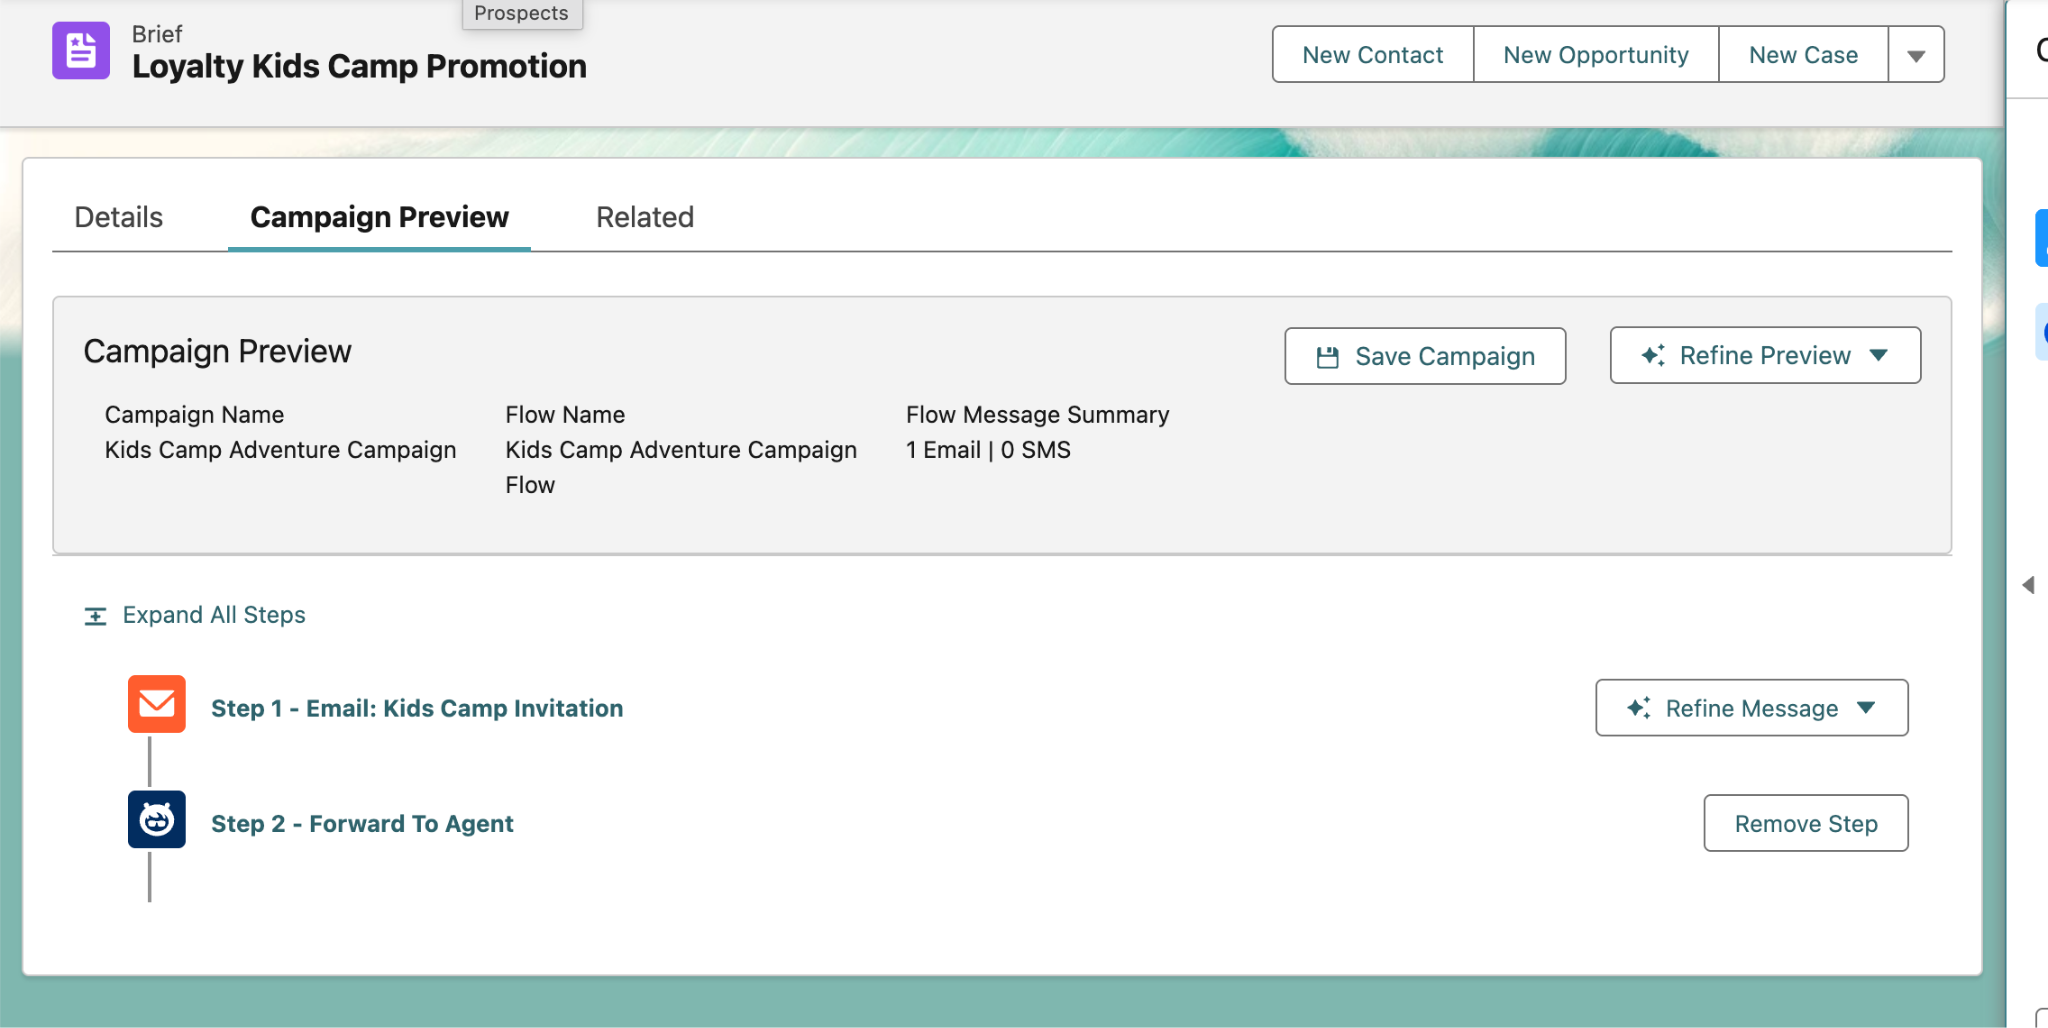
- You will then receive a confirmation message that says the campaign flow has been revised. Next, type and send “save campaign” to the agent.
save the campaignWait 5-10 seconds. The campaign has been successfully saved. YOU MUST CLICK ON THE CAMPAIGN NAME next to the purple icon (shown in red box).
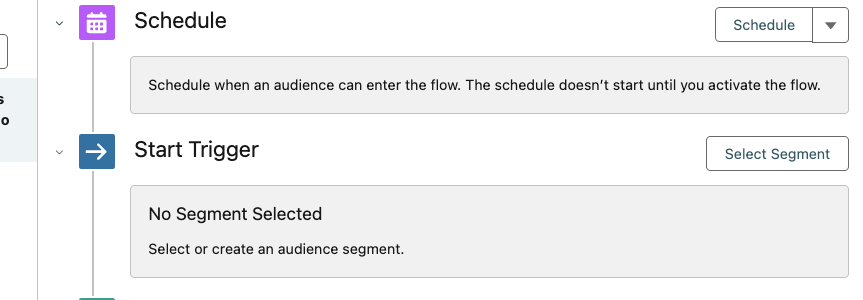
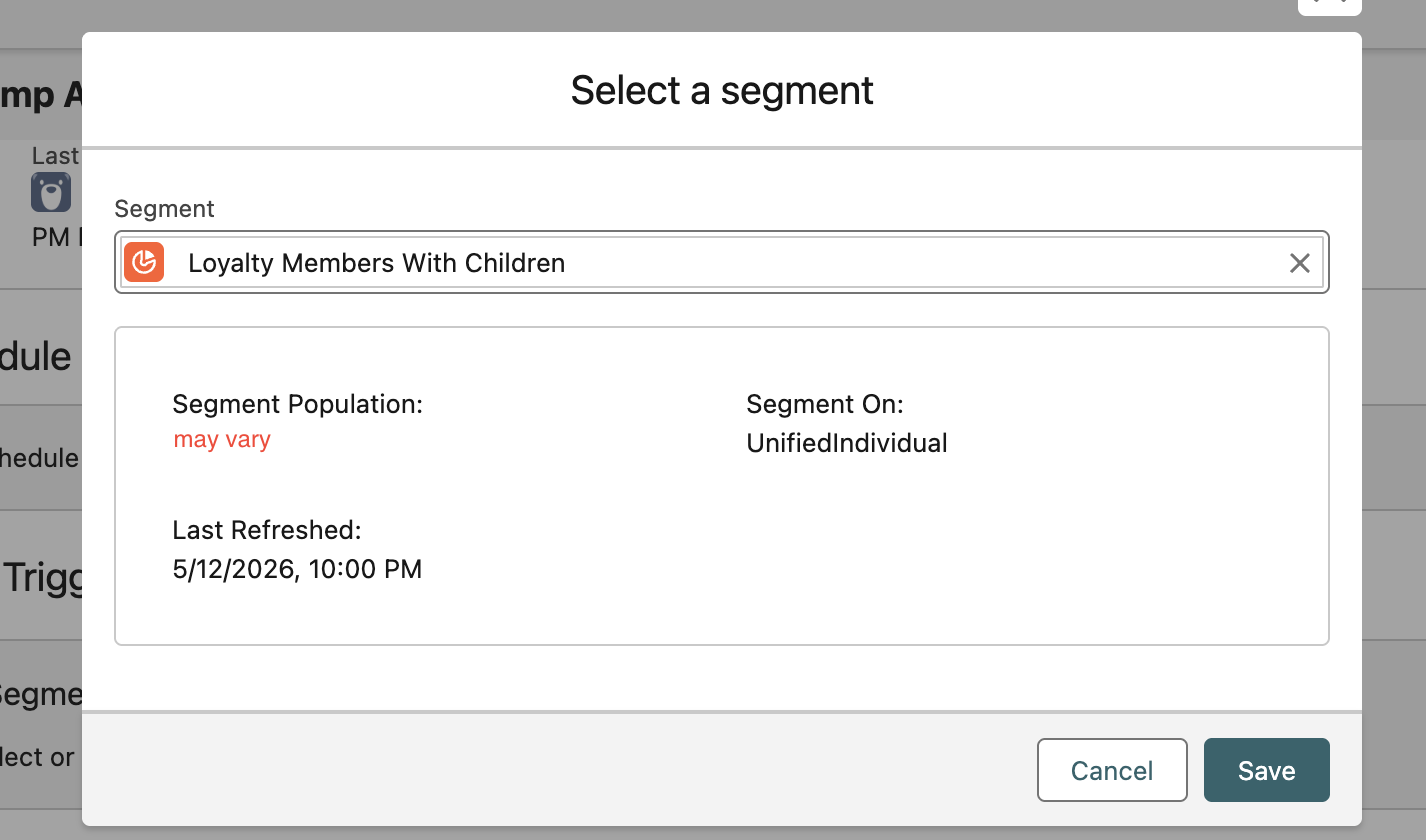
Once the campaign is open, you can close the agent chat window by clicking the X in the agentforce chat window. In the campaign record, click Select Segment next to Start Trigger.
In the pop up window that appears, click on Select an Existing Segment. We will make use of the segment that we created earlier in the exercise.
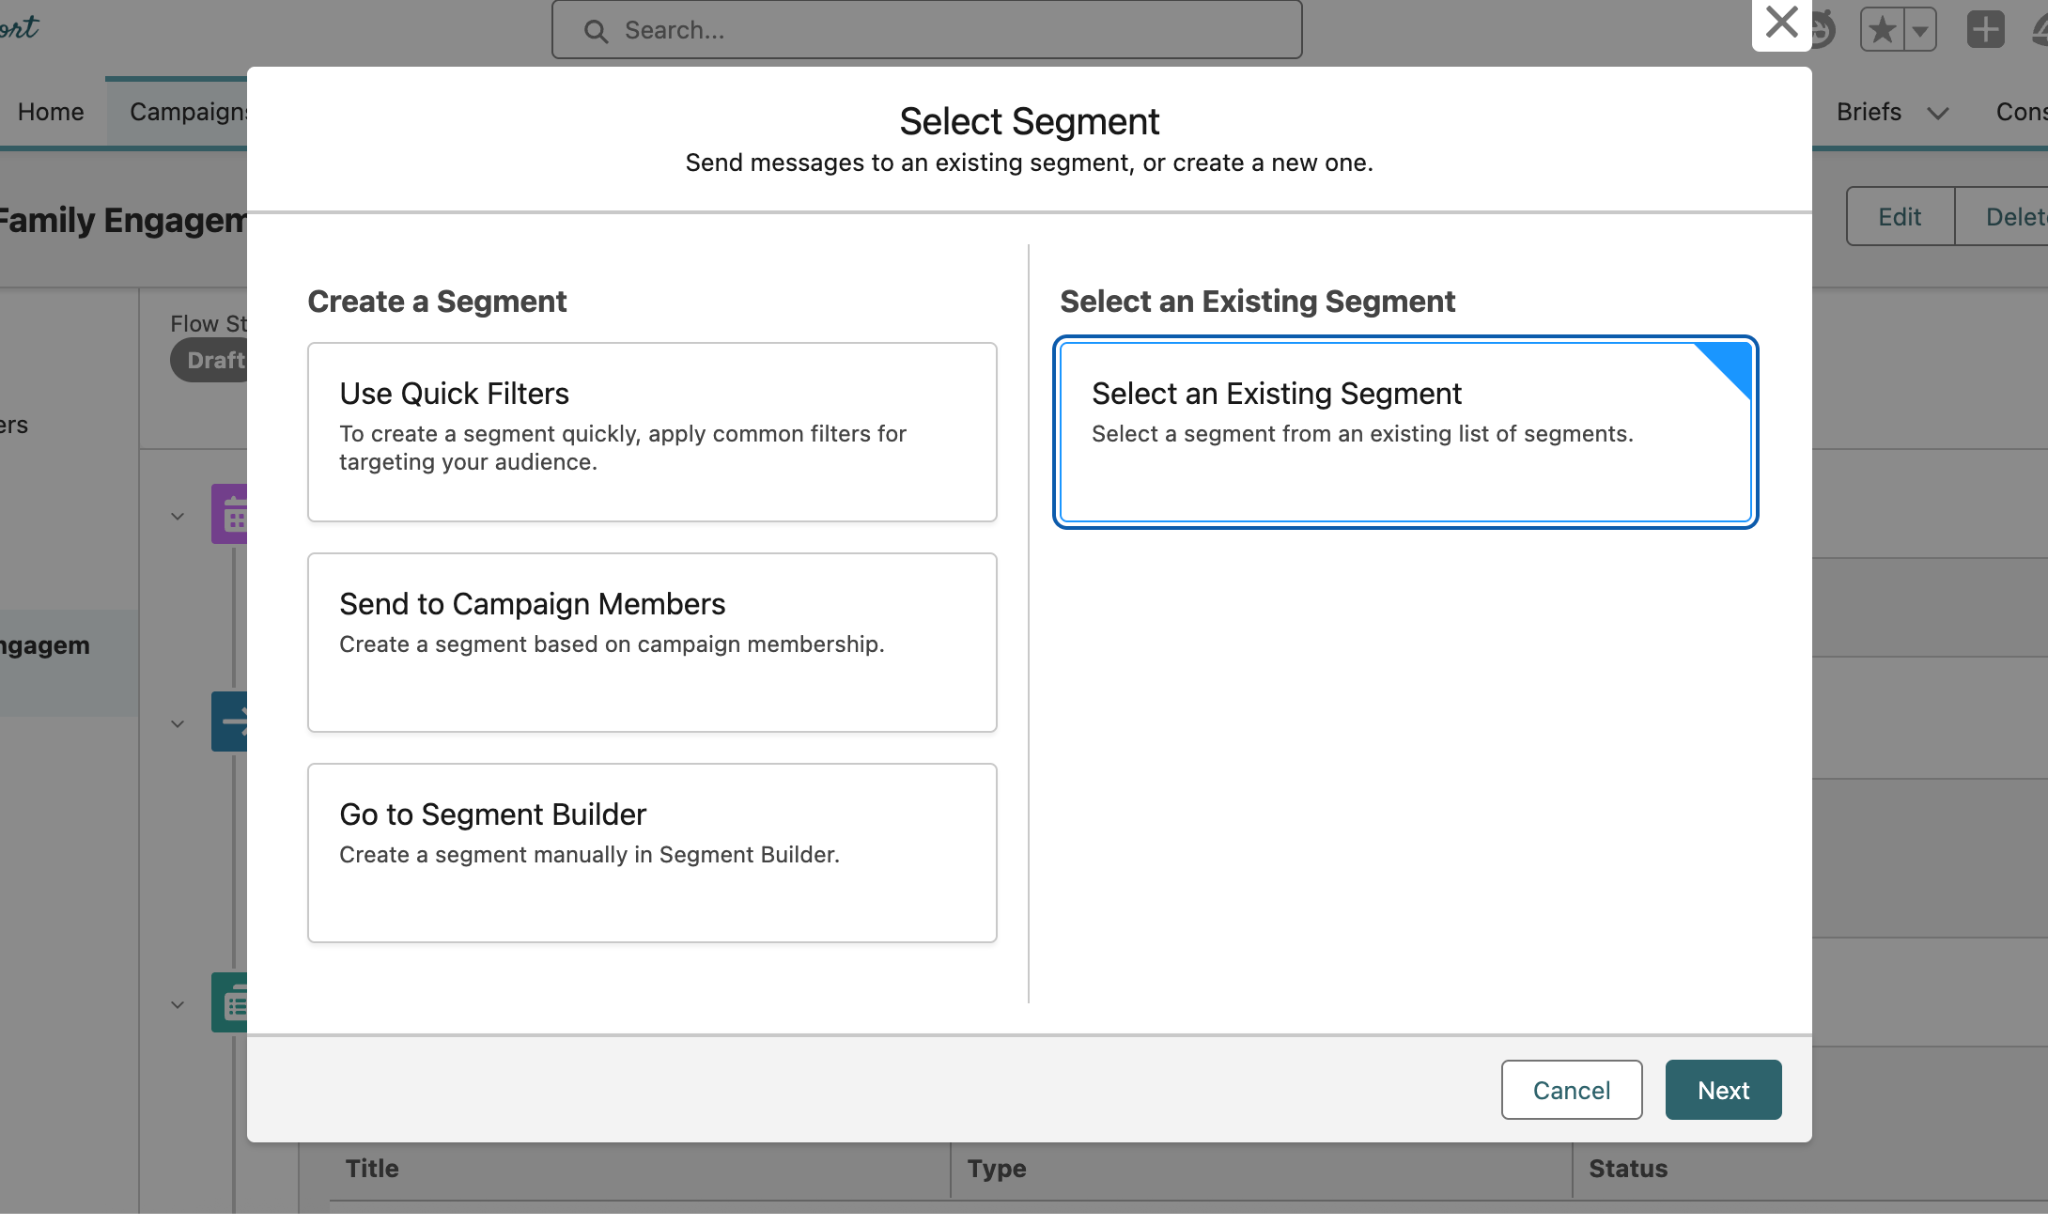
Find and select the segment we created earlier in the exercise from the drop down menu, and click Save in the bottom right after.
You may have a different segment name or population than what you see above, which is ok.
Click on Publish above the segment you’ve added to Start Trigger.

This completes Exercise 1