
Appearance
Exercise 1 - Go Deeper with Calculated Insights
The goal of this exercise is to utilize the integrated and unified individuals to produce customer insights with Calculated Insights (CIs) to bring further value to Coral Cloud’s customer data and power AI Predictions.
Step 1: Create a Calculated Insight from the Unified Individual
Here, we will use Calculated Insights (CIs) to calculate the Lifetime Value (LTV) of a customer. For Coral Cloud, this means aggregating reservation data of over 100M records. This was nearly impossible and a very manual process. With LTV, they can provide their customers with an appropriate level of experience.
At the top left, under the Coral Cloud Resort logo, click the App Launcher, search Data Cloud and then click into the Data Cloud application.
Navigate to the Calculated Insights tab in the tool bar at the top of your screen
You may need to access it through the More dropdown if you don’t see it.
Click New. Here, you see the variety of ways to create Calculated Insights
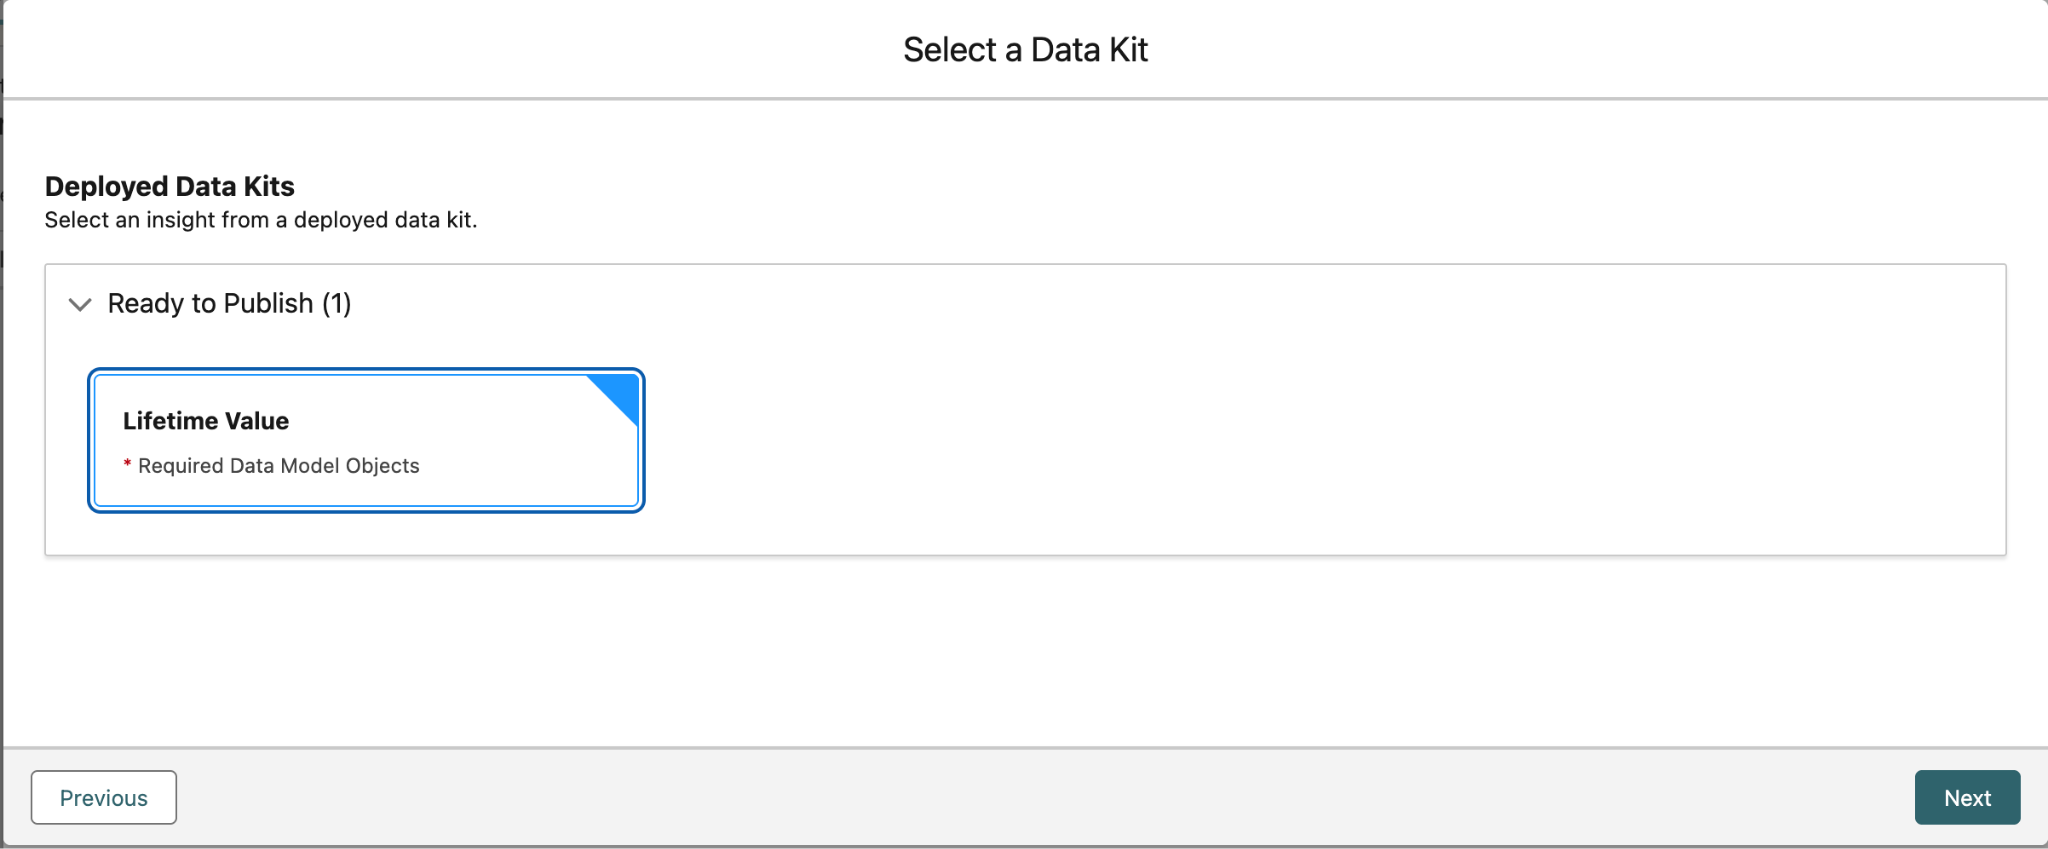
Select From a Data Kit and click Next.

Below the Installed Packages heading, select Lifetime Value and click Next to enter the Visual Insights Builder.
Click the Join node directly to the left of the Aggregate node.
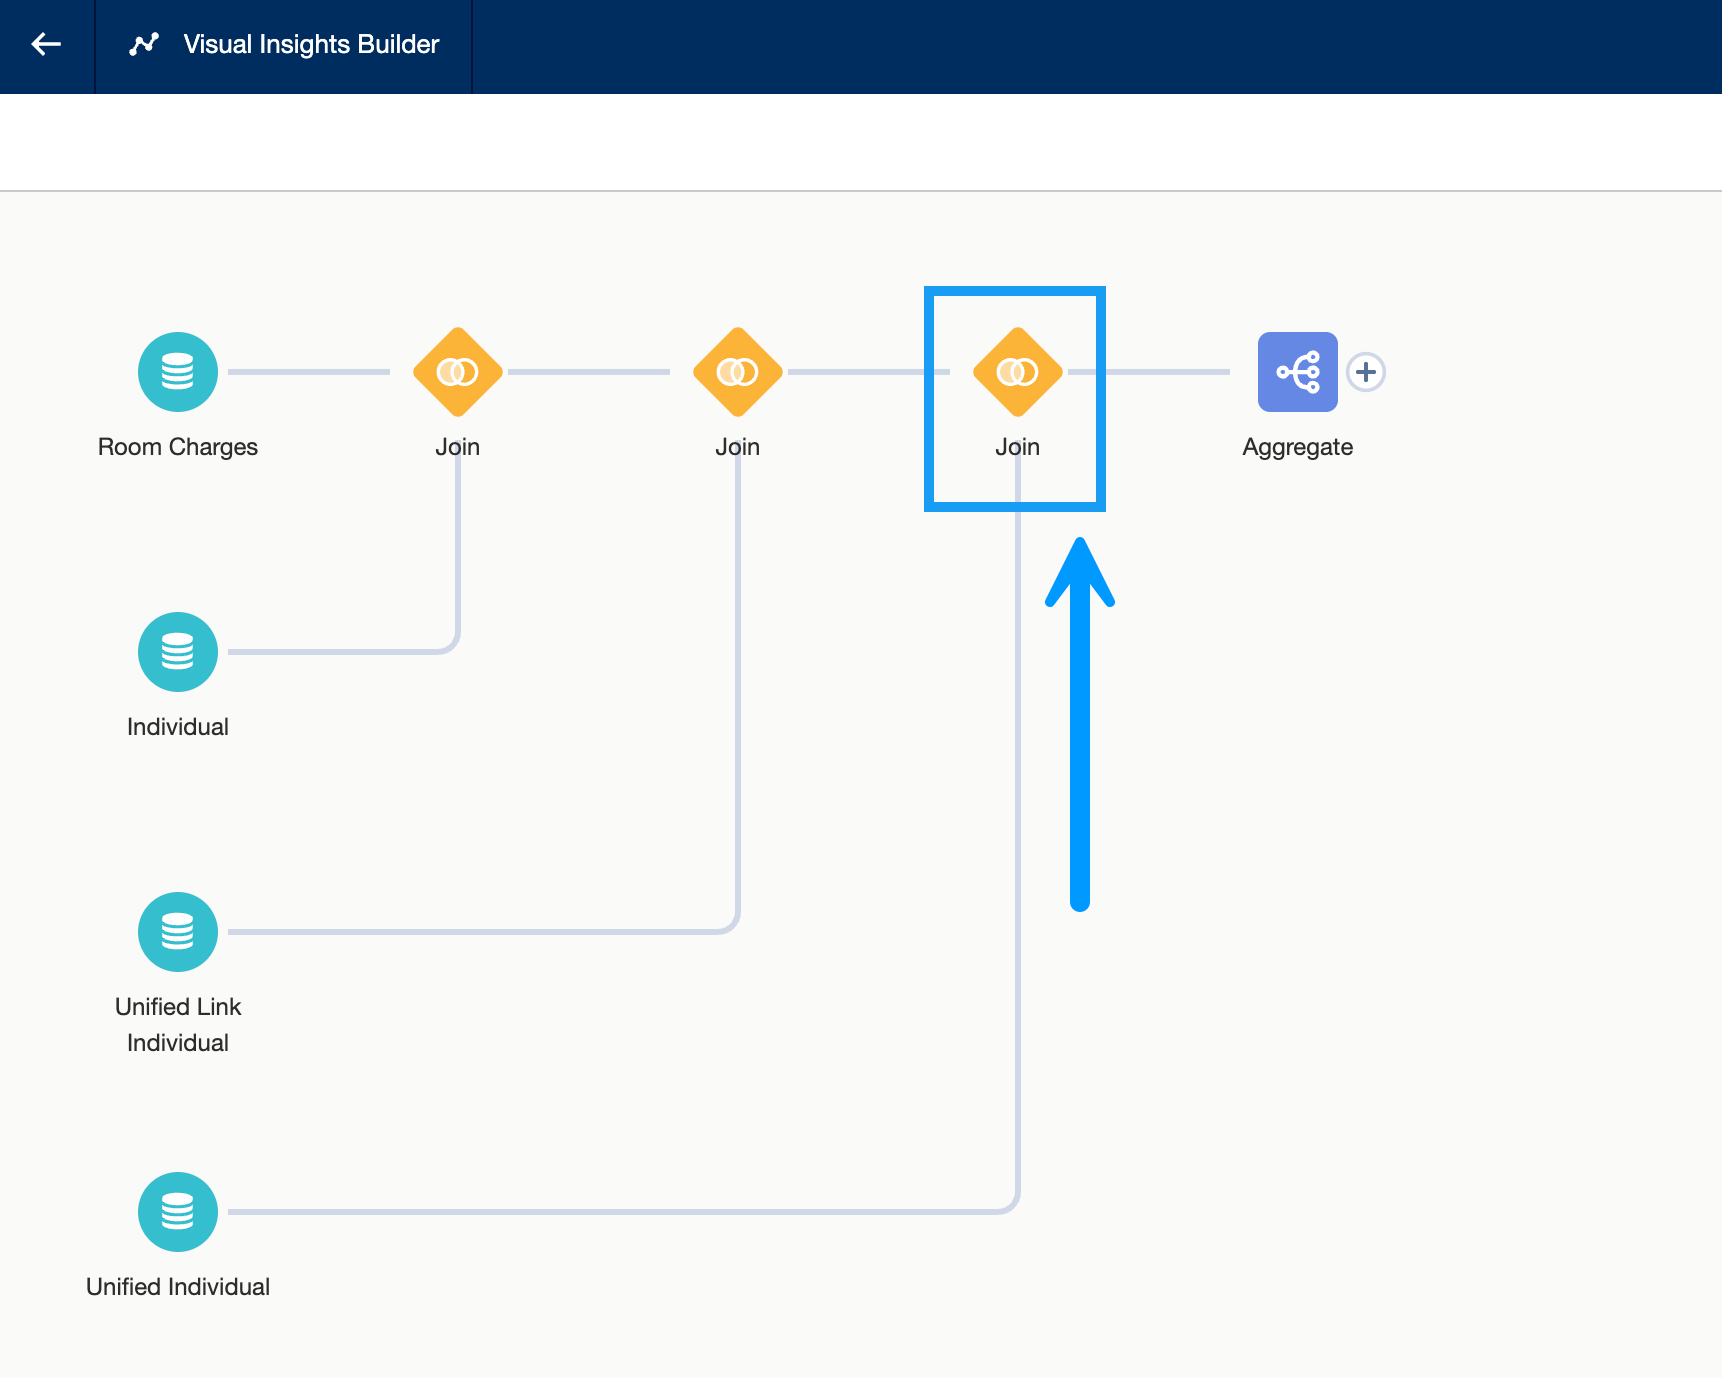

Joins are a SQL construct for combining data from multiple tables/objects. Basically, it takes two records (one from each table) and joins them into a single record. There are multiple types of Joins. In our case, we want Inner Joins to combine or group Room Charges by the Unified Individual (a guest in Coral Cloud’s case).
Data Cloud has automatically created tables that join Unified Individual with other objects. One table was created, the Unified Individual Link, to store a link between the resolved Unified Individual and the Individual. This is important since the Unified Individual holds the matching Guests from S3 and Service Cloud as the same person. This means we can aggregate for a unique individual or guest, not individuals from each source.
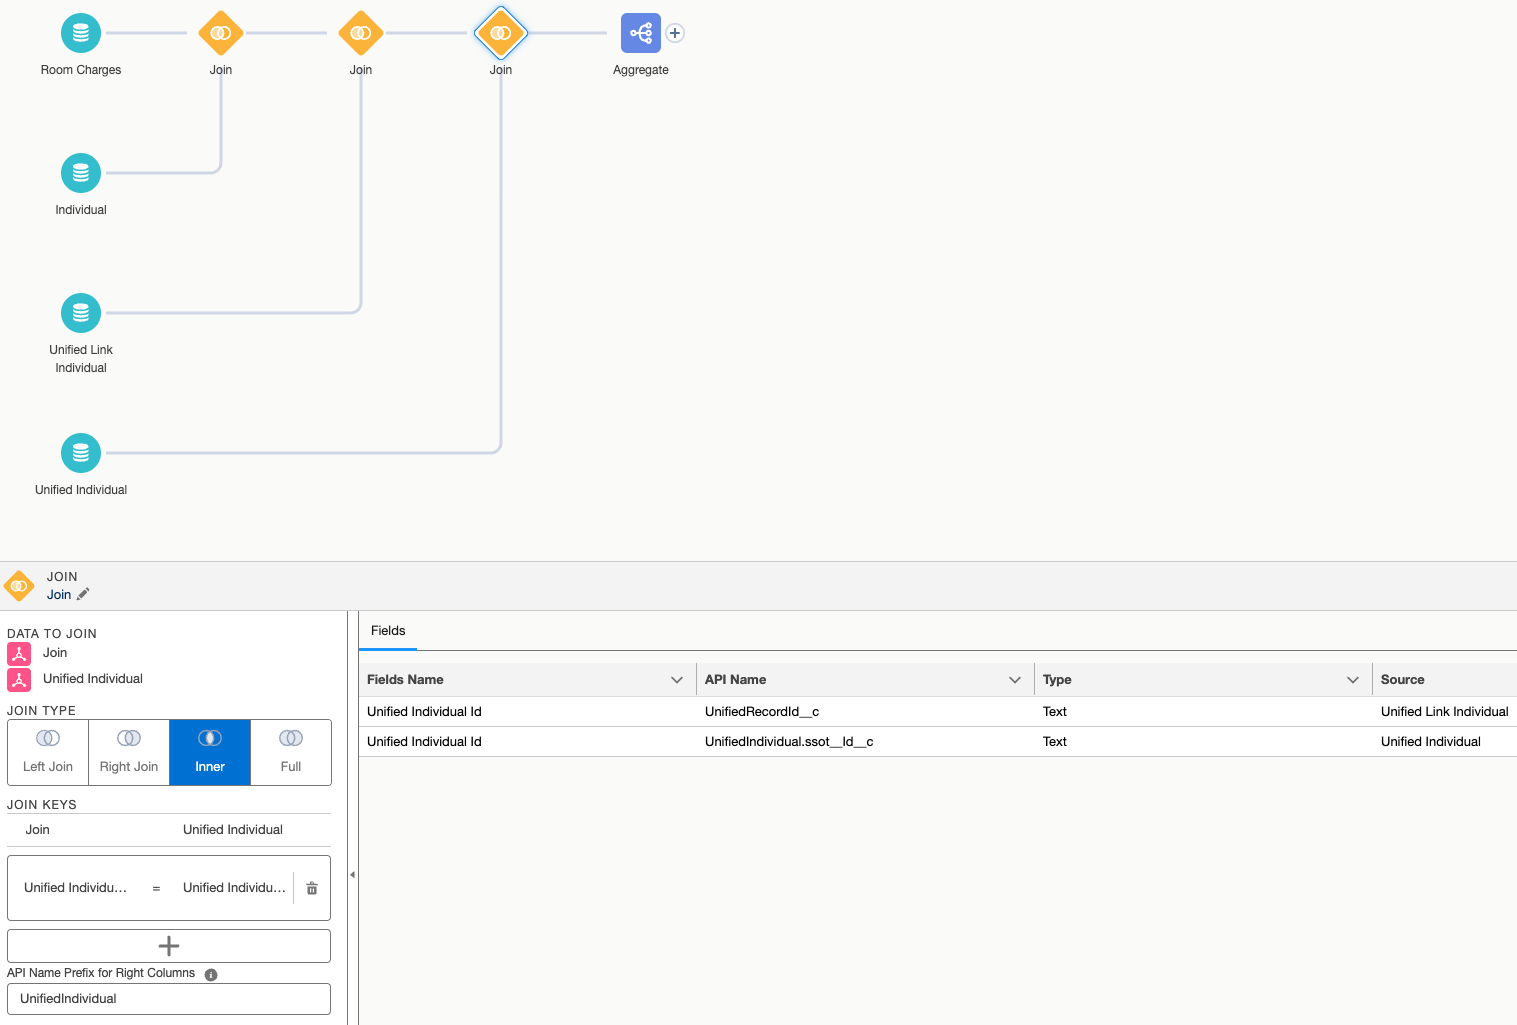
Review the fields on the Join node. Notice how we are joining Room Charges to the Unified Individual. Click Apply at the bottom left.
Next, click on the Aggregate icon on the canvas. Here we can see that a measure has been added named LTV, which is the sum of all related Room Charges for the Unified Individual. A dimension has also been added named UnifiedGuest.
Since Coral Cloud Resorts is utilizing Identity Resolution in Data Cloud and joined Room Charges to the Unified Individual Data Model Object, LTV will be aggregated across all indiviudal customer records to provide a hollistic insight at the Unified Profile level.
From the Aggregate screen, click Apply and then click Save and Run.
Name the Calculated Insight Lifetime Value, then click Next.
Your Calculated Insight might have a different default name and/or API Name. You can rename it to match the image or leave as-is.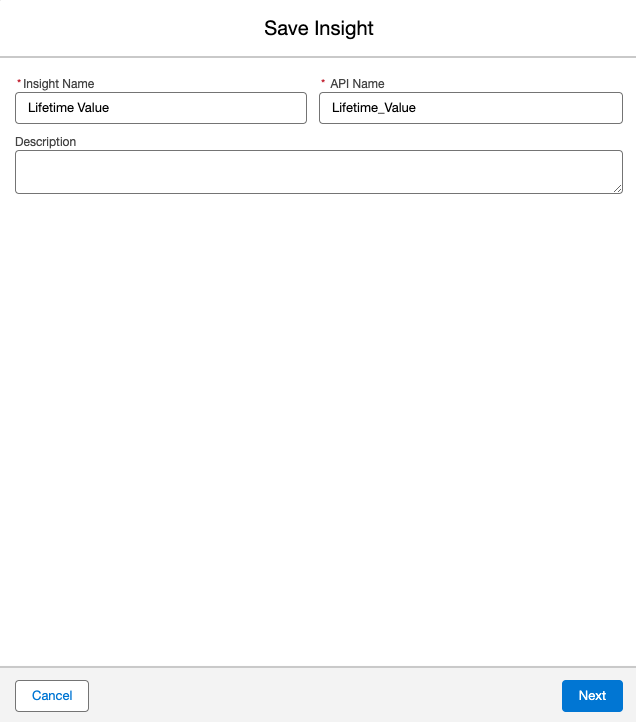
Set the Schedule to Not Scheduled and click Enable.
Now, we need to publish the Calculated Insight. From the Lifetime Value screen, click Publish Now. You may have to click the drop down arrow or refresh your screen if Publish Now is not visible.
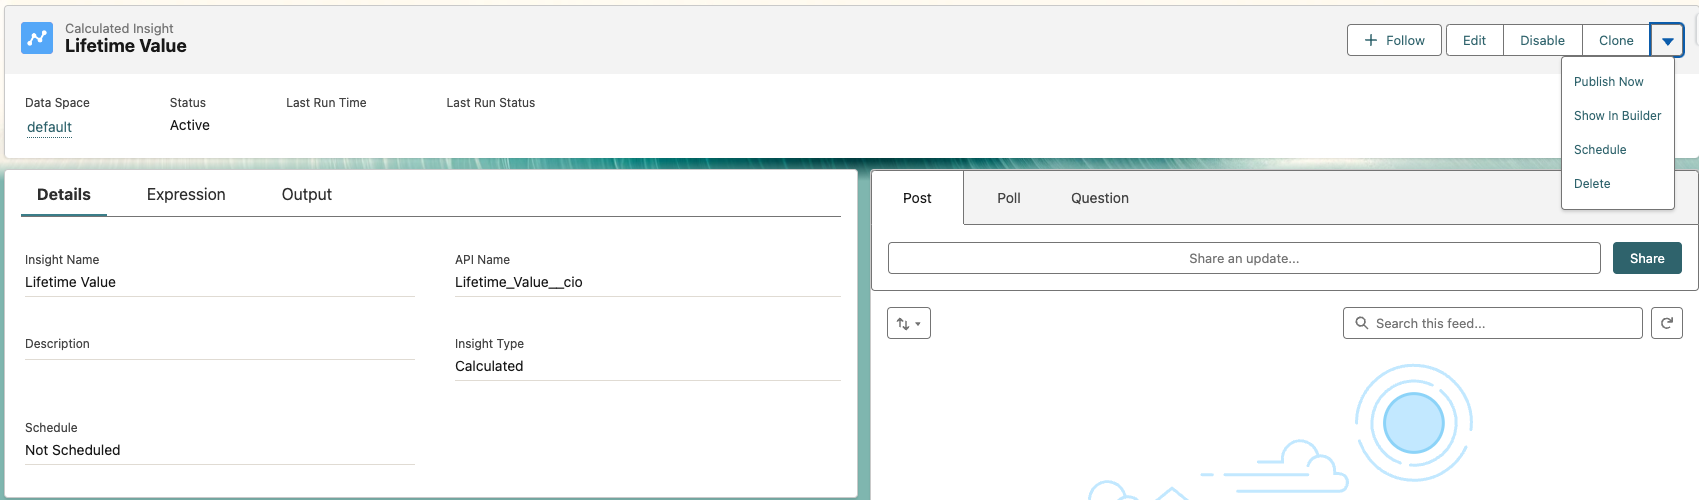
From the Calculated Insight Details, click the Expression tab to see the generated SQL.
NOTE: This can take up to 15 minutes to run. Let’s take a quick break.
From the Calculated Insight tab, watch the Last Run Status change from Pending to Processing to Success. There’s a small Refresh button in the upper right to refresh the List View.
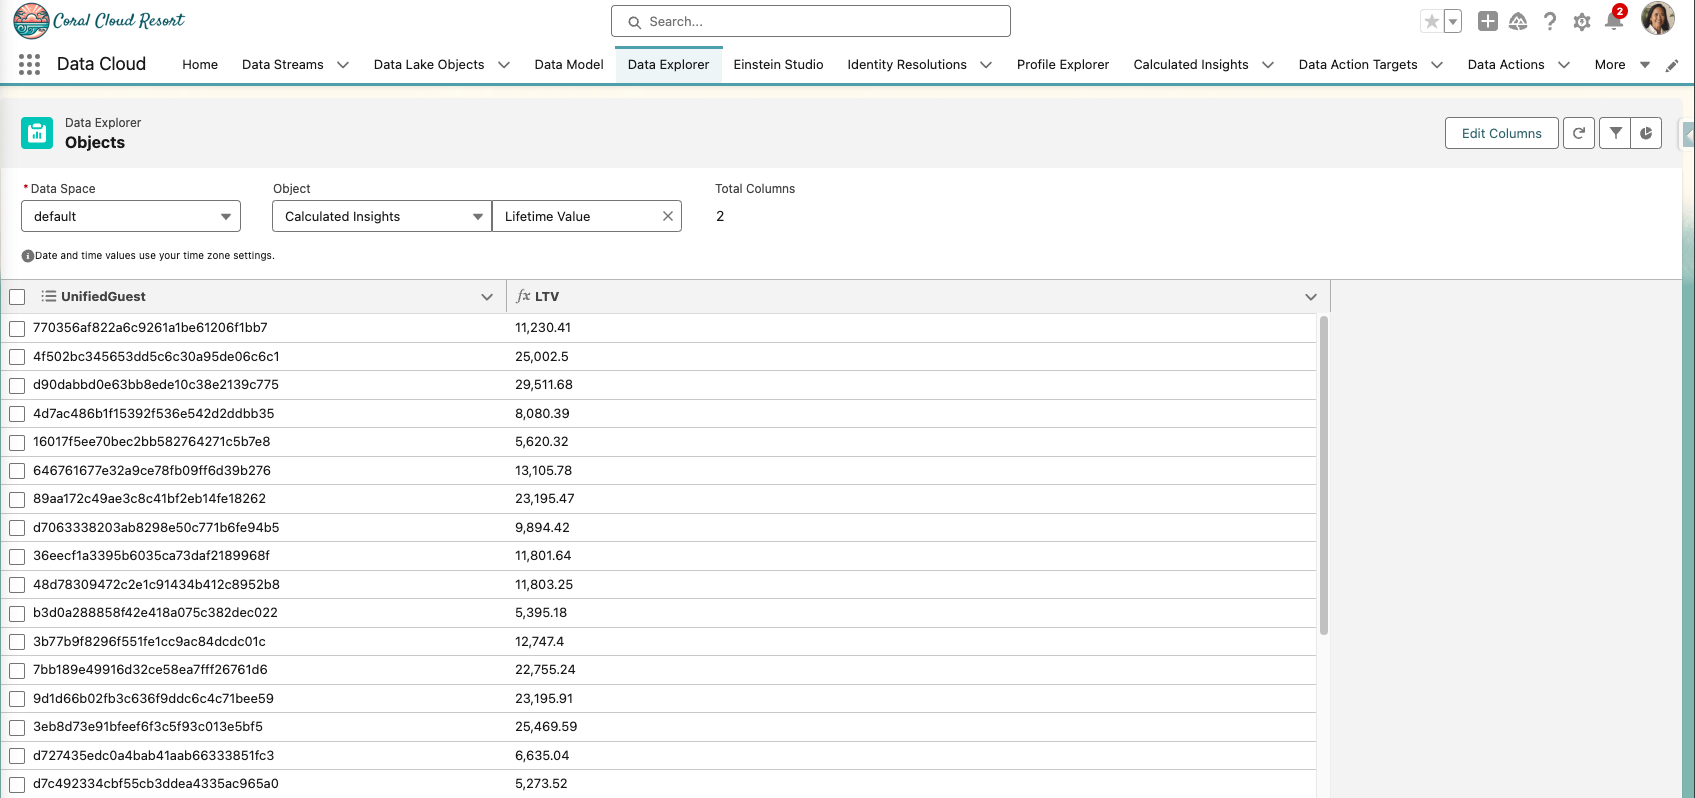
You can view the results using the Data Explorer. Specify the Object as Calculated Insights and select your CI.
Step 2: Using Unified Individuals in Salesforce Apps
Finally, we can see how to utilize our unified customer profile for our Salesforce users.
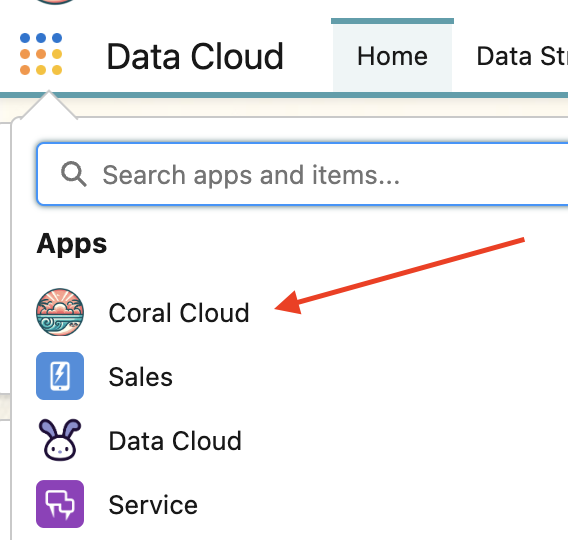
Use the App Switcher in the upper left to switch to (or open a new tab for) the Coral Cloud App.
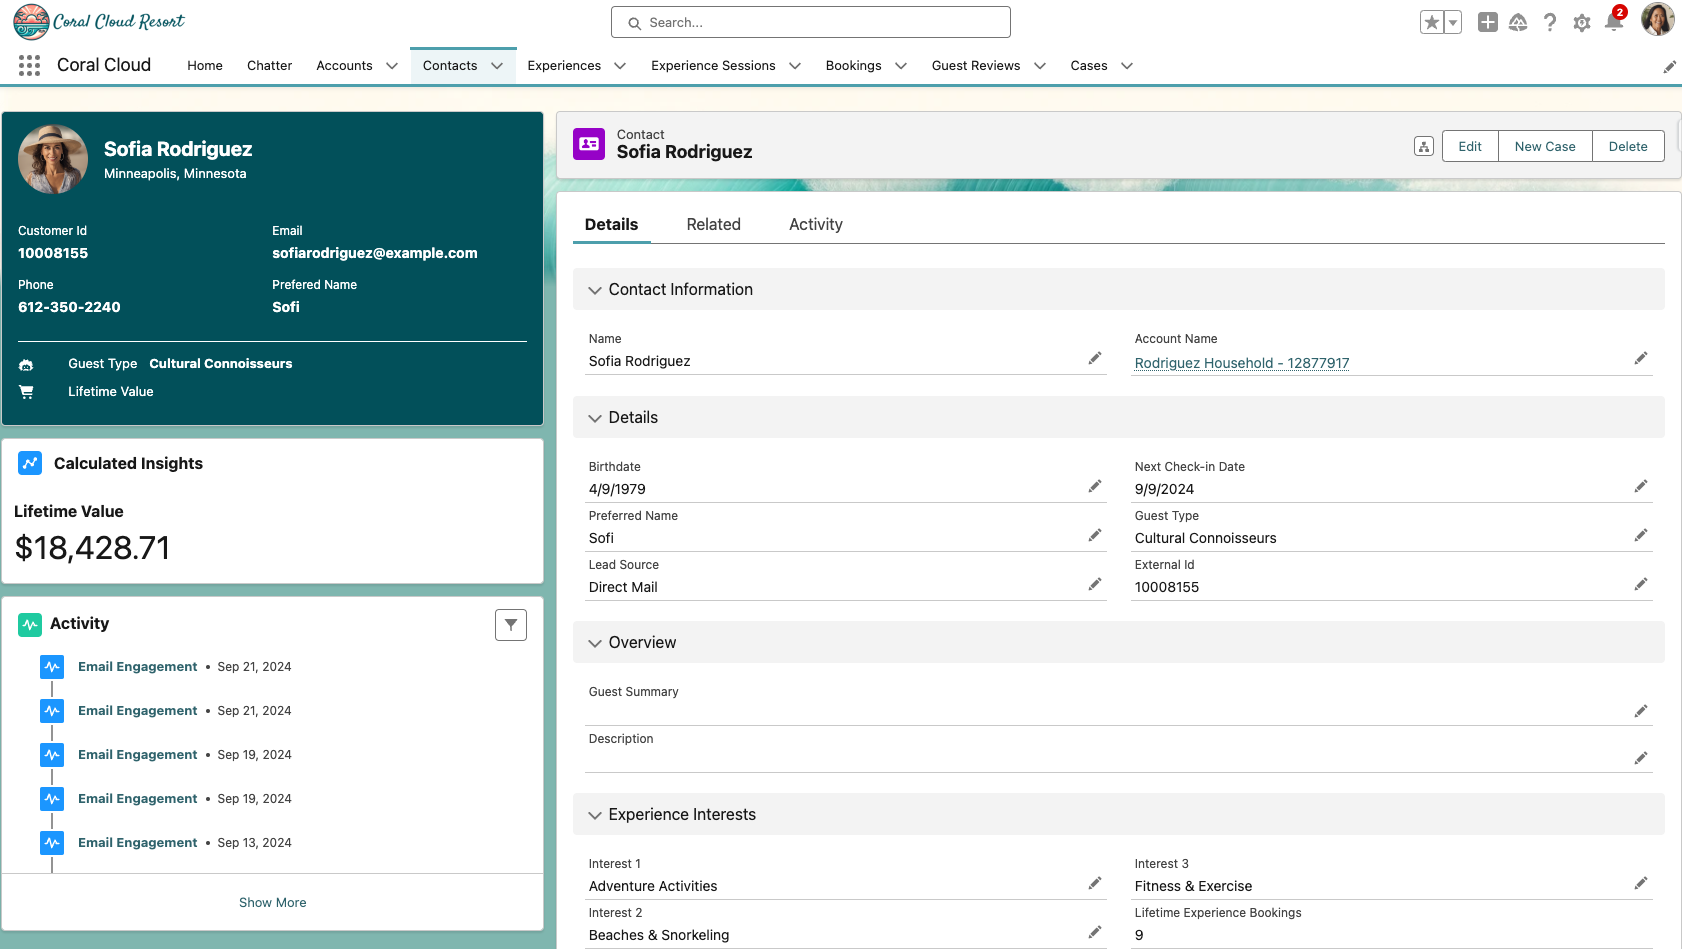
Click the Contacts tab, toggle from Recently Viewed to All Contacts, and search for Rodriguez.
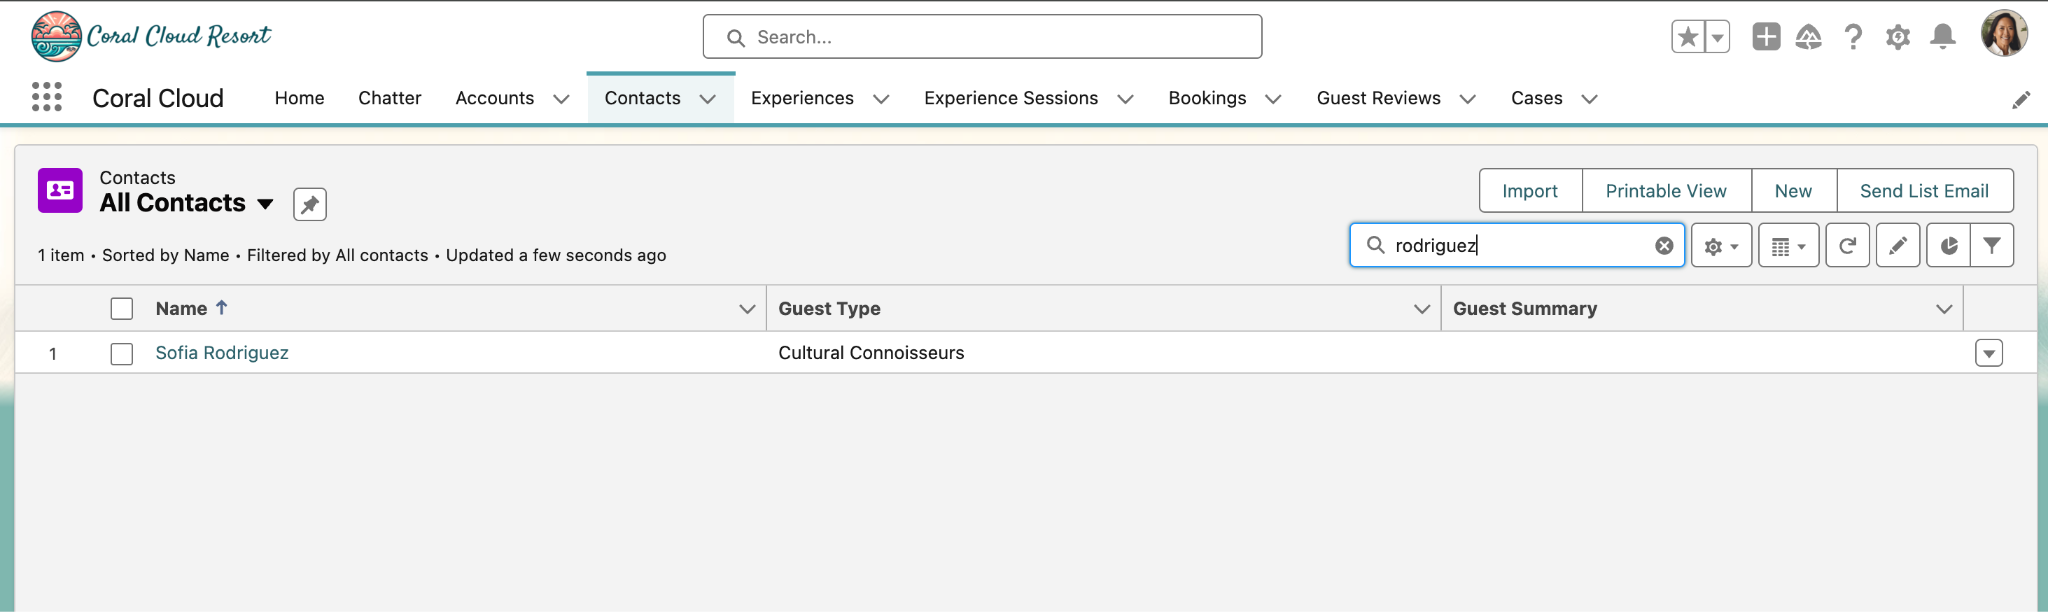
Click the Sofia Rodriguez link under Name to see the Contact details.
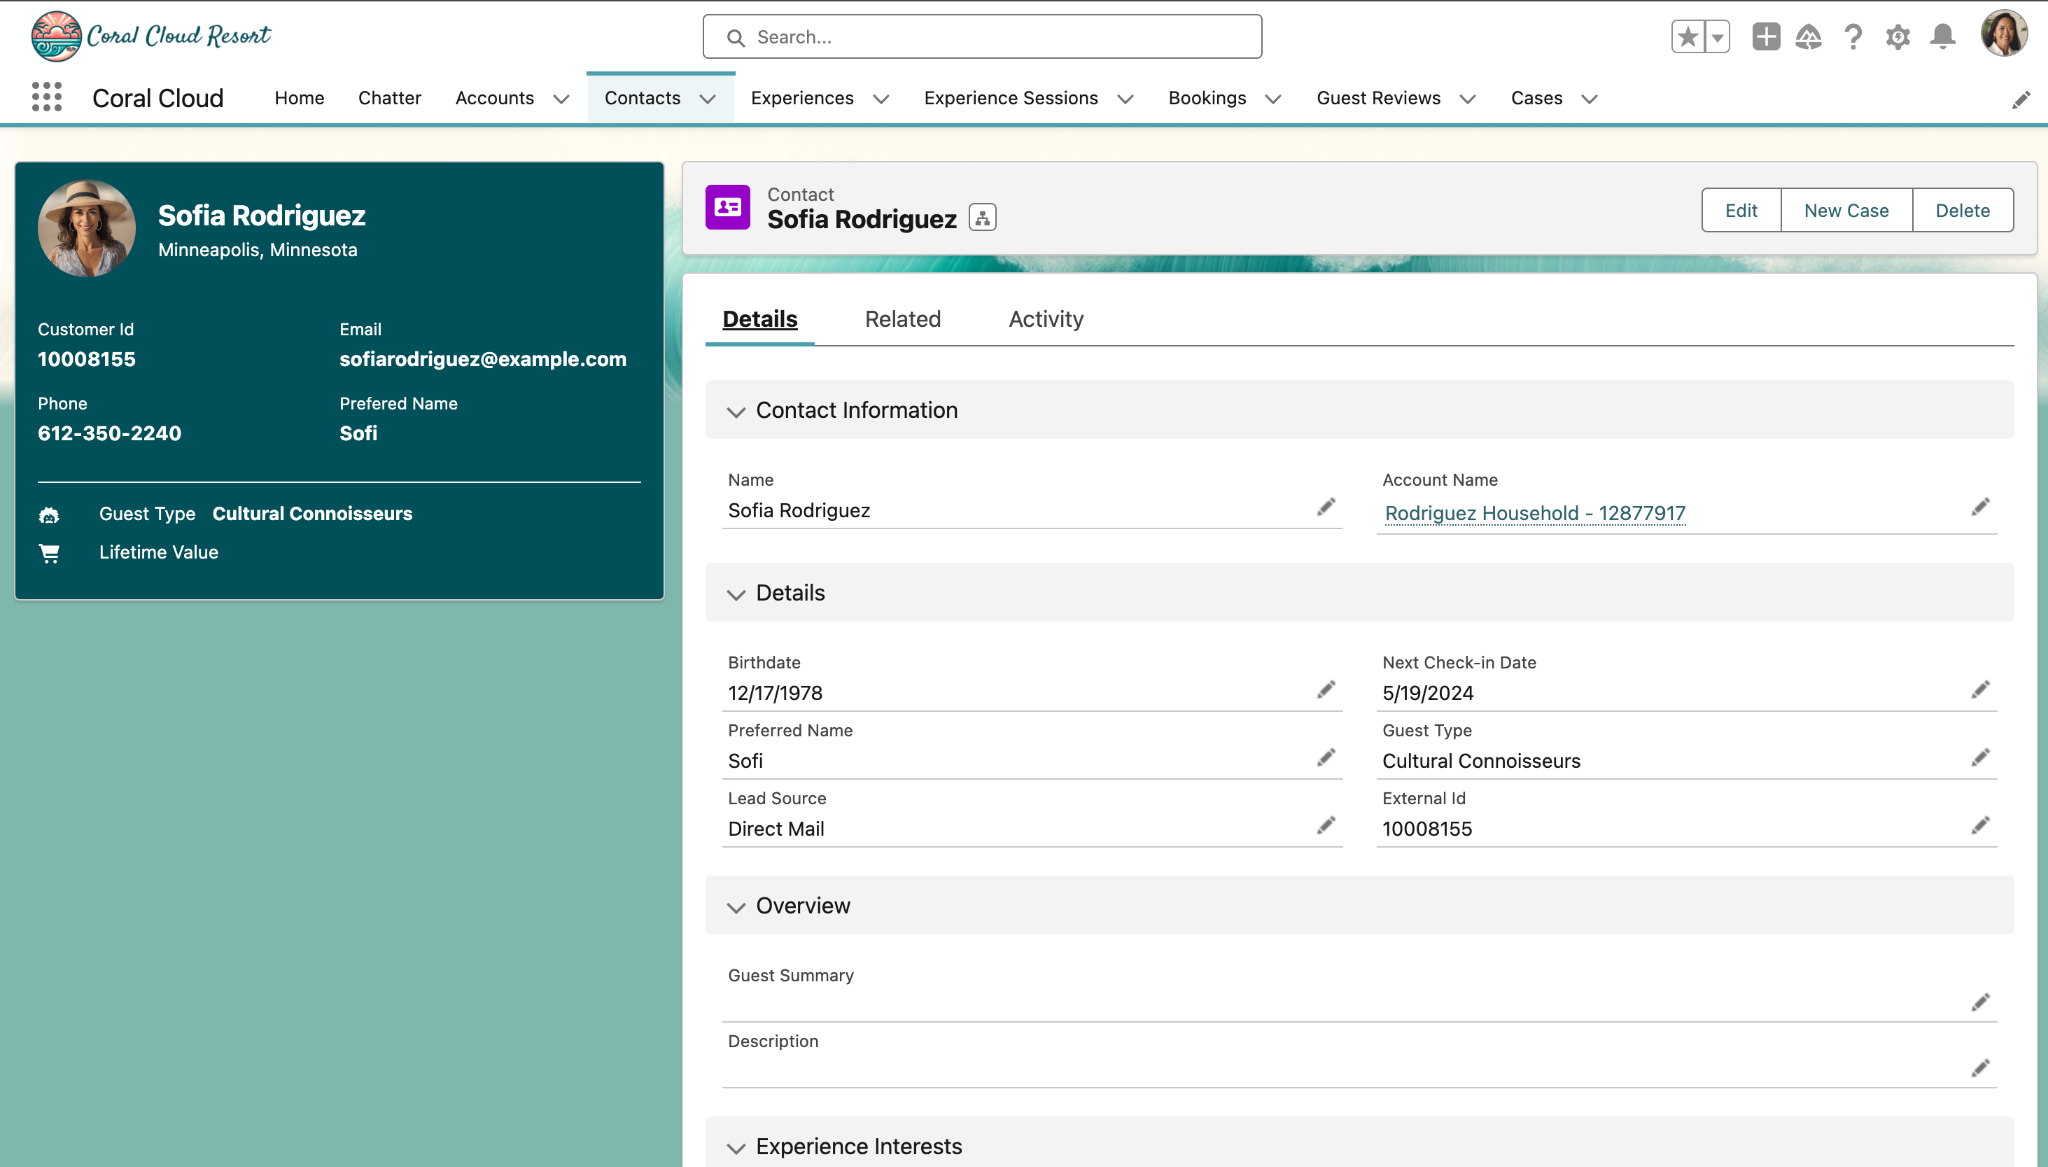
Here, you can see the details from the Unified Individual as a Contact. Let’s edit this page to add Data Cloud Profile Engagement and our recently created LTV Calculated Insight from the Unified Profile.
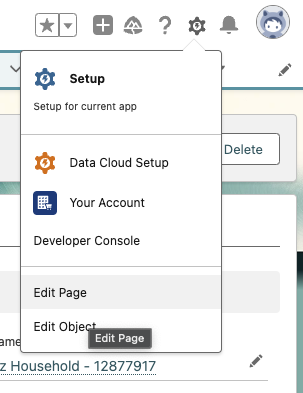
Click the Gear at the top right and select Edit Page.
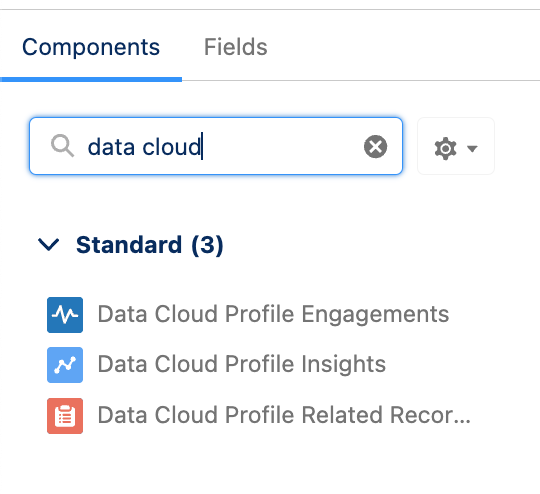
In the left-side search bar under Components type Data Cloud.
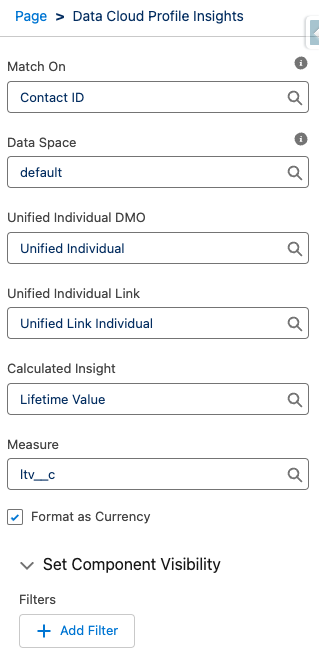
Let’s add that Lifetime Value (LTV) Calculated Insight we created earlier!
In the left-side panel drag Data Cloud Profile Insights over to the right and place it between the Contact Card and the Loyalty Member Profile component.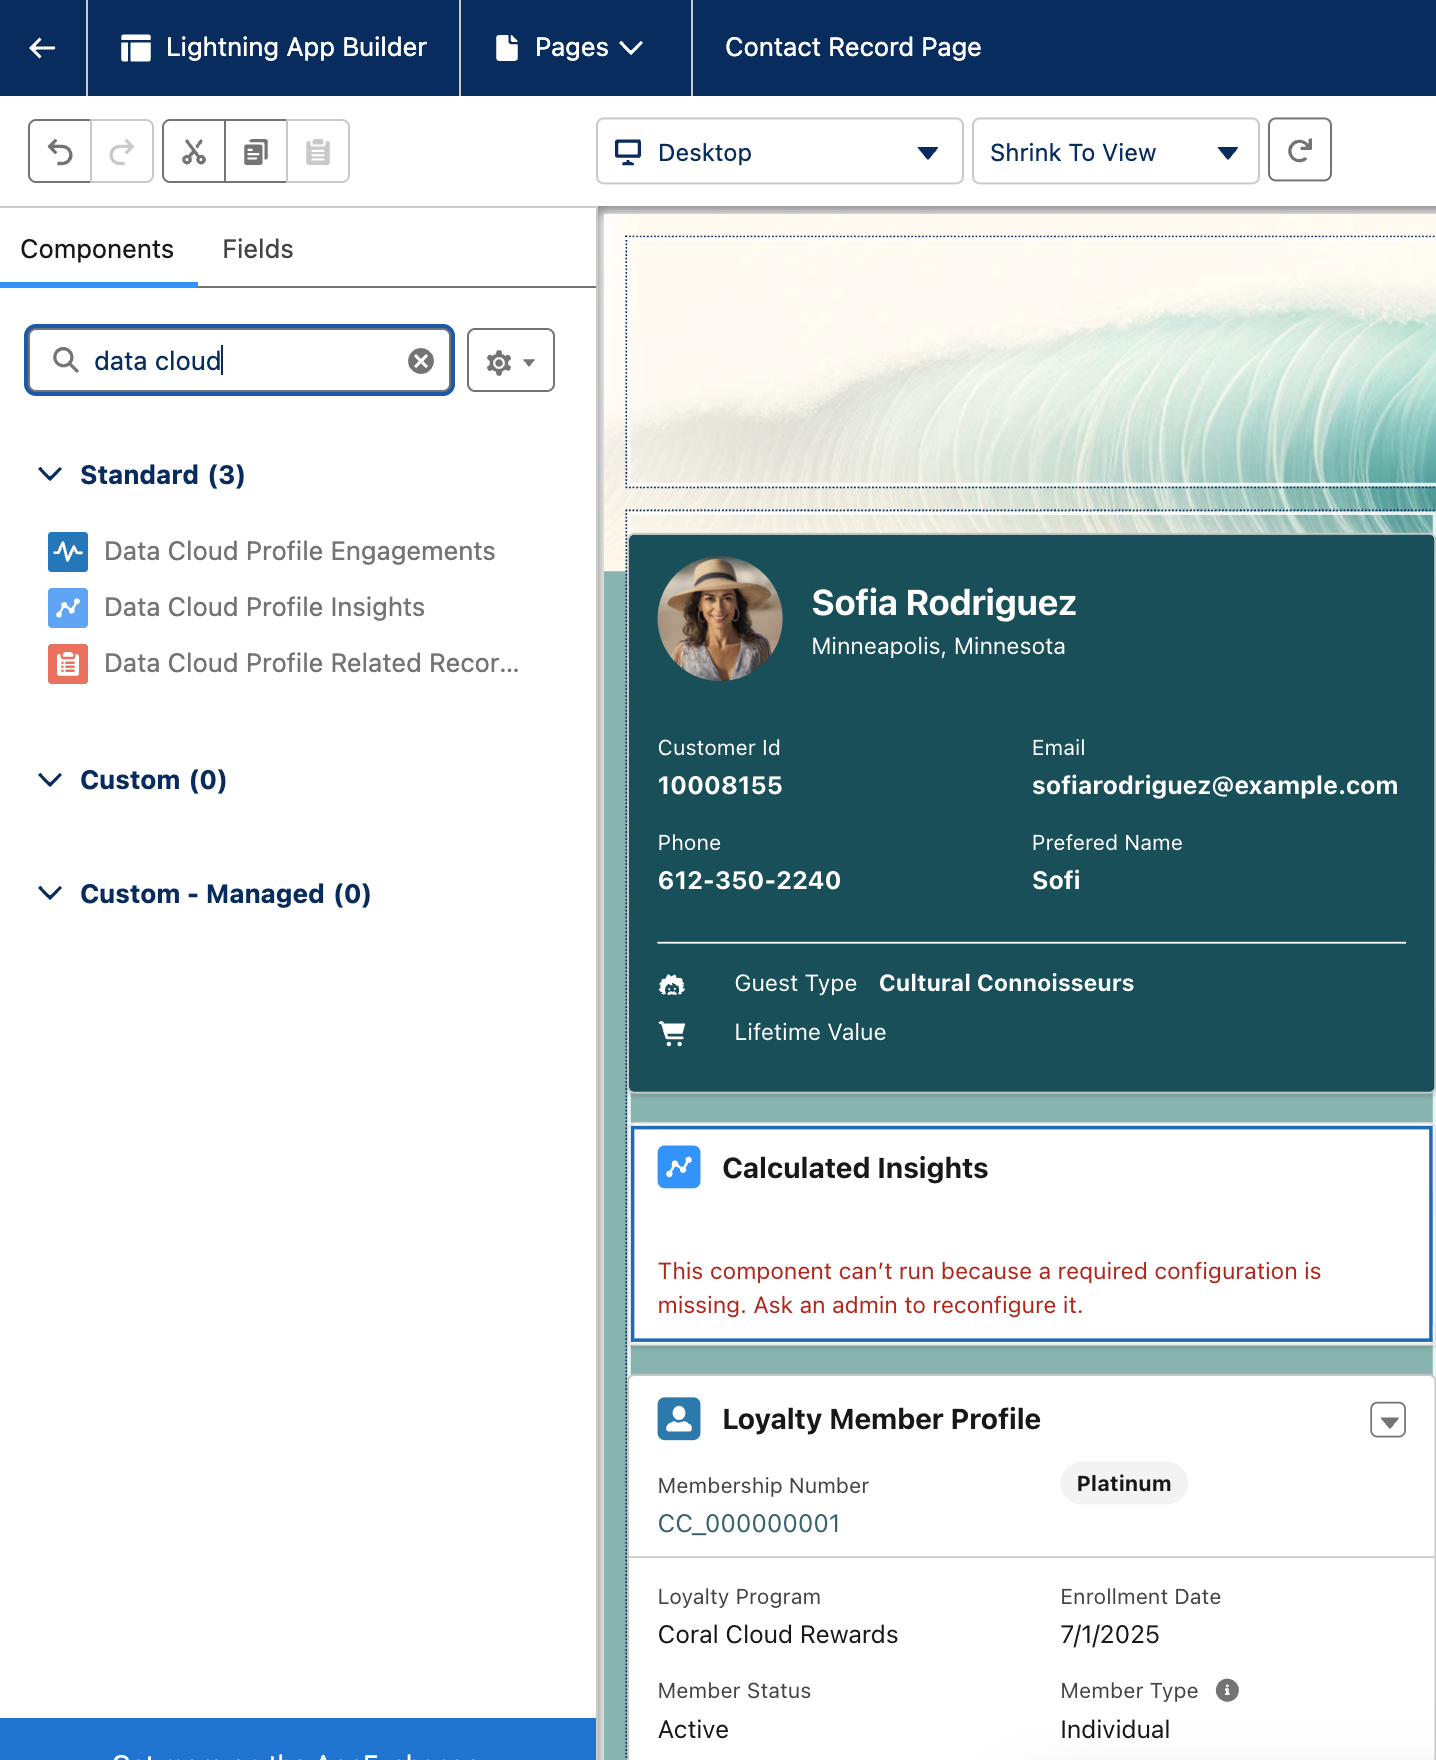
On the right-side, under Data Cloud Profile Insights, make the following changes:
Under Match On select Contact ID
Under Data Space select default
Under Unified Individual DMO select Unified Individual
Under Unified Individual Link select Unified Link Individual
Under Calculated Insight select Lifetime Value
Under Measure select ltv__c
Check the Format as Currency box
Once your screen looks like the picture below, click Save.
Exit the Lightning App Builder using the Back Arrow in the upper left to return to the Contact.
Note that this enriched unified profile data can be used across Salesforce clouds, including Leads, Cases, and Accounts, while still being controlled by roles and permission sets.
This completes Exercise 1.