Appearance
Exercise 0: Setup Your Salesforce Org
To get started with this workshop, complete these steps to request a Workshop environment for these Hands-On Exercises.
Step 1: Request a Workshop Environment
Go here to access the signup form for this Workshop:
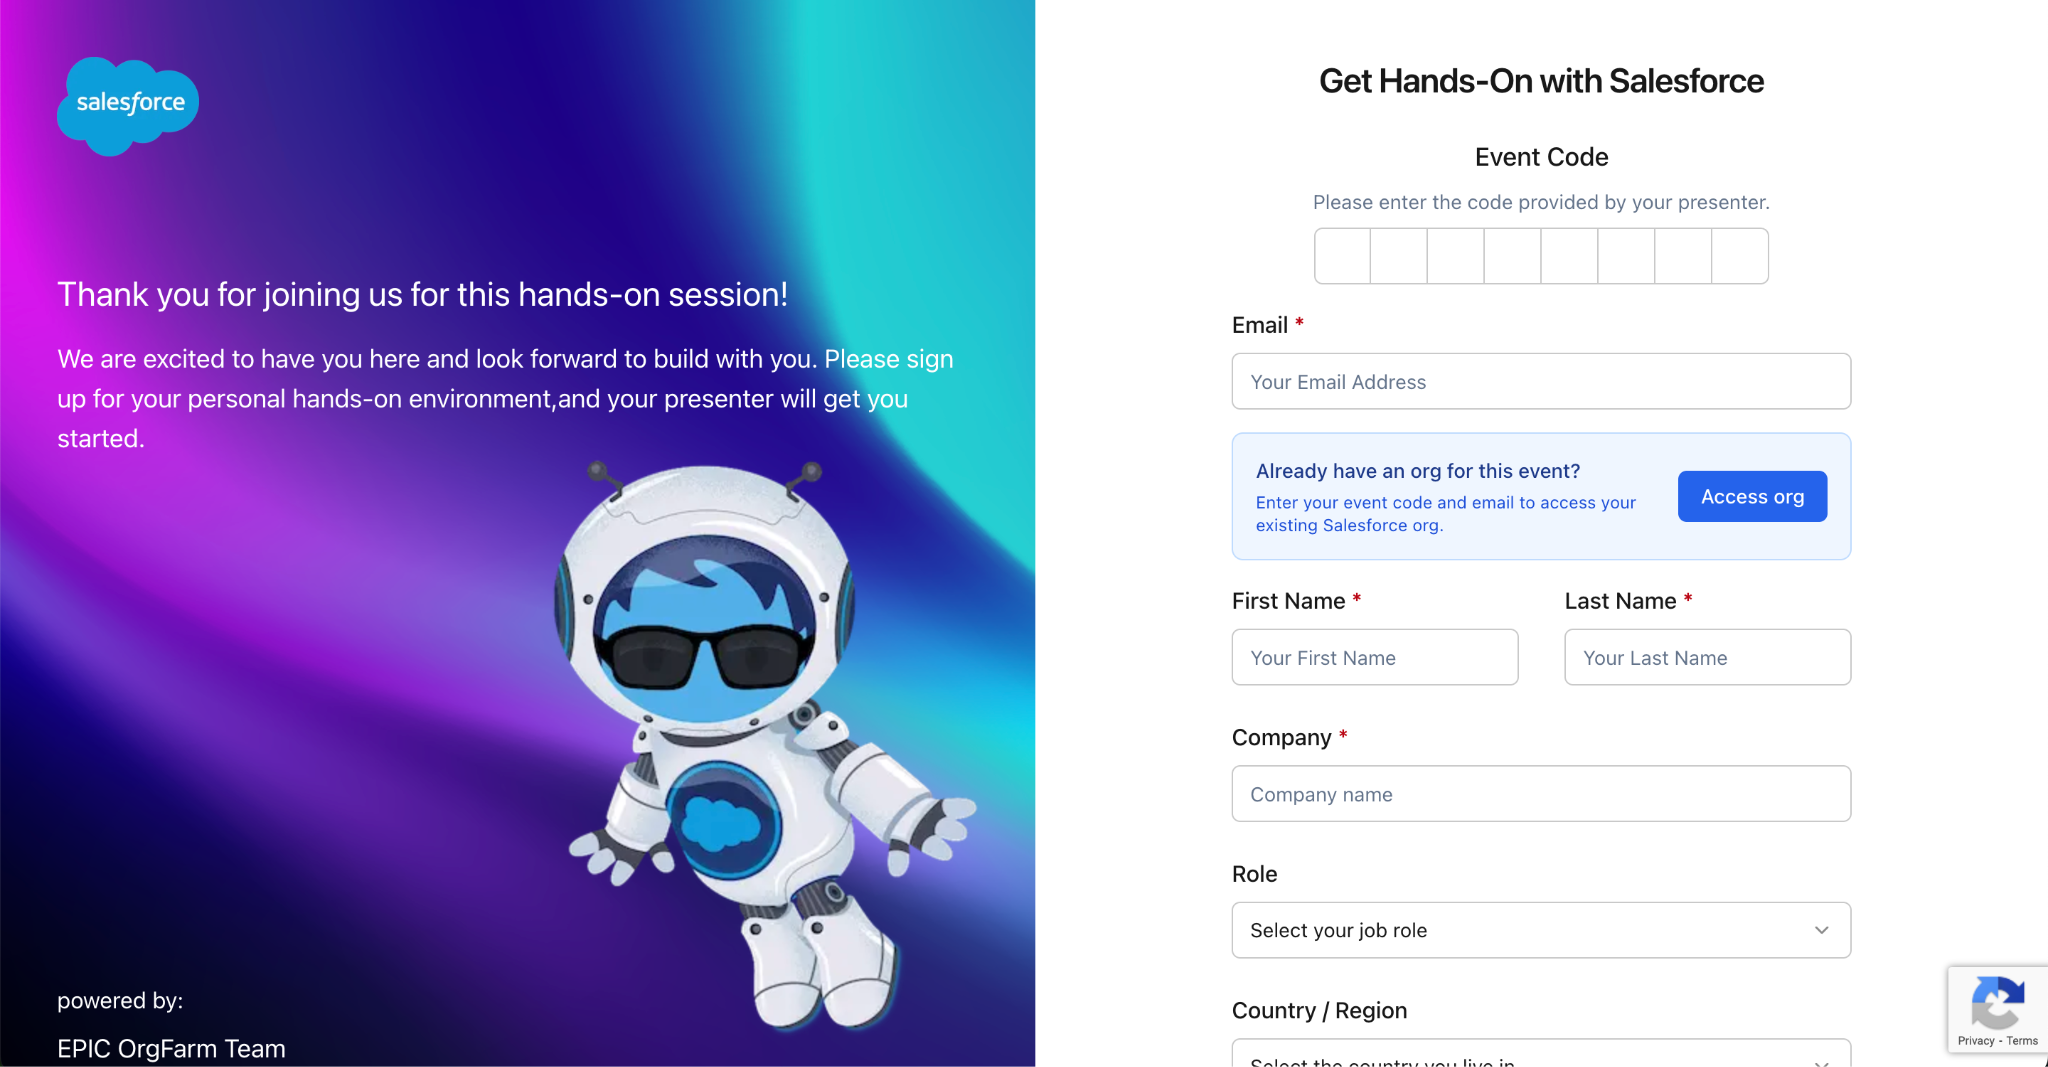
Complete the form, including the provided Event Code and your email address. Click Submit.
Make a note of your credentials. Use those credentials to log into your environment at login.salesforce.com
The home page in the Data Cloud App summarizes the current configuration, including Data Streams, Segments, and Activations. You can also customize this page using Lightning App Builder.
Step 2: Change your user’s email address
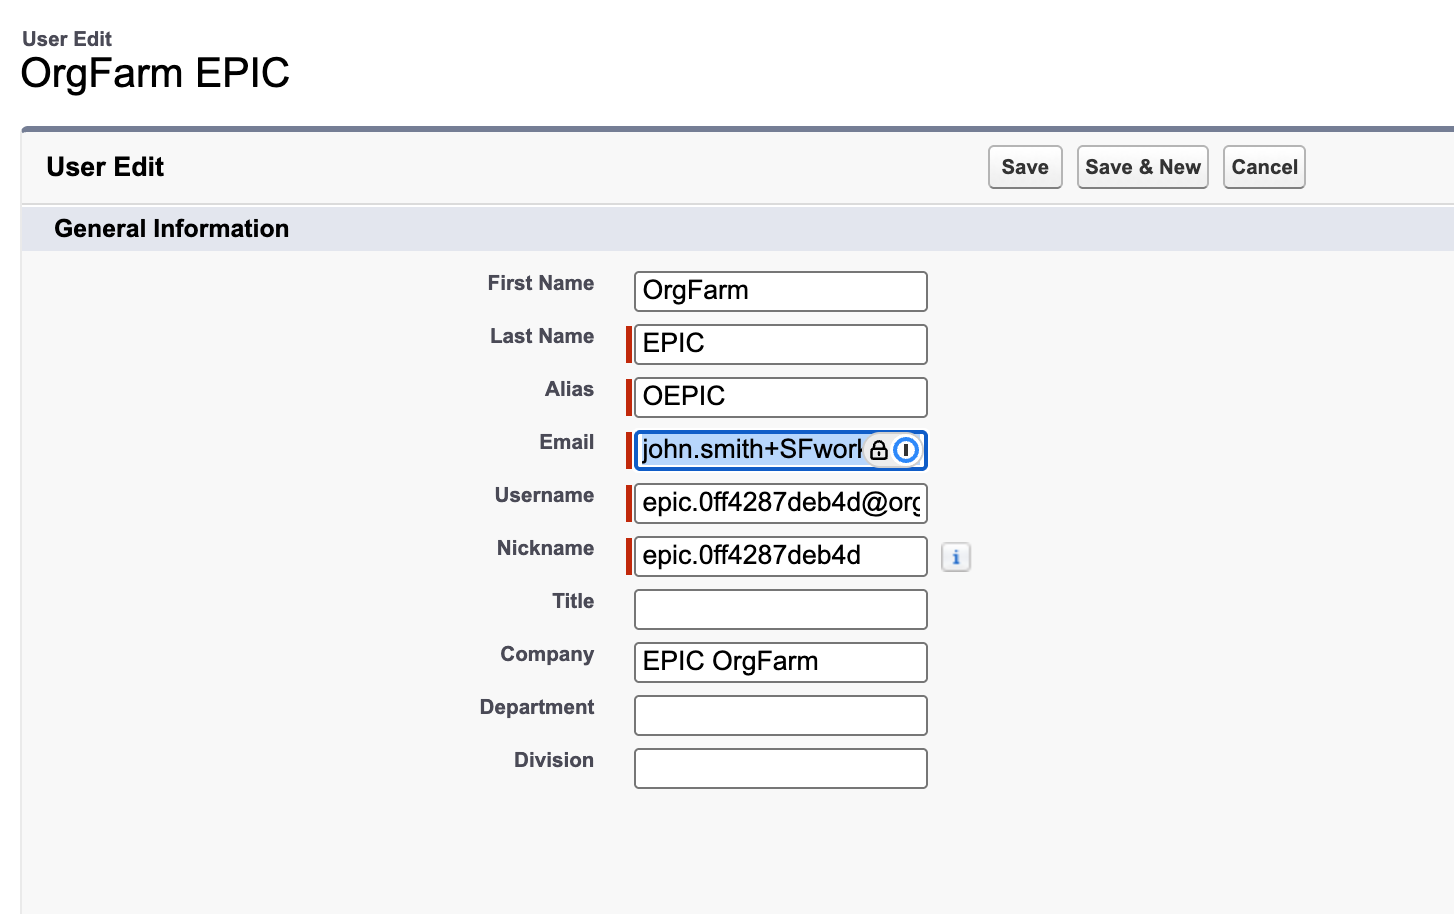
To finish claiming this Salesforce org, you must change your user’s email address to a personal (non-corporate) email address.
- Click your user image near the top-right of your screen, and select Settings.

- Find the Email field and change the email from epic.orgfarm@salesforce.com to your personal email address (not your work email). Tip: If you use Gmail, add “+SFworkshop” after your email but before the “@gmail.com” (example john.smith+SFworkshop@gmail.com)
Click Save and then OK on the next pop-up. Don’t forget the email you chose! You’ll need this soon.
Next, go to your personal email inbox and open the email from QA_SUPPORT@salesforce.com and click the link to finish changing your email address
 .
.Once you get confirmation, you can hit the Continue button.
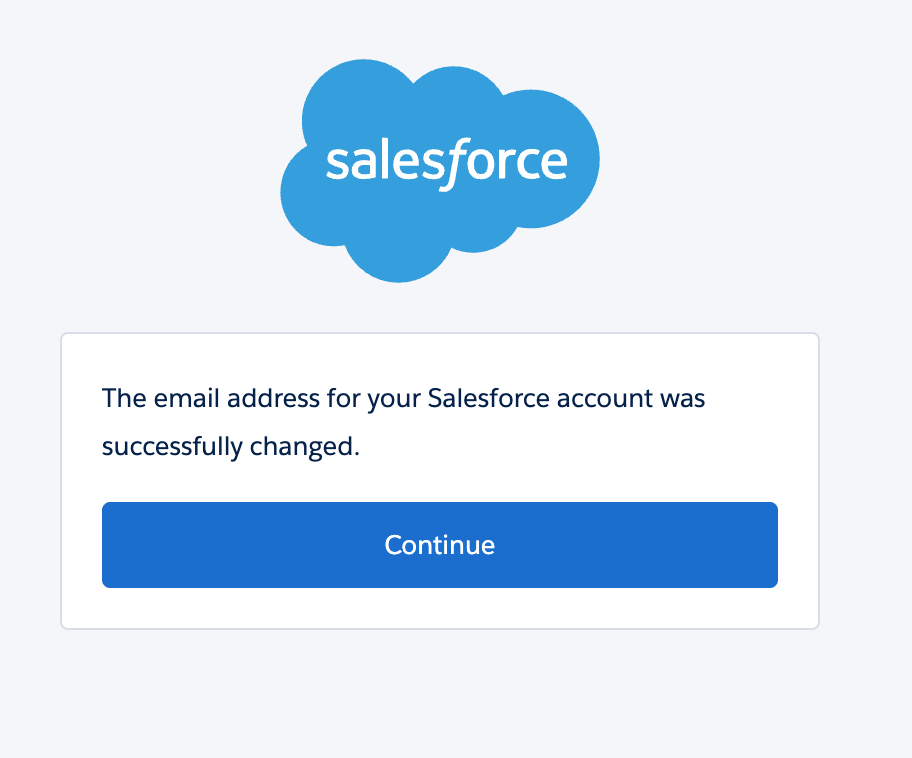
- You may need to log into this account again, so please use the provided credentials from Step 1 (not the email address you just changed).
Step 3: Import MuleSoft APIs
In this step, you will import pre-existing MuleSoft APIs from Anypoint Exchange. We have created the CoralClouds OpenTable API and already published it in Anypoint Exchange.
At the top-right, click the Setup icon and search for API Catalog. Then, select API Catalog.

Click into the MuleSoft Tab, then click Start Sync.
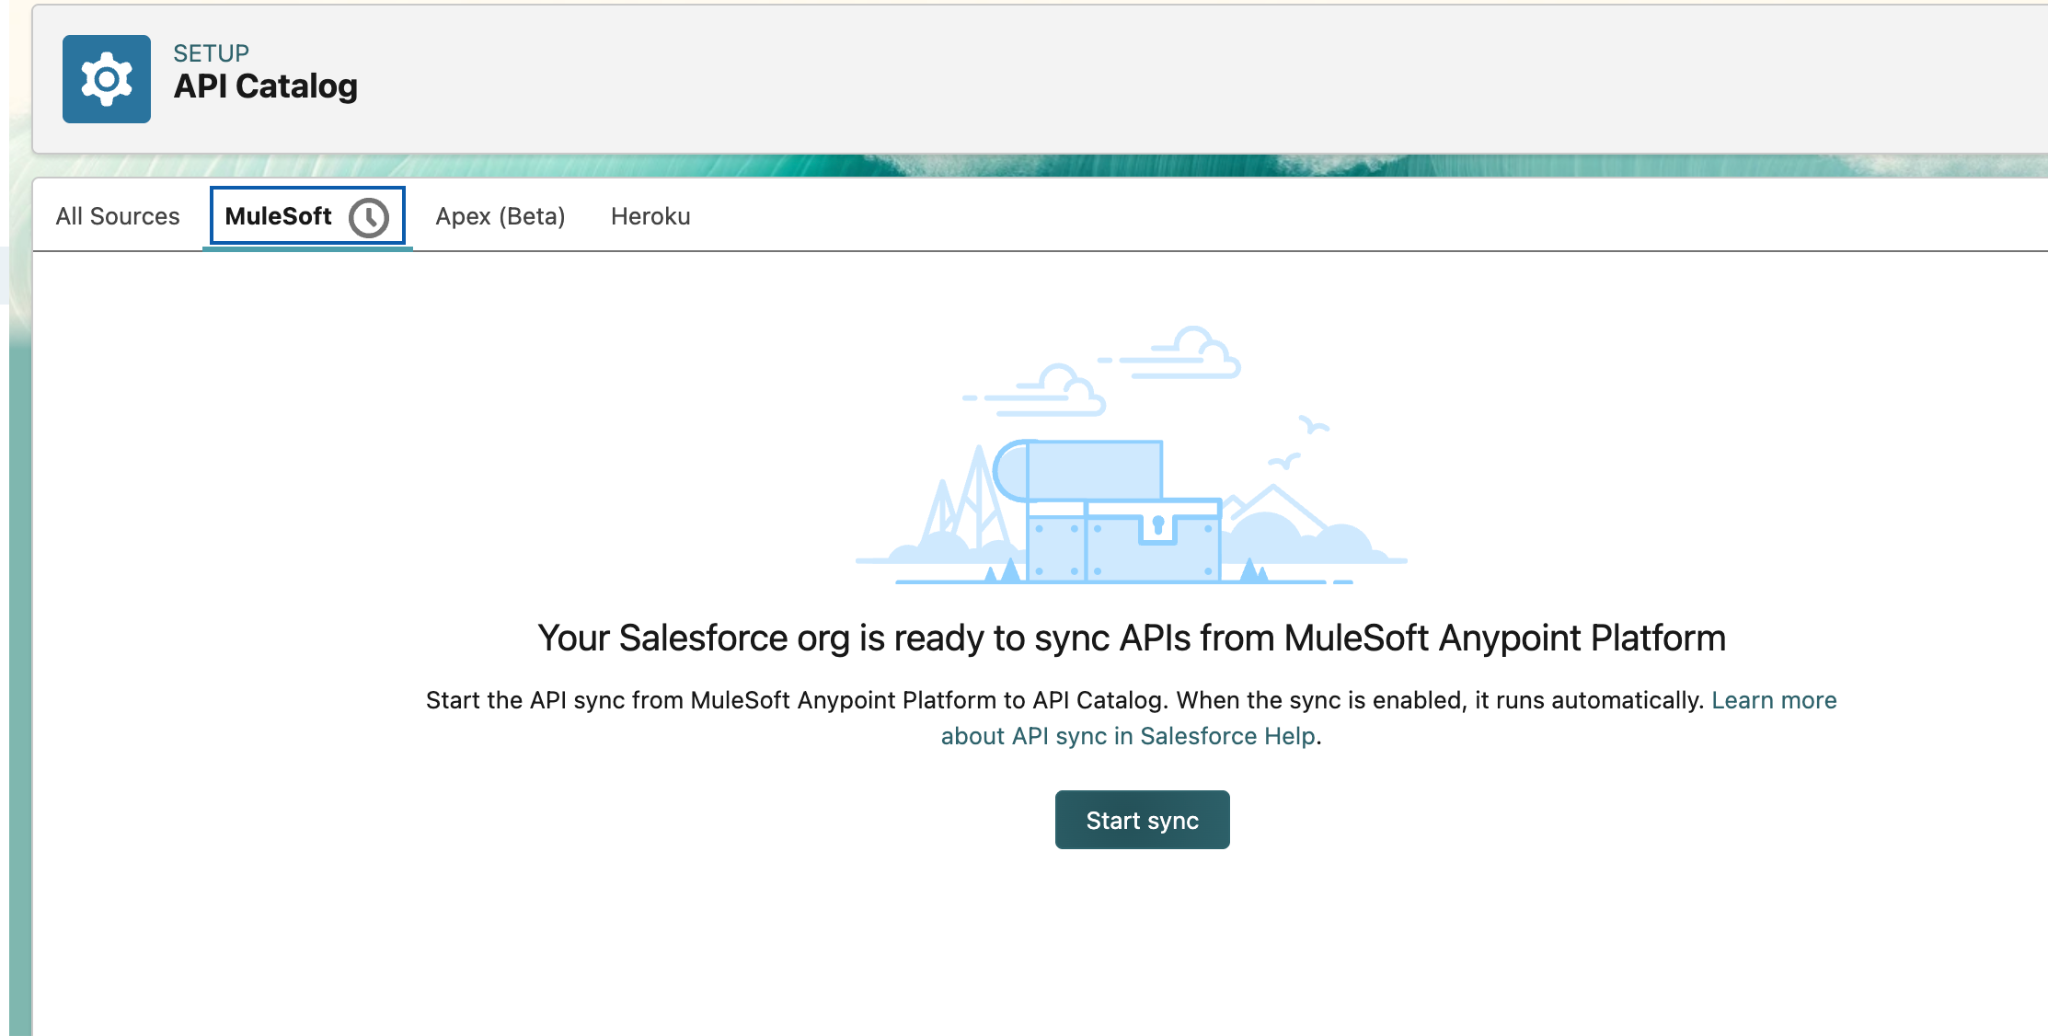
Verify that the Open Table API populates in the list. If it does not immediately populate, wait about 30 seconds and click the Refresh button.
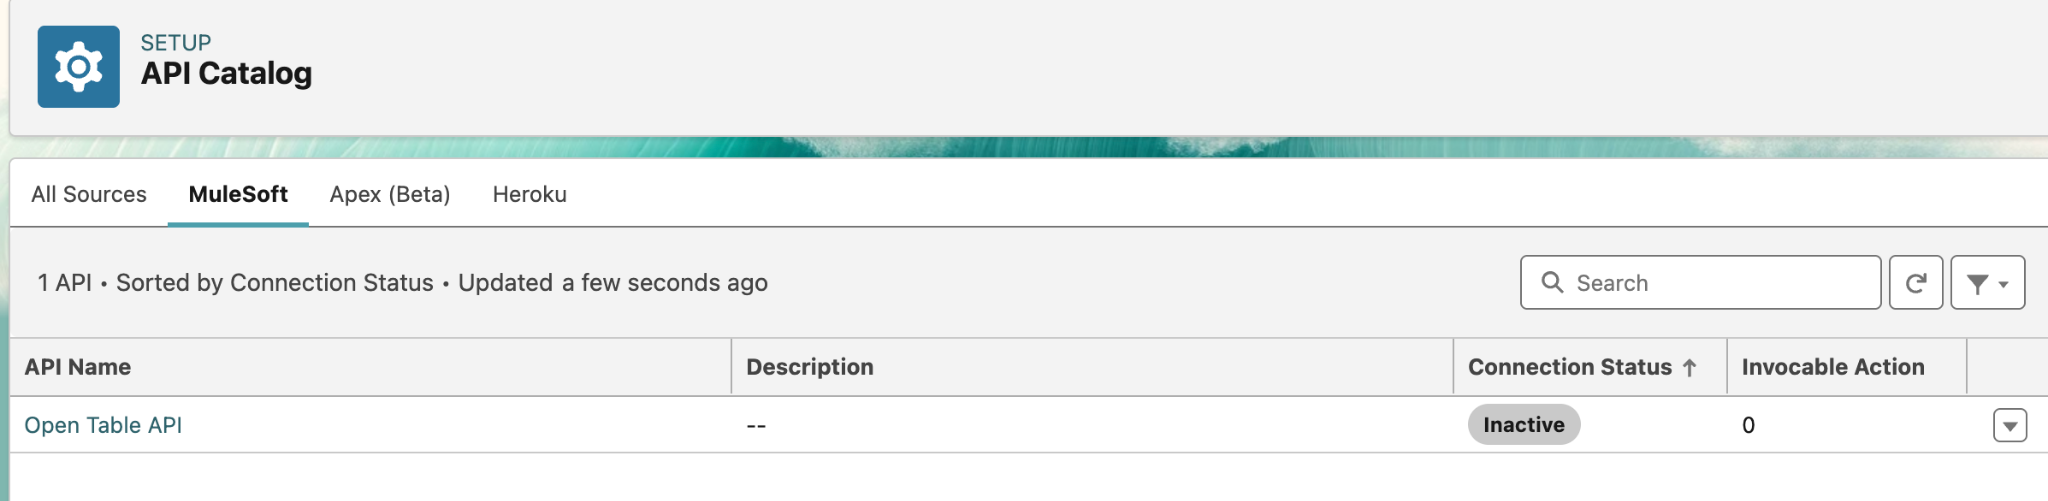
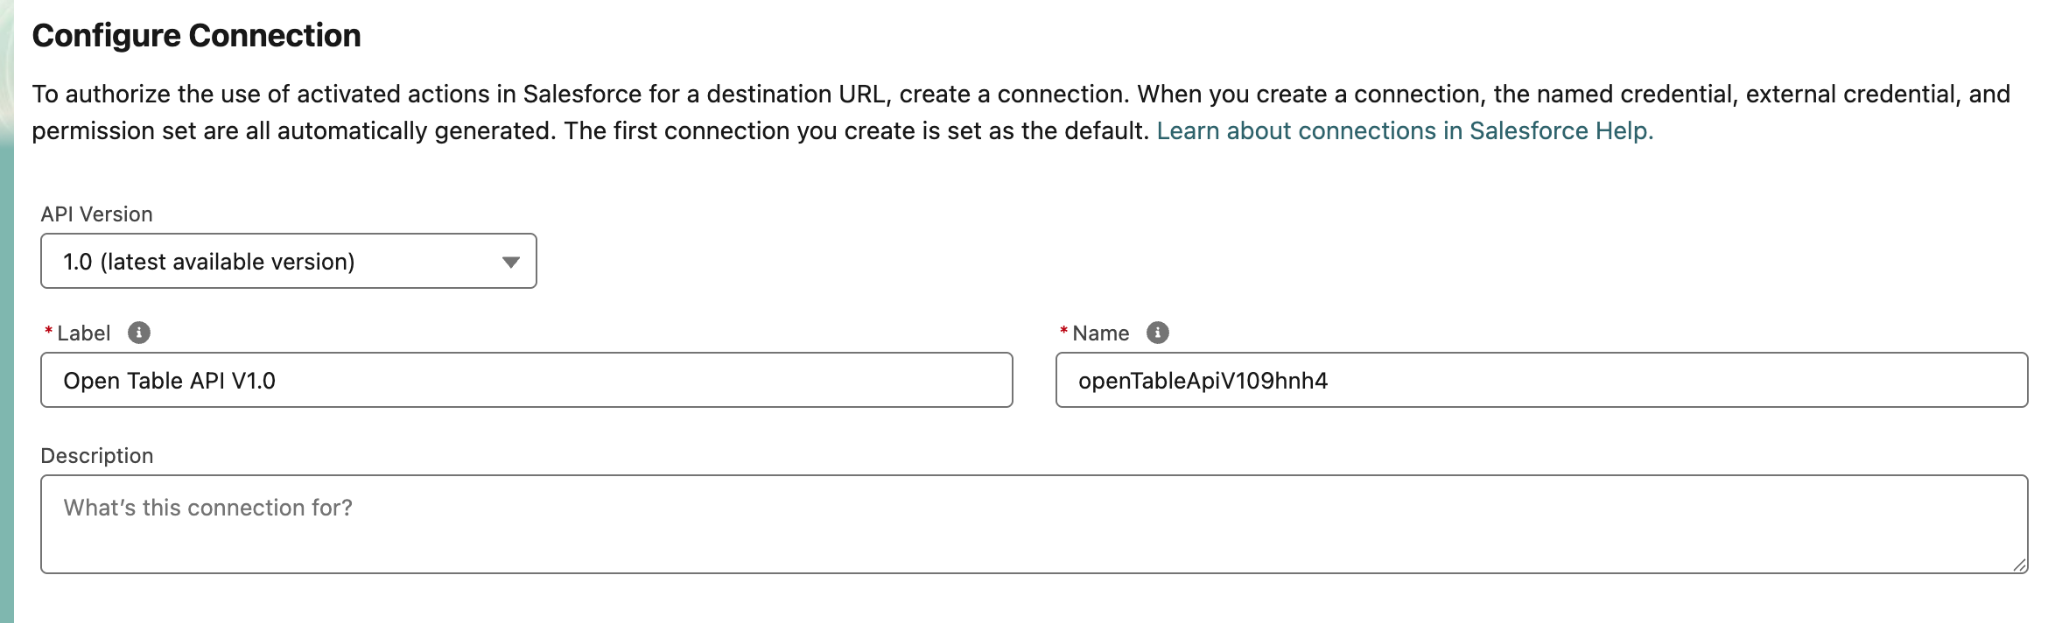
Click the dropdown button and the right-most end of the Open Table API row and select Activate Actions.

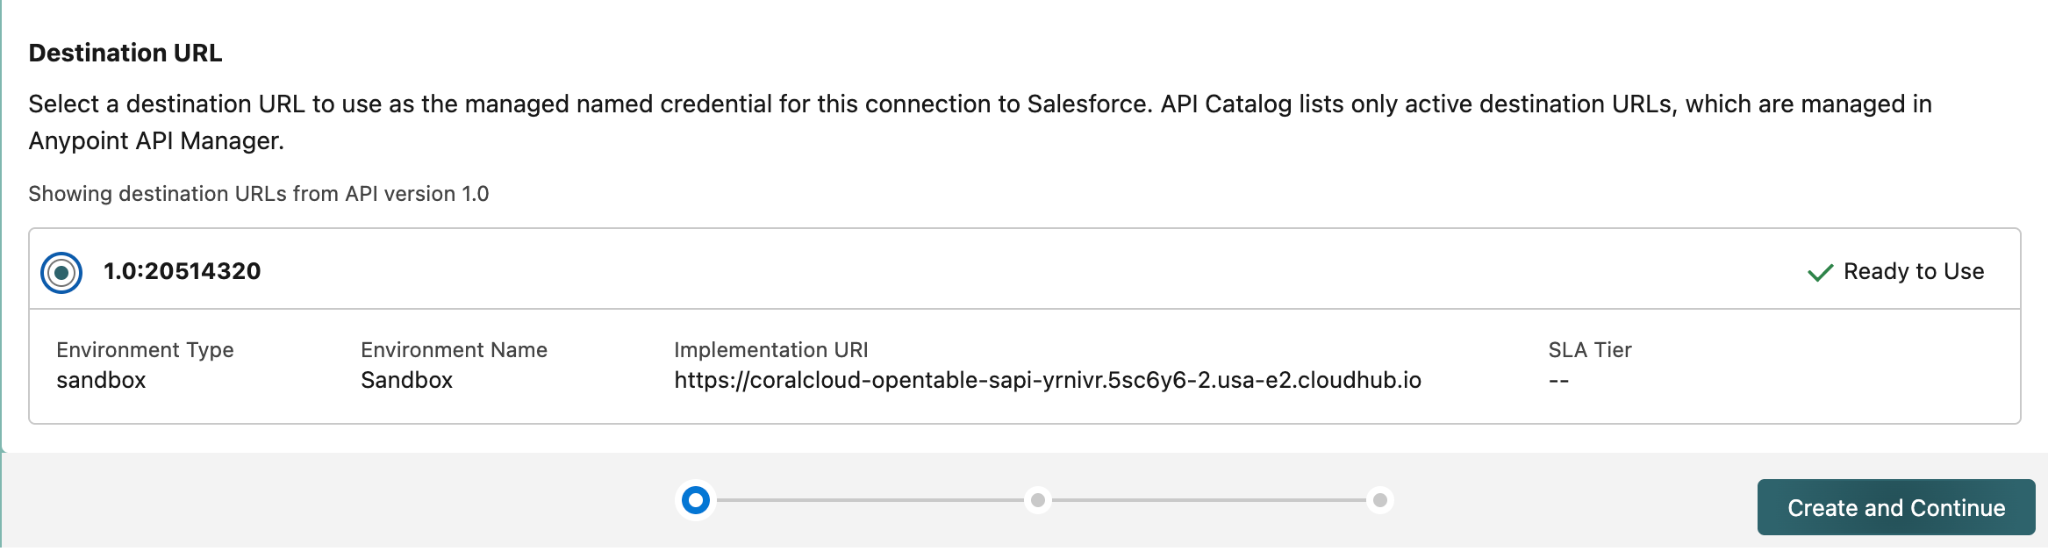
Scroll down until you see the Destination URL section. Select the first Destination URL, and then click Create and Continue.
Click the Manage User Assignments button to give users access to these APIs.
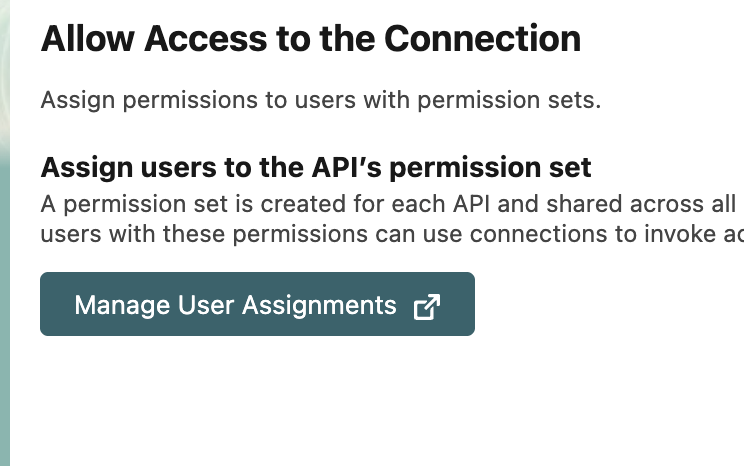
Click the Manage Assignments button near the top of the page.

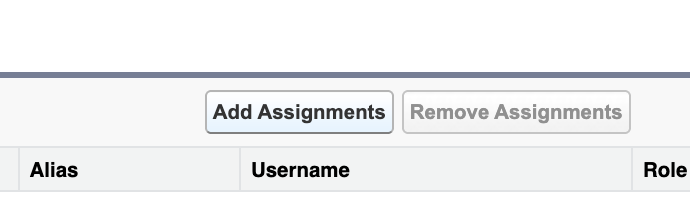
Click the Add Assignments button.
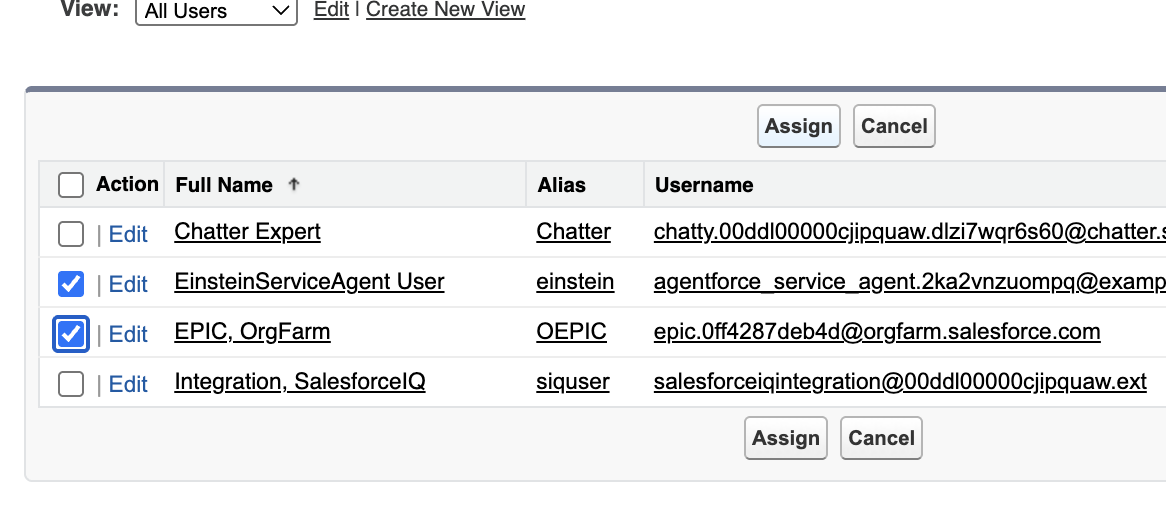
Check the boxes for the EPIC, OrgFarm and the EinsteinServiceAgent User users. Then, click Assign.
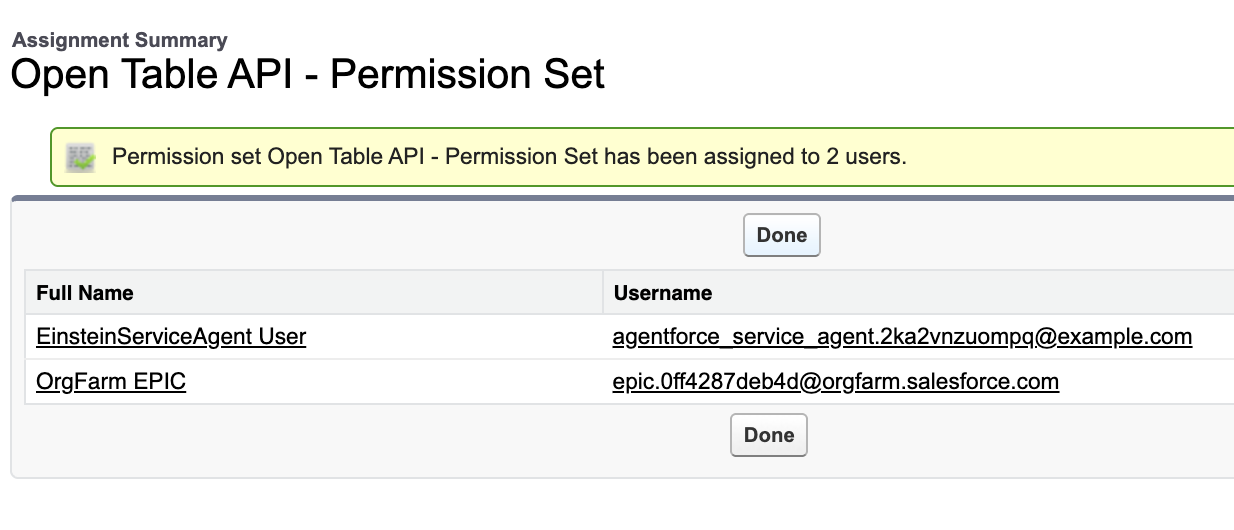
Click Done on the next screen then close that tab.
Navigate back to the browser tab where you clicked Manage User Assignments
Click Next.
Check the Select all operations checkbox, then click Done.
Mulesoft APIs are now available for use in Salesforce automation, such as Agentforce and Flows!
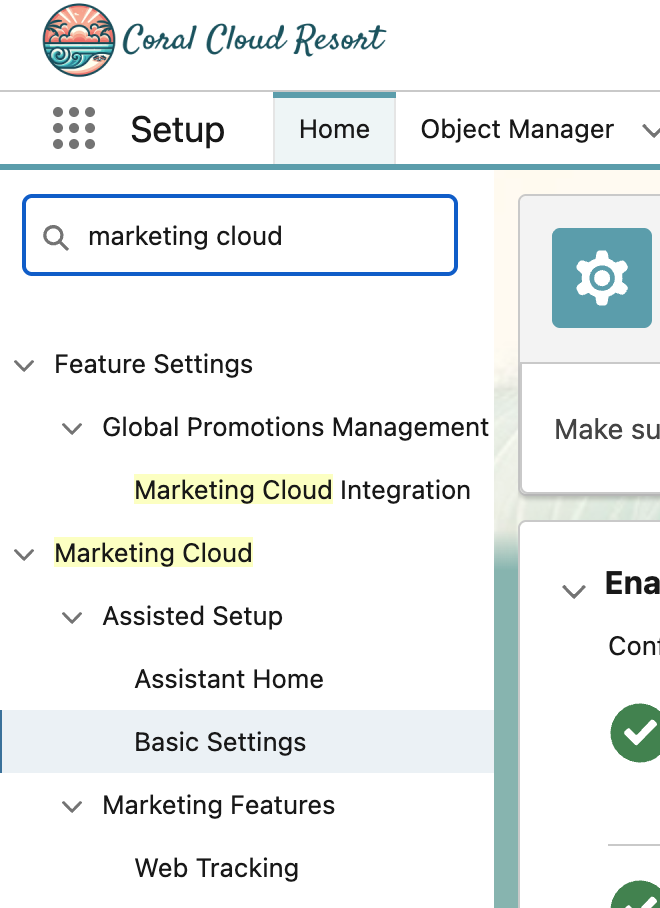
Step 4: Enable Marketing Cloud
- Back in Setup, in the Quick Find box, type Marketing Cloud, then click Basic Settings.
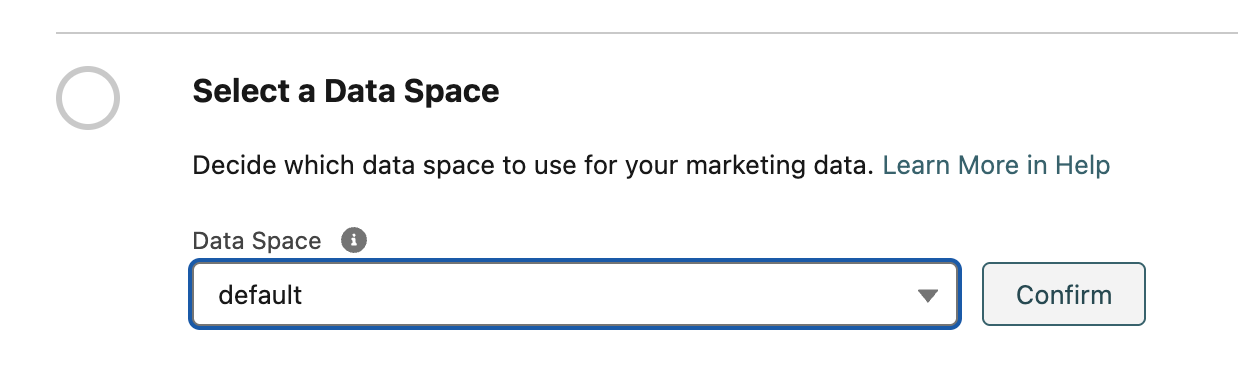
- Once Basic Settings loads, scroll down to the Select a Data Space section and select Default from the dropdown and click the Confirm button.
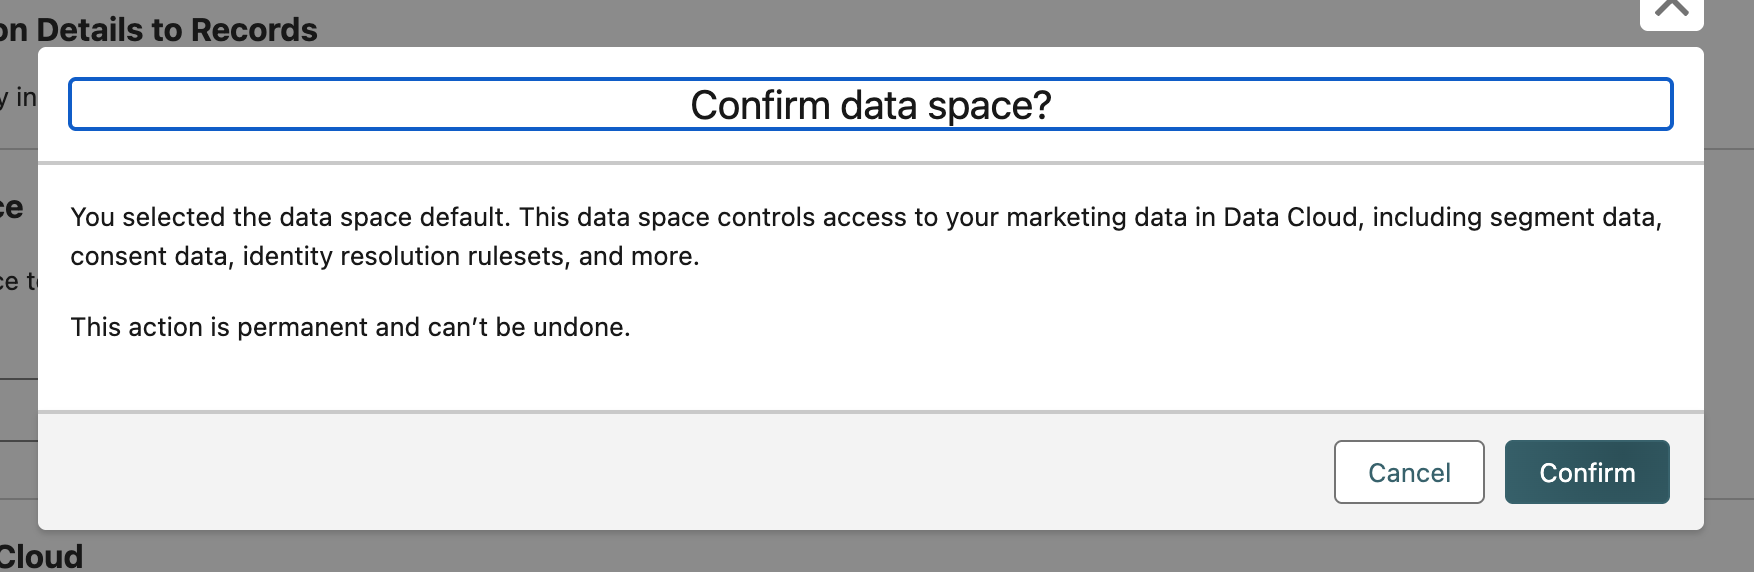
- Click Confirm at the next pop-up window.
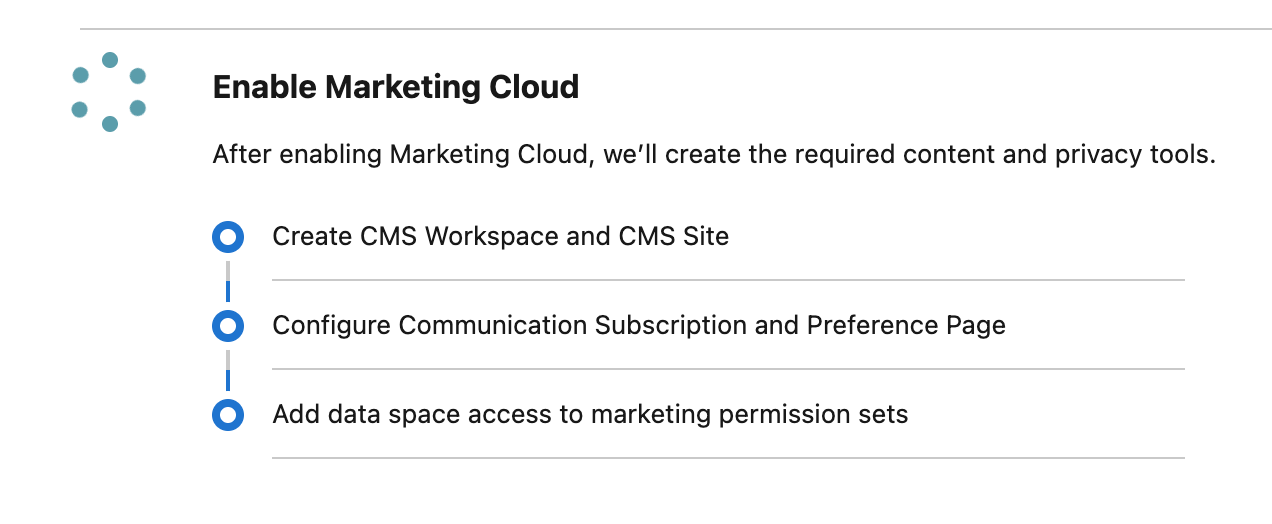
- The Enable Marketing Cloud step will start spinning, but we don’t have to wait for this to complete. Consider the Marketing Cloud setup done.
This completes Exercise 0.