
Appearance
Exercise 4 - Transition from Agent to Human Representative
This exercise configures your Agentforce Service Agent for escalations and routing. You'll then set up a chat modal to test chat session acceptance and human handoff.
Step 1: Routing Outbound Messaging from Agentforce to a Human
Let’s continue configuring your Agentforce Service Agent to manage escalations and transfer messaging sessions to a Human Agent.
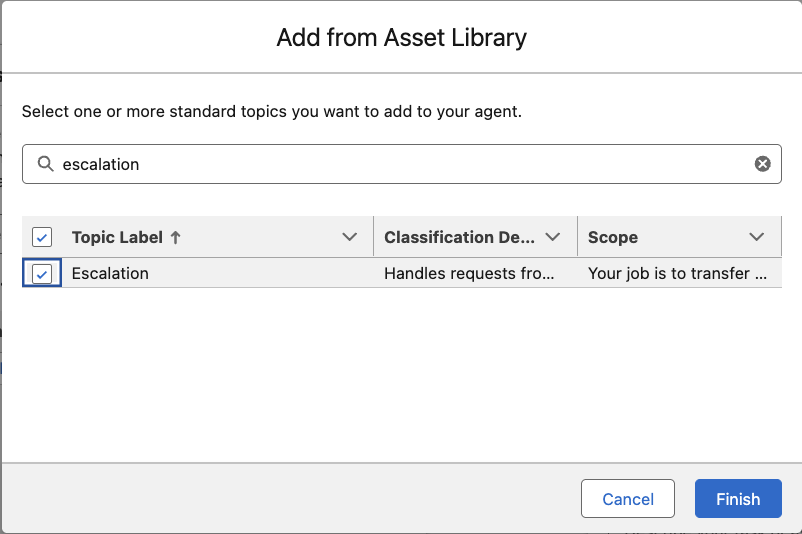
- In Topics, click the New and select +Add from Asset Library.
- Search for and select the Escalation topic and then click the Finish button.
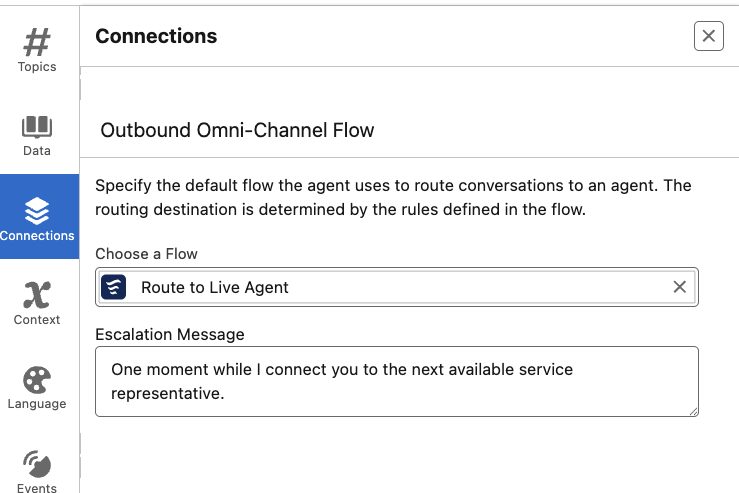
- On the left, click the Connections button, scroll down to Outbound Omni-Channel Flow.
- In the Choose a Flow section, and click the pencil to edit.
- In the search bar that just appeared under Choose a Flow click and then select the Route to Live Agent flow and then click Save at the bottom.
- At the top right, click the Activate button.
Step 2: Configuring the Agent Chat Model
Finally, we configure the interface through which the customer will interact with the AI and Human Agents, testing it via a packaged deployment site.
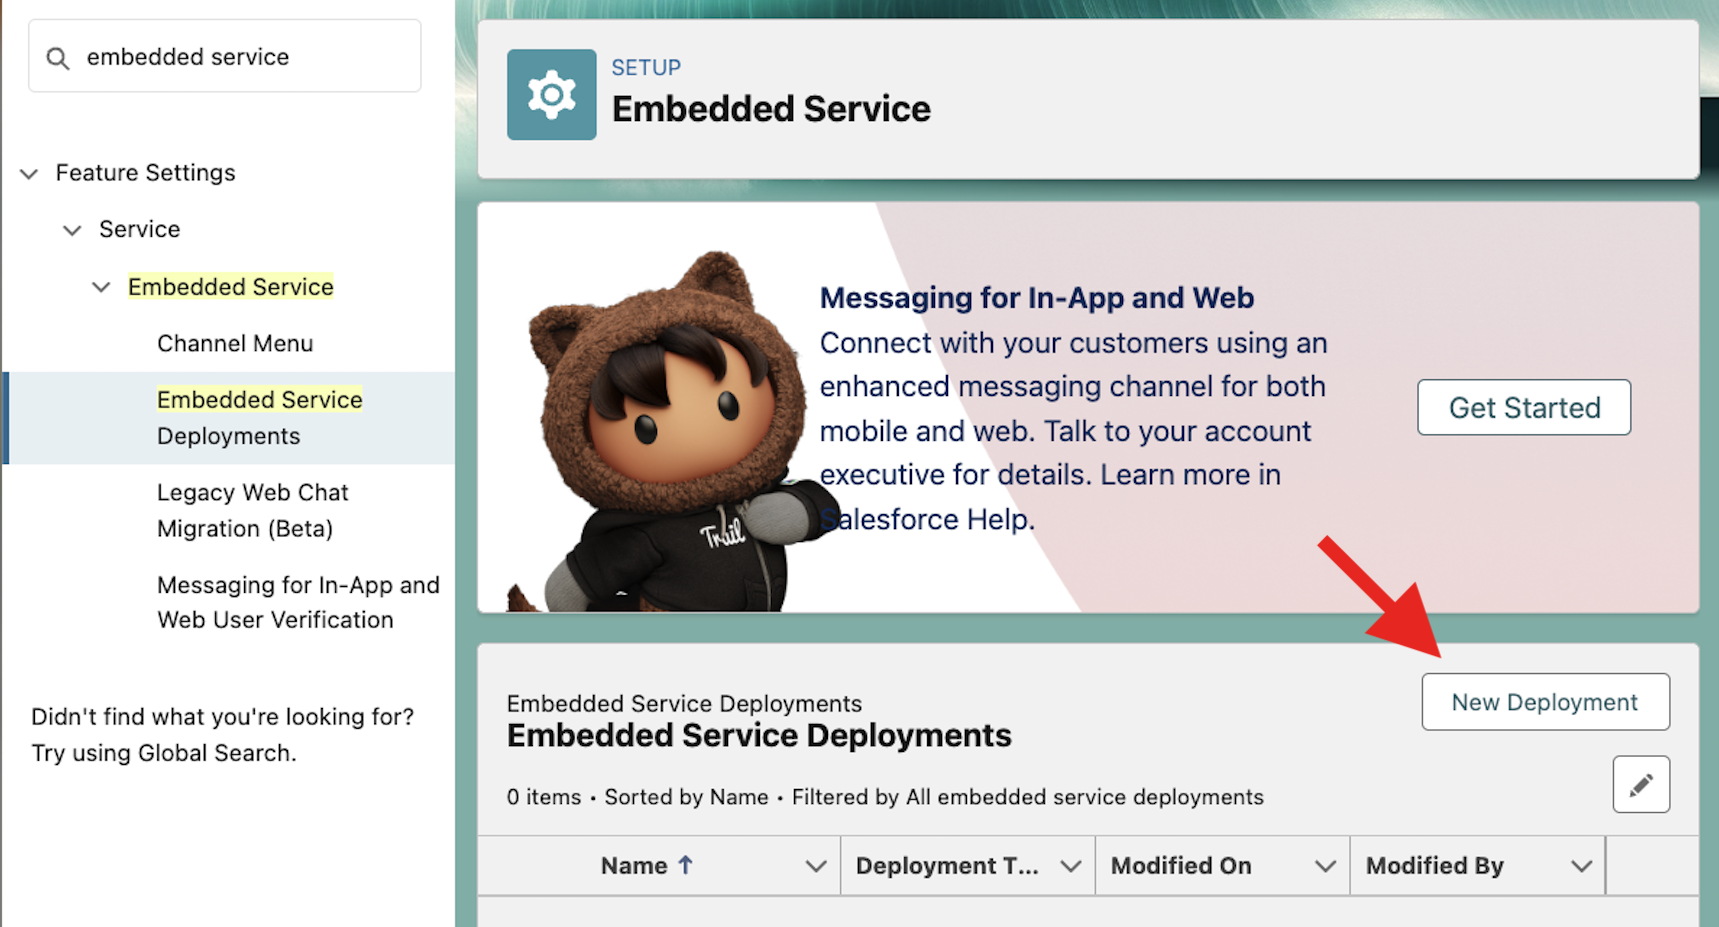
Once again, click the Back icon at the top left to return to Setup.
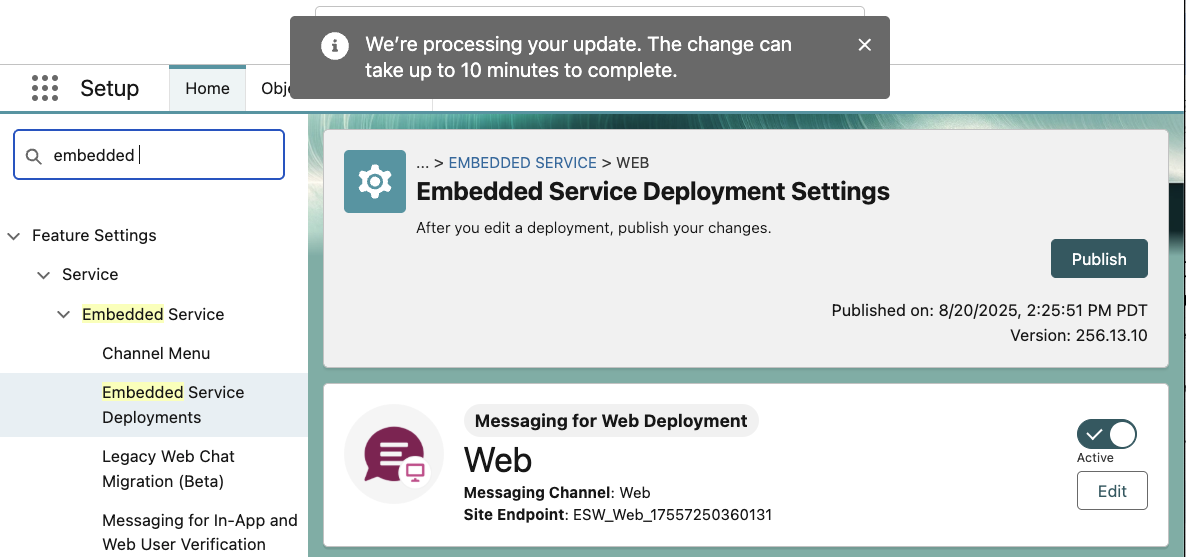
In the Quick Find box, search for Embedded Service and then click Embedded Service Deployments
Click the New Deployment button.
Select Messaging for In-App and Web and click Next.
Select Web and click Next.
Input the following details:
- Embedded Service Deployment Name:
Web - API Name:
Web - Domain:
salesforce.com(it won’t matter what you input here for our purposes) - Messaging Channel:
Web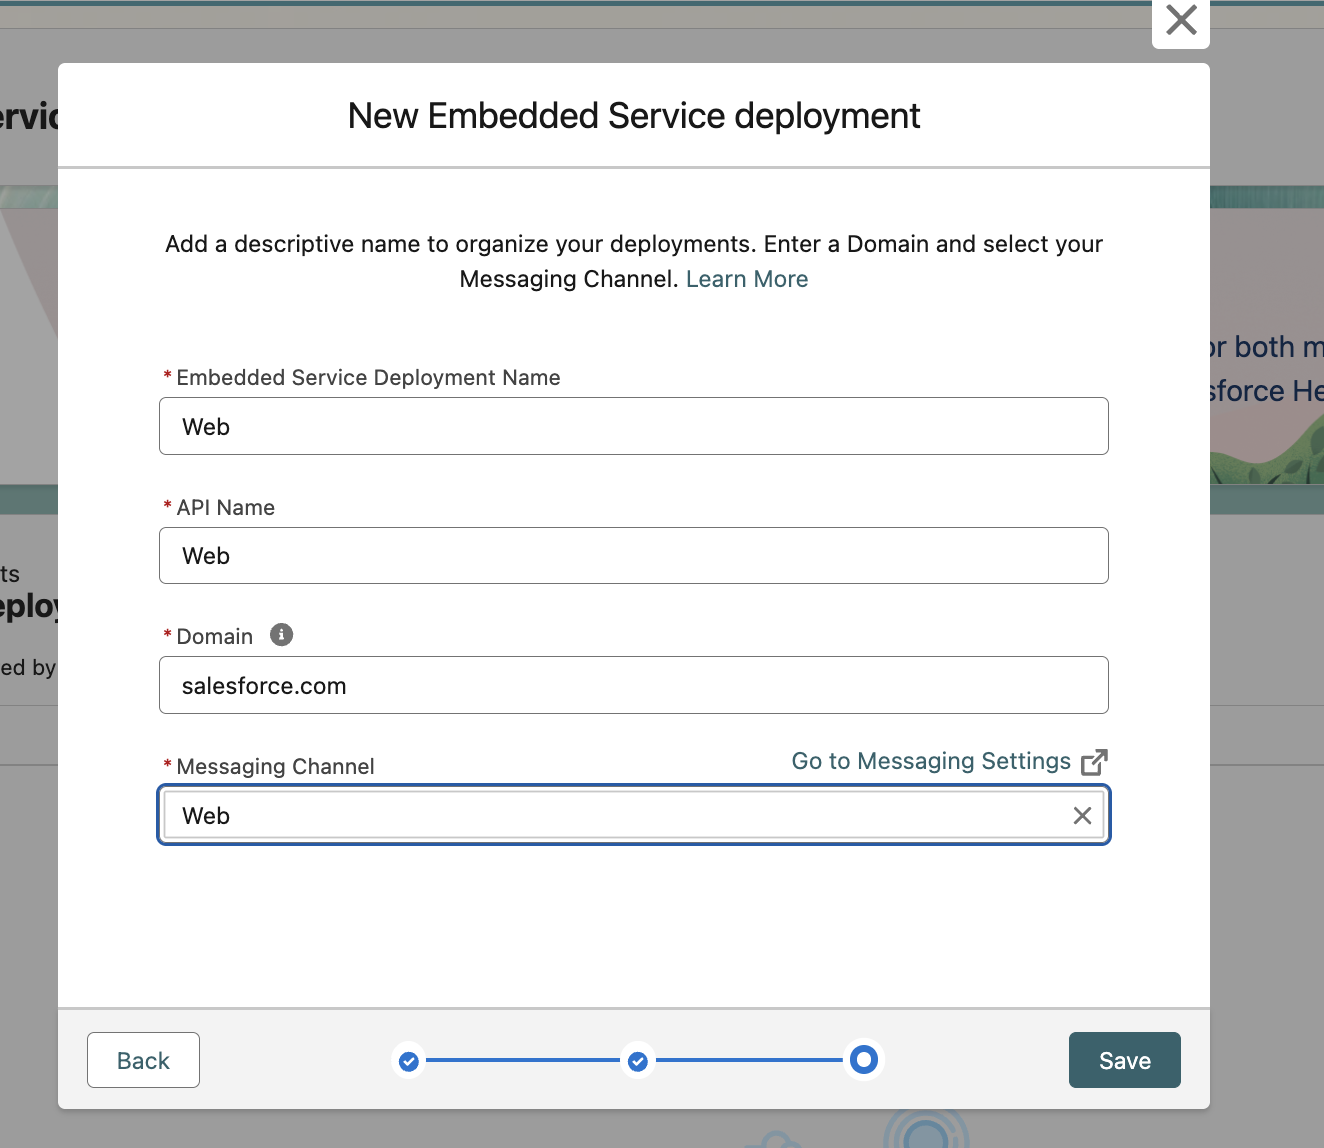
- Embedded Service Deployment Name:
Click the Save button.
It should take a minute or two for your deployment to be created.At the top right, click the Publish button. You should see a grey pop-up saying that this will take 10 minutes, but this can be ignored.
Step 3: Testing the Agent Chat Modal
We are now ready to test the Agent we’ve built.
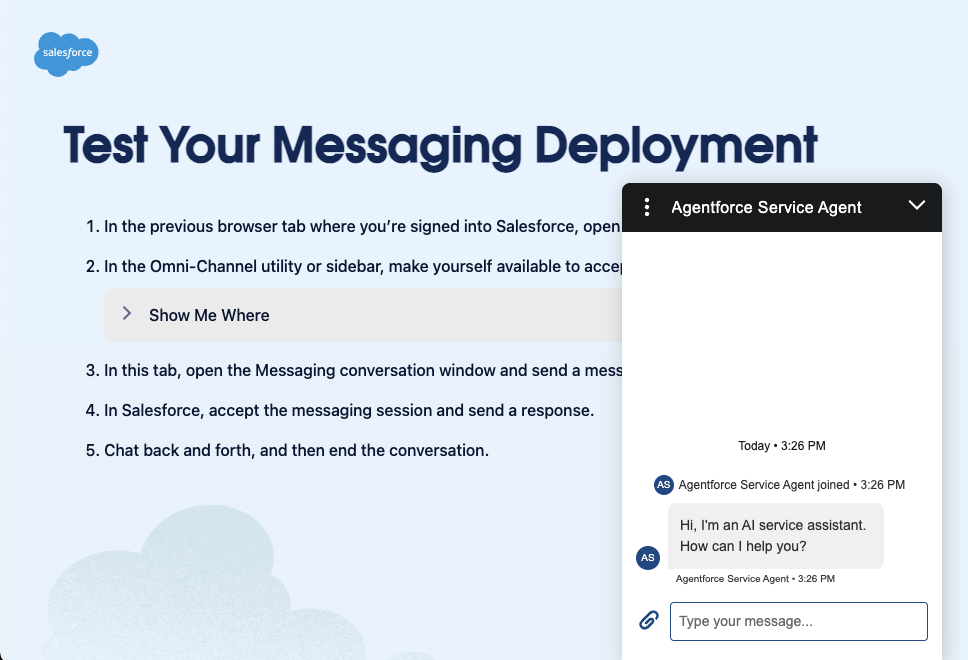
Refresh your page.
Scroll down and click Test Messaging.
On this same page, you will notice an option to Install Code Snippet. The resulting Javascript snippet can be used to place your chat session on any custom website. Salesforce also provides a standard Embedded Messaging lightning component for use on Experience Cloud sites.
You will now be in a new tab that says Test Your Messaging Deployment. You should see a blue chat modal in the bottom right corner of this page. Leave this alone for now, we will return to this in a few steps.
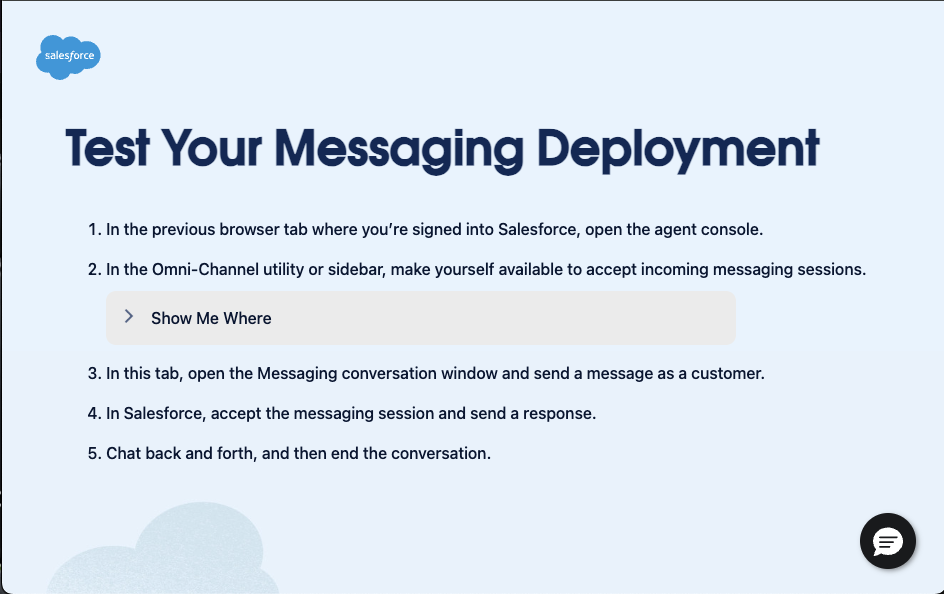
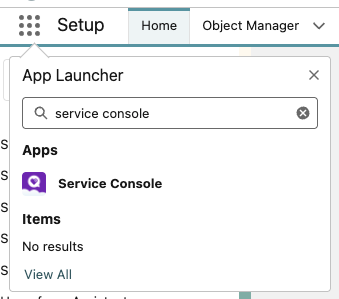
Click back into your previous tab, click the App Launcher button at the top left, search for Service Console and then click Service Console.
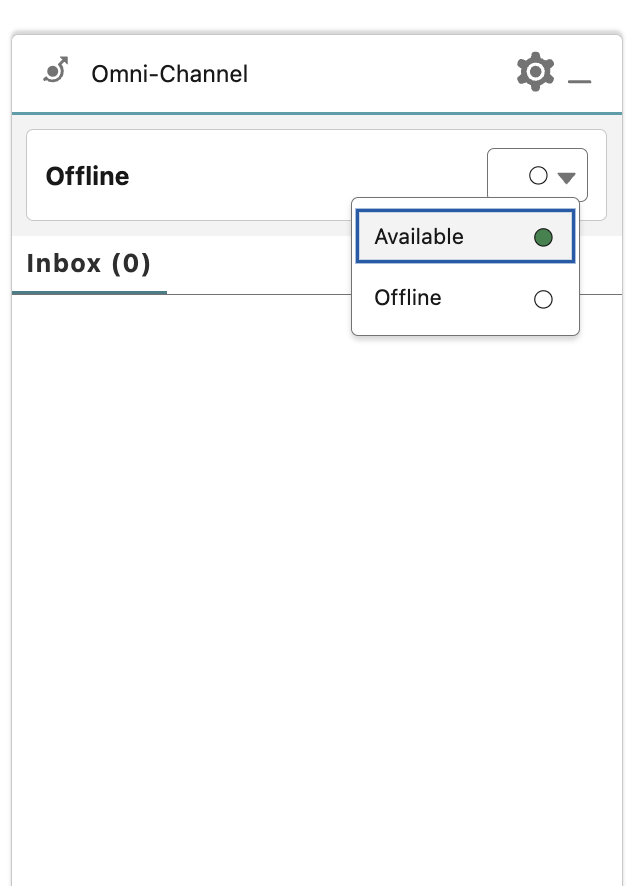
In the bottom left corner, open the Omni-Channel utility item and set your status to Available.
We are now ready to test our chat deployment! Open the tab with your test page again and click the chat modal to open the chat session. This will initiate a conversation with your Agentforce Service Agent.
Try asking the first question you tested in the previous exercise:
What time does the Coral Vineyard open?
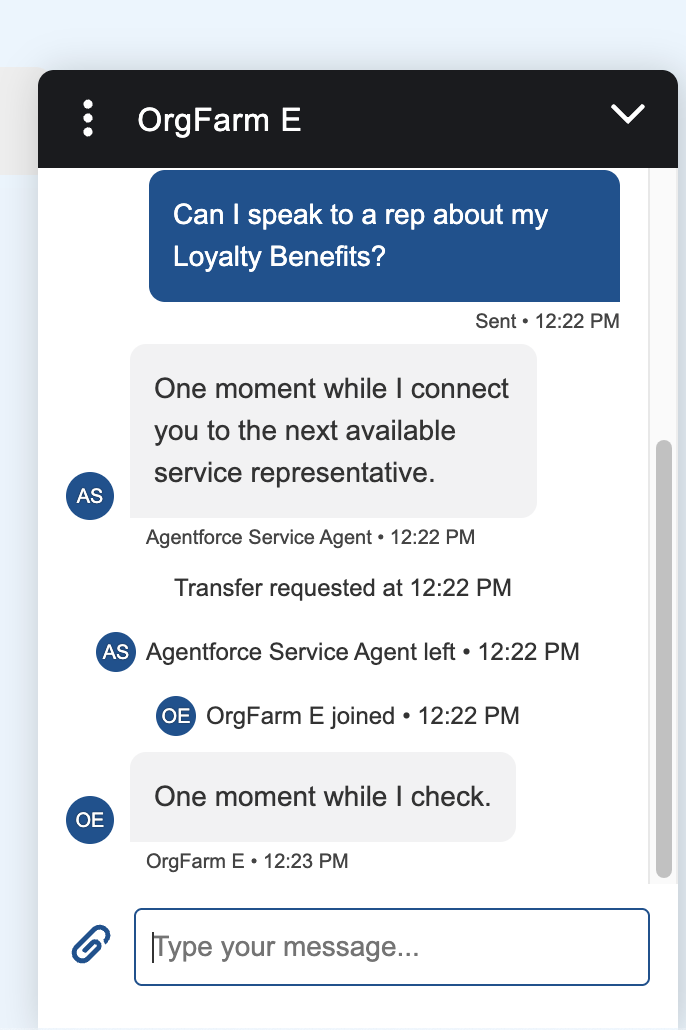
Now let’s try handing off the conversation to a live agent with any variation of the following message:
Can I speak to a rep about my Loyalty Benefits?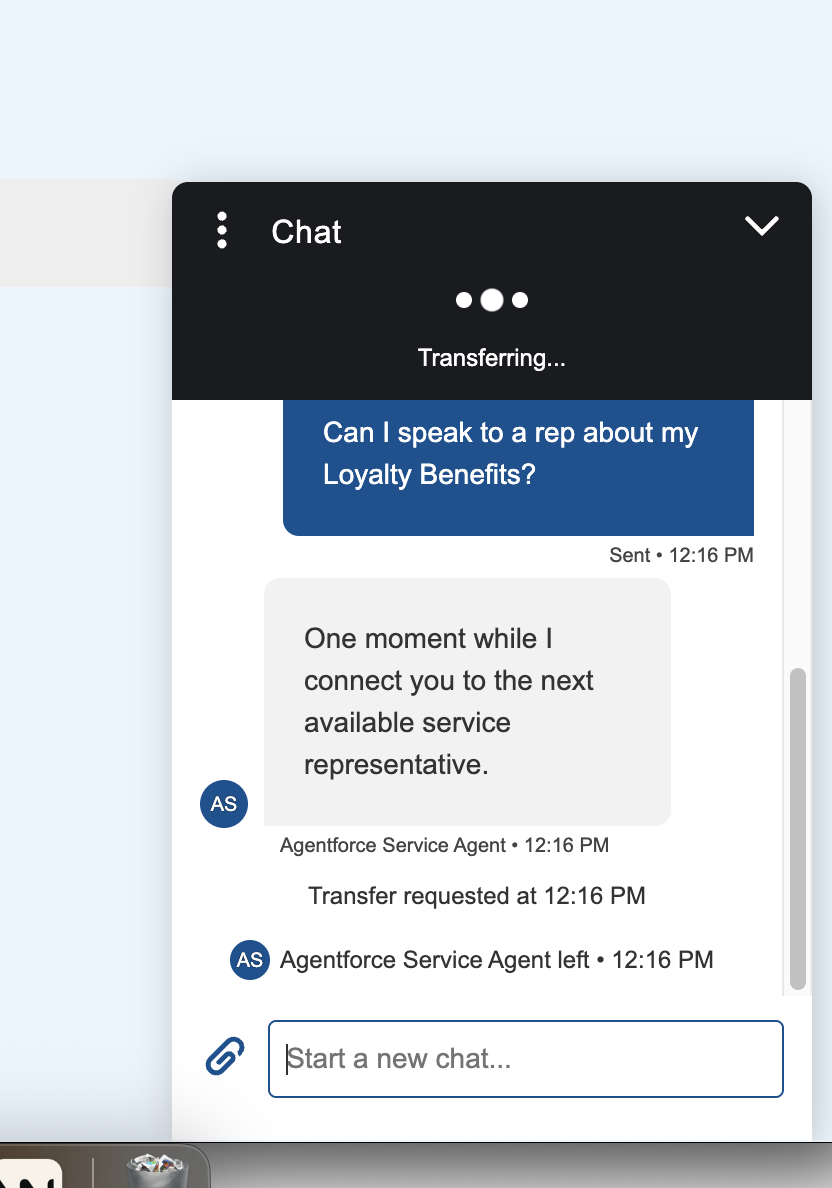
Navigate back to your Service Console tab.
Open the Messaging Session by clicking the checkmark. You will see a new tab open on your Service Console.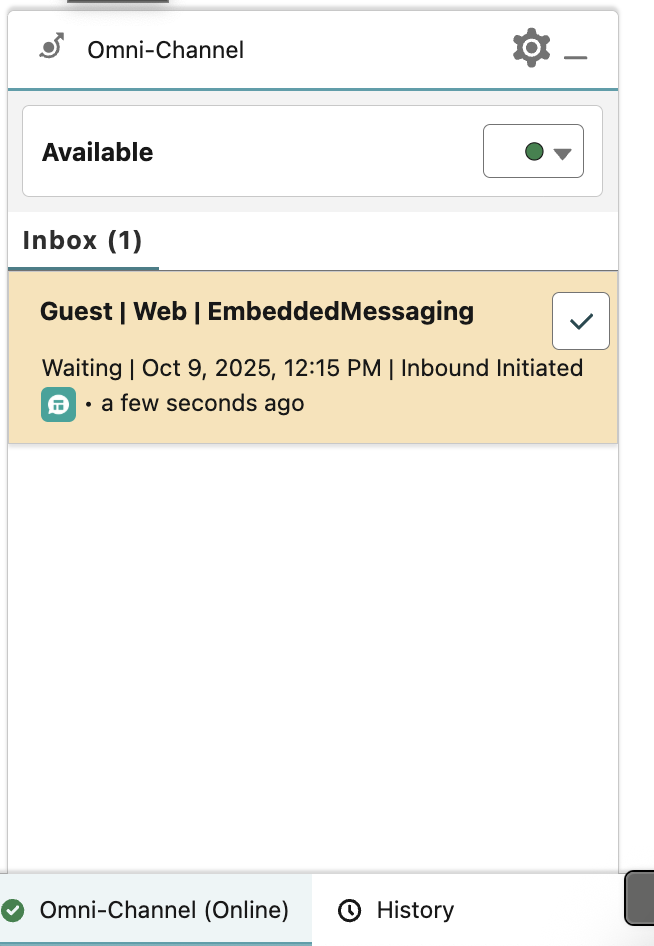
In the Messaging Session record you will find a live chat interface with the previous Agentforce interaction retained.
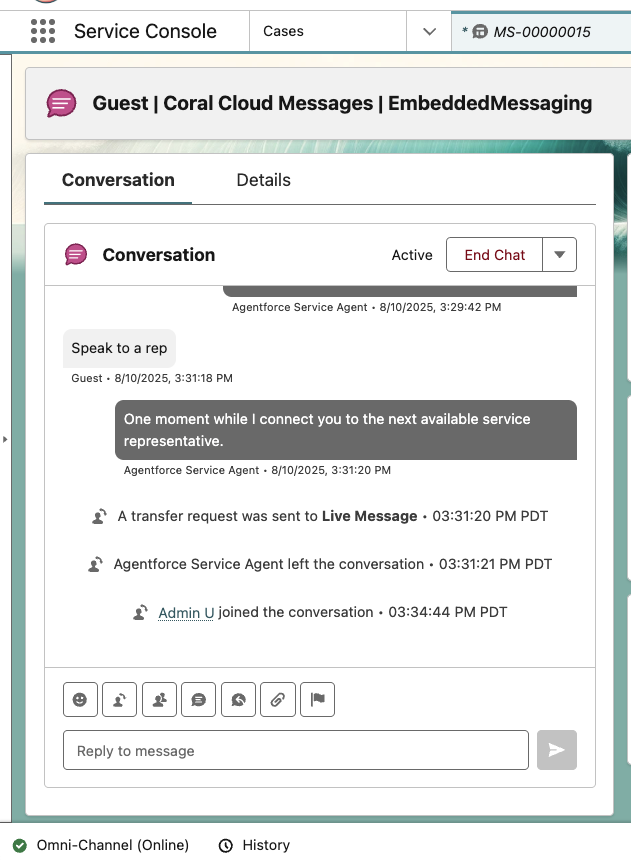
Troubleshooting Note: If you cannot see the live chat session, access the gear icon > Edit Page > Drag in the Enhanced Conversation component into the Conversation tab. Then Save and Activate as Org Default

From the Service Console chat, type:
One moment while I check.Navigate back to the Test Messaging tab and take notice of the bi-directional conversation.
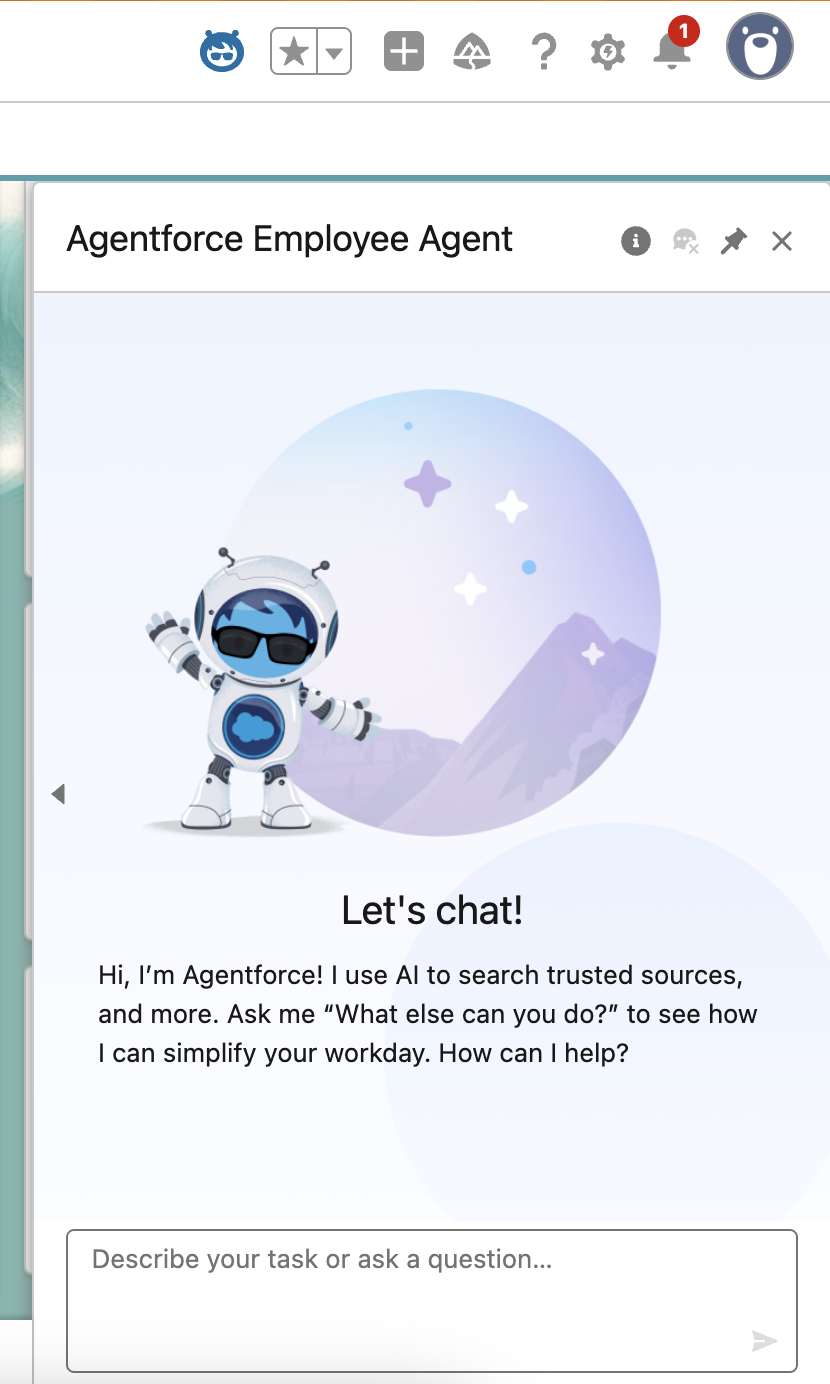
Step 4: Testing the Employee Agent
In this step, the Customer Service representative will use the Employee Agent we enhanced in Exercise 2.
Click the Agentforce Icon, top right, to open the employee agent. This agent will help you chat with Sofia about her Loyalty Benefits, as she has requested to speak with a human.
Sofia has just asked us via the chat what benefits she has available. In the Employee Agent Chat, paste:
What benefits are available for Sofia Rodriguez?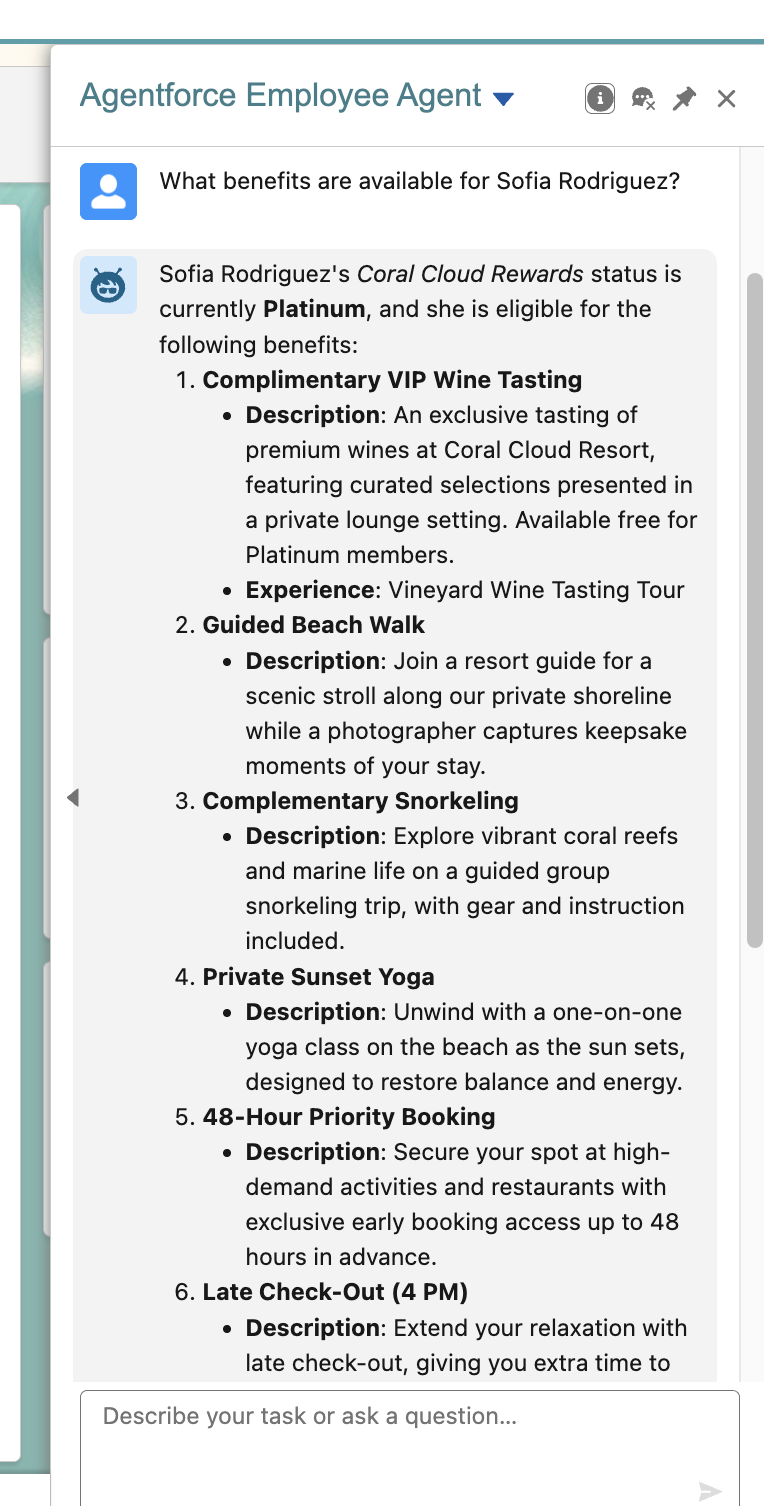
Note that our agent uses the Summarize Member Benefits custom action we set up earlier to respond to this query. We see that Sofia has Complimentary VIP Wine Tasting available to her like we set up earlier.
Troubleshooting Tip: If you get generic LOYALTYTIER info, try refreshing the page and asking again (and potentially altering the ask to
What is the loyalty status of Sofia Rodriguez?orWhat benefits are available to Sofia Rodriguez?)Imagine that the Coral Cloud employee has communicated these benefits to Sofia.
Sofia is intrigued by the complimentary VIP Wine Tasting and wants to book a tour for 5 guests next Monday.
Paste the following into the Employee Agent:Book VIP Wine Tasting next Monday for 5 guests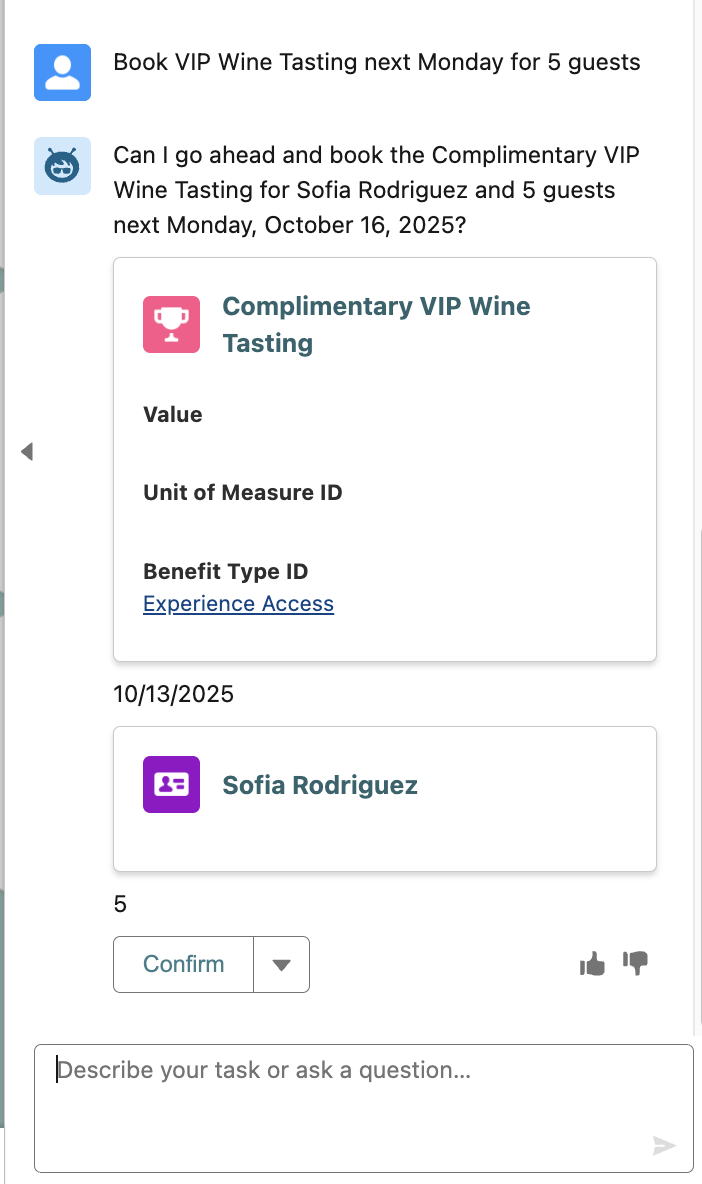
Click Confirm with the agent.
Troubleshooting Tip: If the Agent asks the same question again, type Confirm in the chat to finalize.
The agent will execute and confirm the booking.
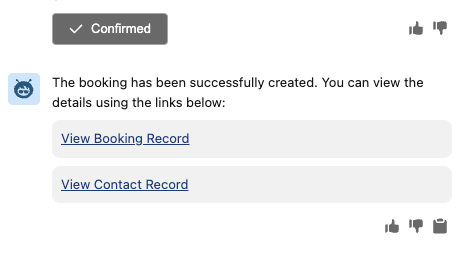
The agent also provided a couple of record links. Click the View Contact Record link to open a new tab in the Service Console.
Finally, we see Sofia Rodriguez and her Loyalty Member Profile (Platinum Tier).
To confirm the Experience Booking, click the Related tab to verify that the booking record has been created properly with a price of $0 for Sofia’s complimentary wine tour.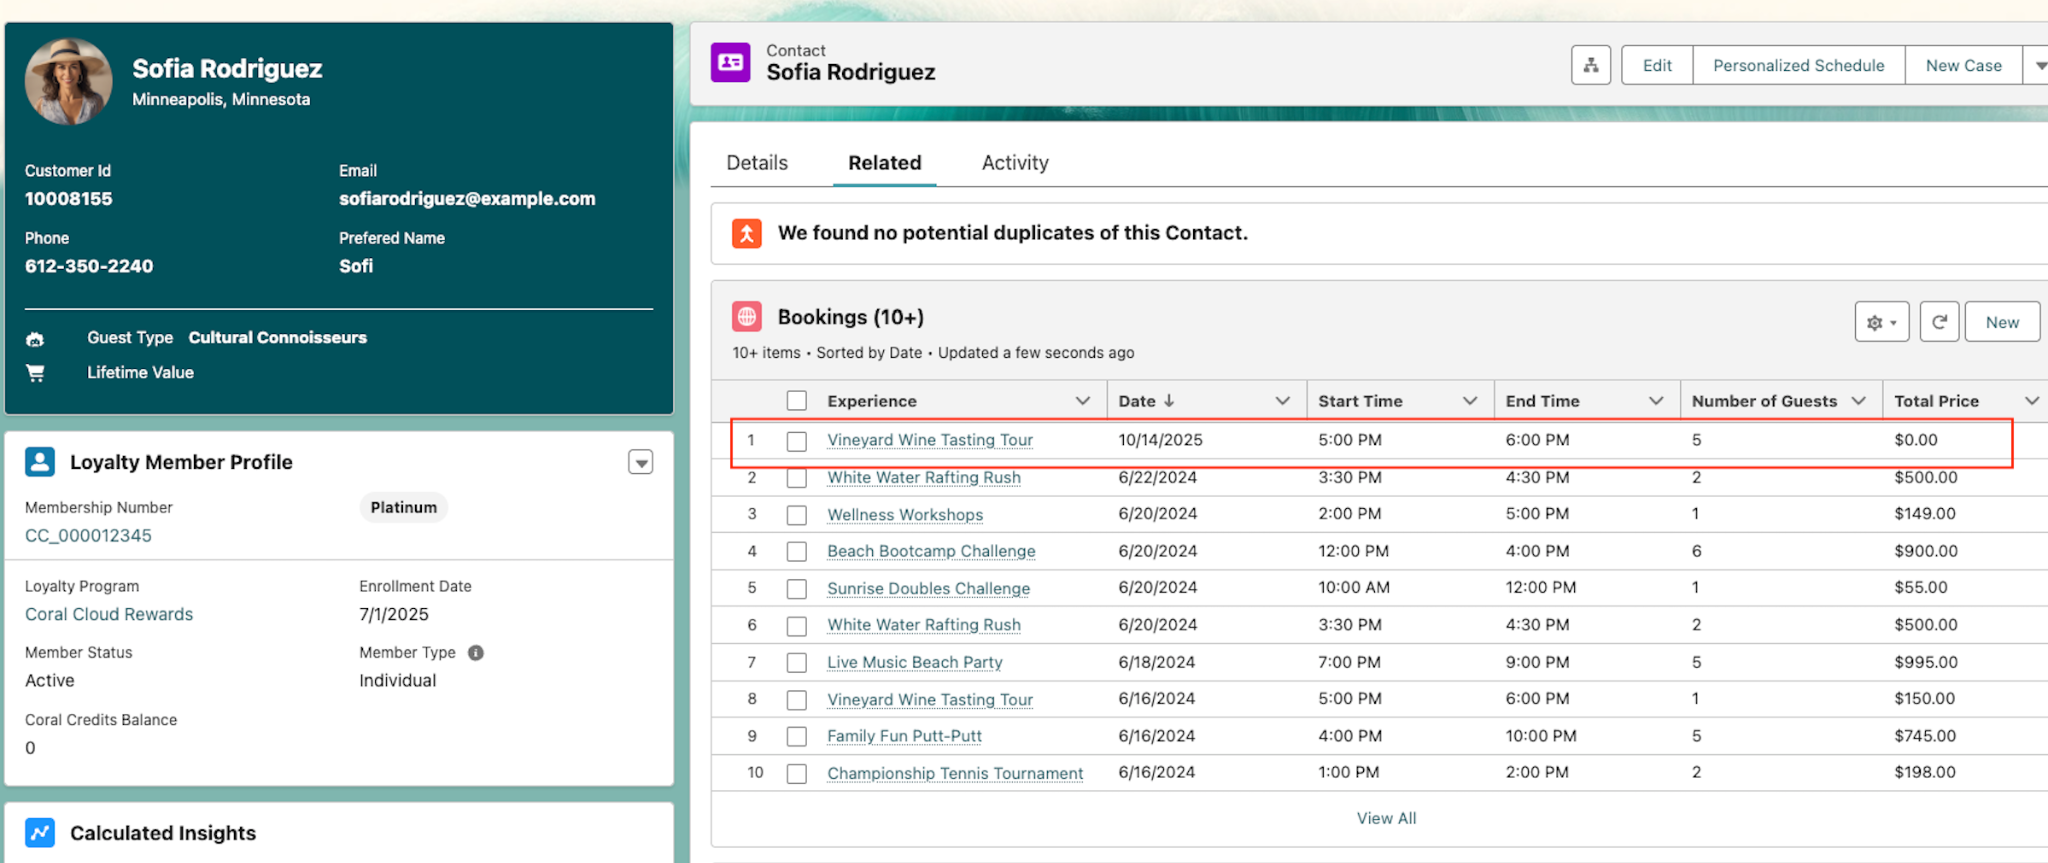
This concludes Exercise 4.