
Appearance
Exercise 3 - Supercharge Service Agent with Website Knowledge
The goal of this exercise involves seeding an Agentforce Service Agent with unstructured data from the Coral Cloud Resort website, which acts as a digital brochure for their restaurants and experiences.
Step 1: Create the Data Cloud Web Crawler
Use the App Switcher in the upper left to switch to the Data Cloud App.
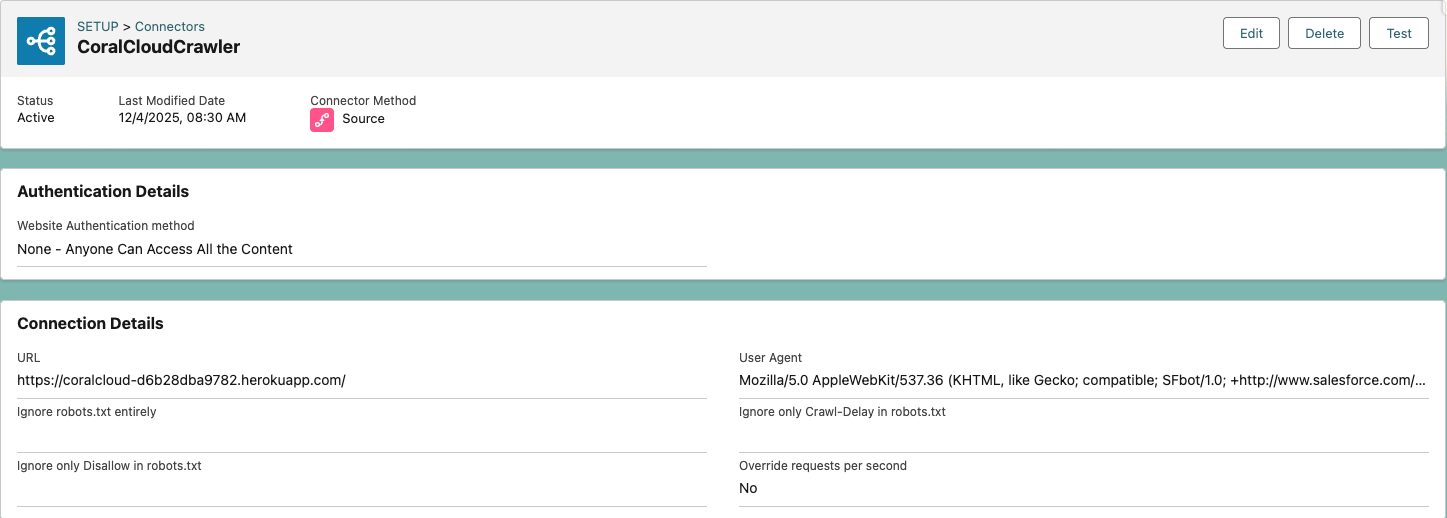
Navigate to Setup > Other Connectors > Click CoralCloudCrawler

We have already set up the Web Crawler Connector for you. Notice the URL and User Agent fields. Data 36O uses this information to find a website on the internet and crawls the website content using the specified User Agent.
Navigate back to the Data Cloud app via the App Launcher.
Click on Data Lake Objects and select New.
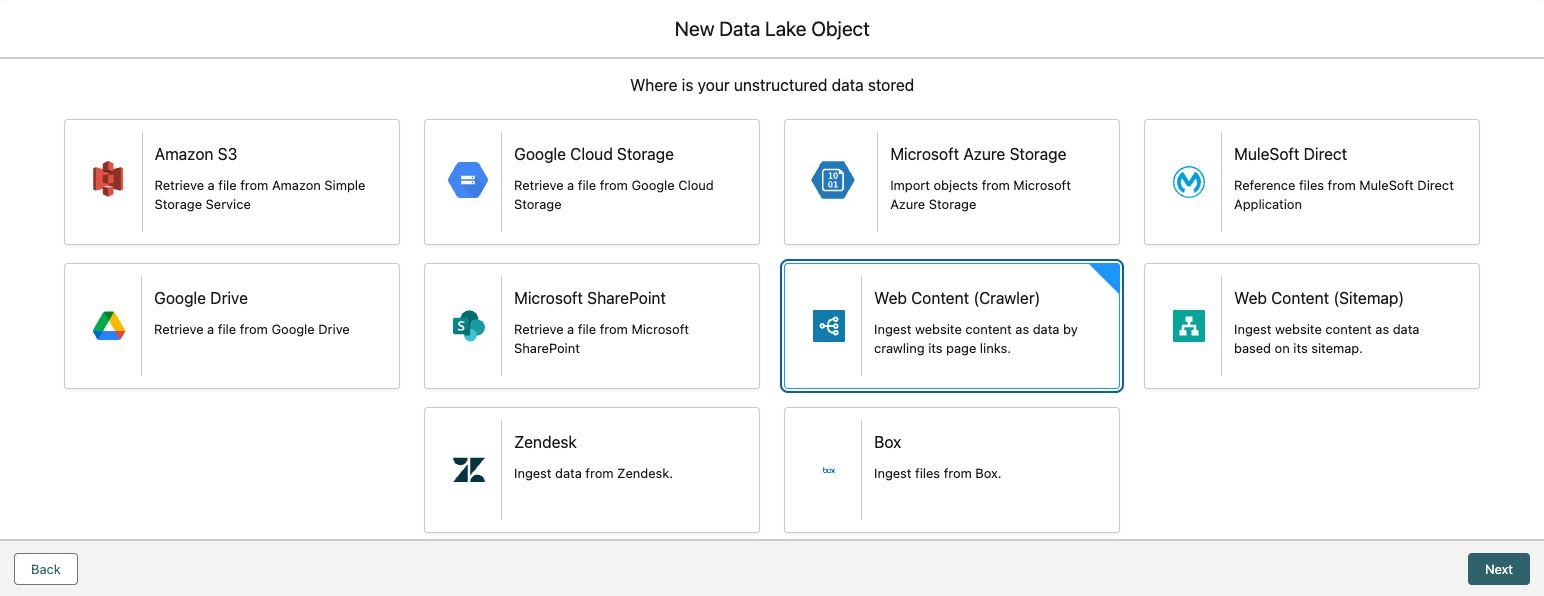
Select From External Files and click Next.

Choose Web Content (Crawler) and click Next.
Set the following values:
- Select Connection:
CoralCloudCrawler - Crawl Depth:
2
- Select Connection:
Click Next
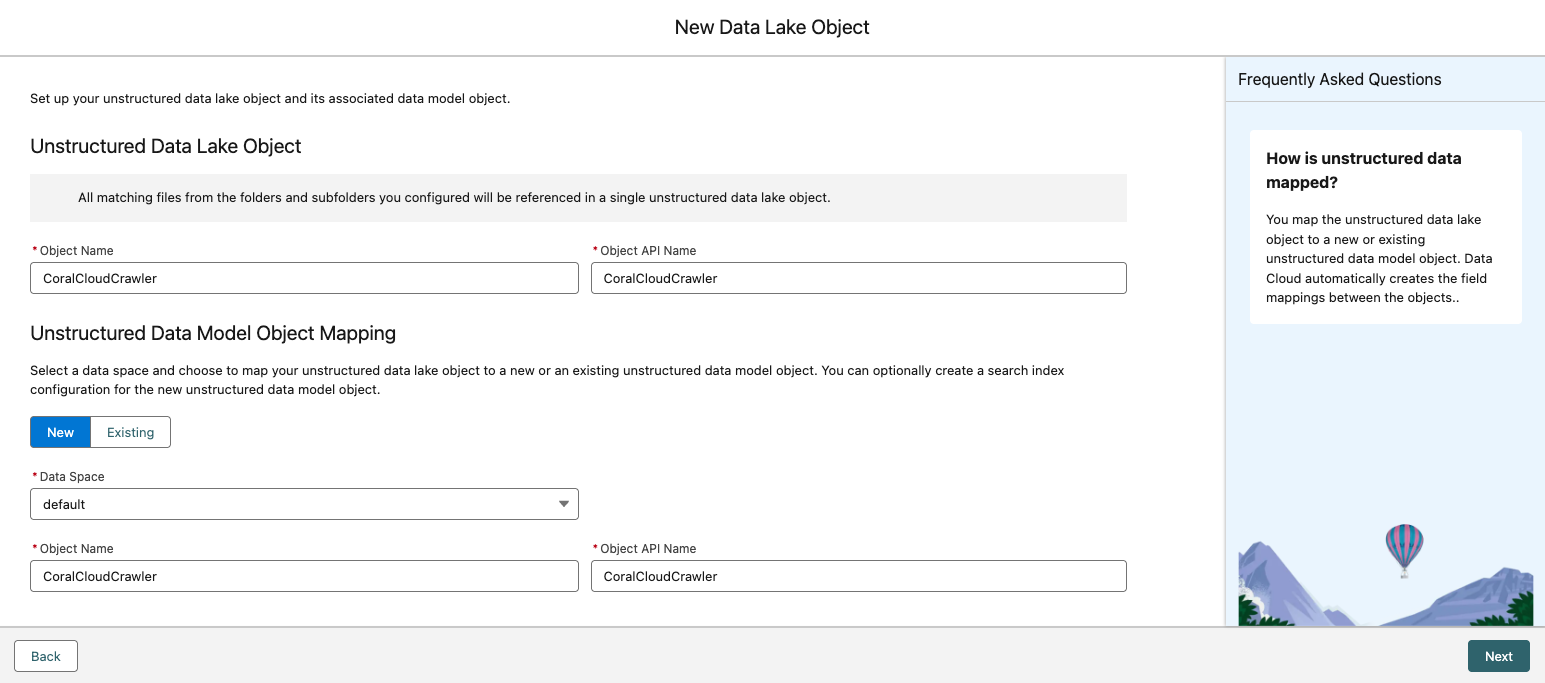
Configure the Unstructured Data Lake Object with the following:
- Object Name:
CoralCloudCrawler - Object API Name:
CoralCloudCrawler
- Object Name:
Configure the Unstructured Data Model Object Mapping with the following:
- Data Space:
Default - Object Name:
CoralCloudCrawler - Object API Name:
CoralCloudCrawler - “Enable semantic search with system defaults”:
Selected
- Data Space:
Click Next
Review your configuration details and click Save.
You will find your data stream processing in the Data Streams tab with the name CoralCloudCrawler_ds. You can periodically click the refresh button while you wait for Last Run Status to update from Pending to Success. This may take up to 10 minutes to complete.
Step 2: Create a Custom Retriever for the Web Crawler
When you use the Web Content (Crawler) connector, it creates a Search Index and requires a Custom Retriever to be created. The Search Index creates sequential chunks of the information brought in from the website, while the Custom Retriever takes a user’s query and returns to the most relevant chunks from the Search Index.
We will start with creating the Web Crawler Connector and associated DLO and then create the Custom Retriever to expose the content to our agent.
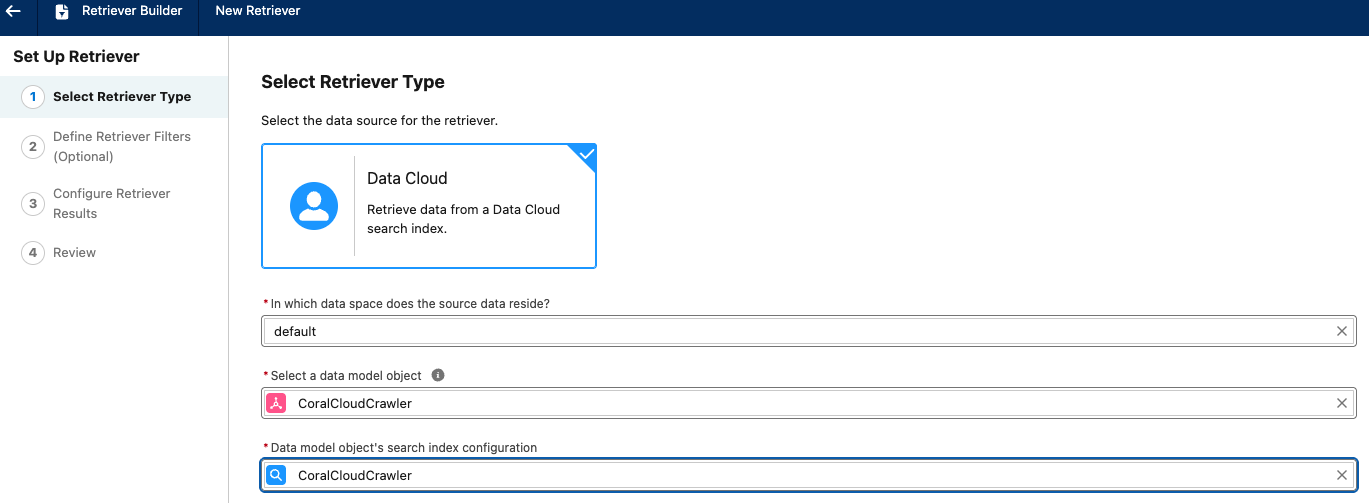
- Navigate to Einstein Studio > Retrievers.
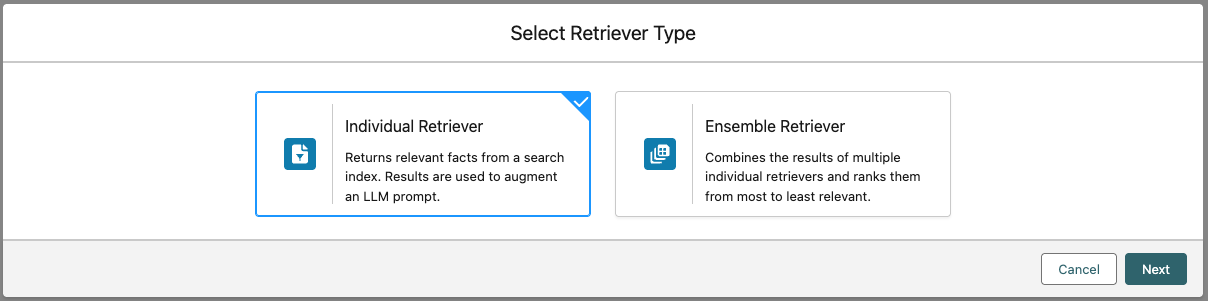
- Click New Retriever and select Individual Retriever, then click Next.
- Select Data Cloud as the Retriever Type, then choose CoralCloudCrawler as the Data Model Object and CoralCloudCrawler for the search index configuration. Click Next.
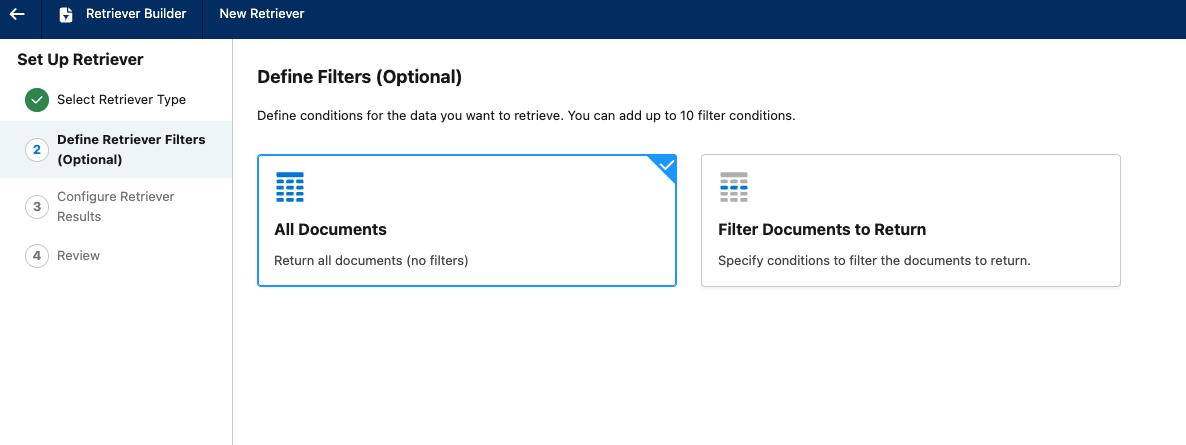
- Select All Documents and click Next.
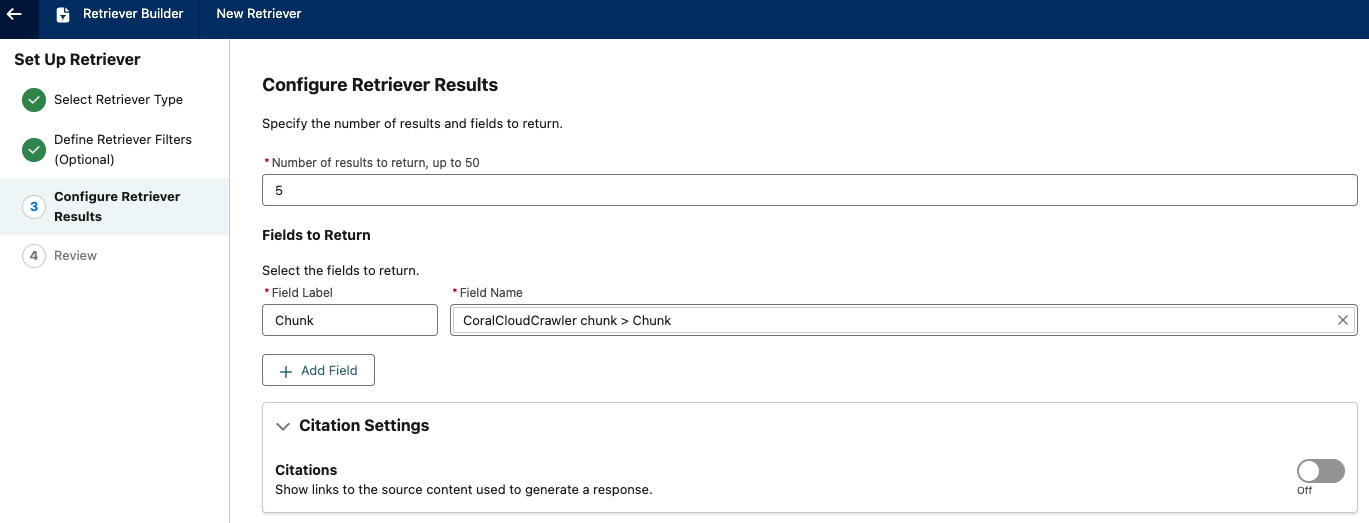
- Set the Number of Results to Return to 5.
- For Fields to Return, in the Field Name field, select Related Attributes > CoralCloudCrawler chunk > Chunk. The Field Label will autopopulate for you.
- Click Next.
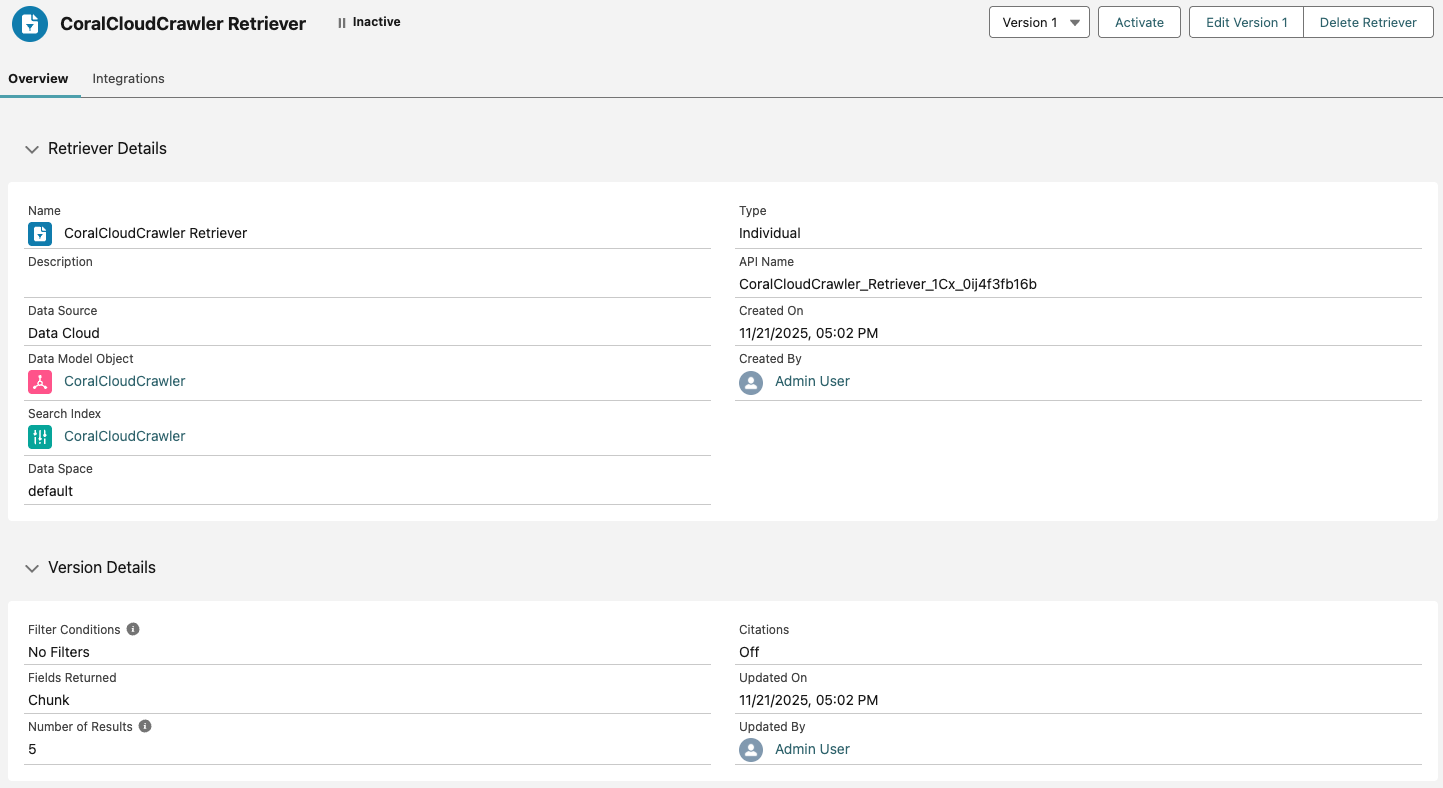
- Review the Set Up Retriever screen and then click Save.
- Leave the Name as CoralCloudCrawler Retriever. Click Save.
- Now that we have created our Custom Retriever for our Coral Cloud Backup Web Crawler, we just need to Activate it for use with our agent. Click Activate. Click Activate again.
Step 3: Load Your Web Content into the Answer Questions with Website Prompt Template
Let’s review how you can use the newly-created Retriever to seed your Agentforce agent. The Web Content (Crawler) connector automatically creates a Search Index and Retriever. The Search Index chunks website information, while the Retriever uses a user's query to return relevant chunks. Next, we'll review using this Retriever to seed your Agentforce agent.
- From the Agent Builder screen, click the Back icon at the top left to return to Setup.
- In the Quick Find box on the left, type Prompt, then click Prompt Builder.
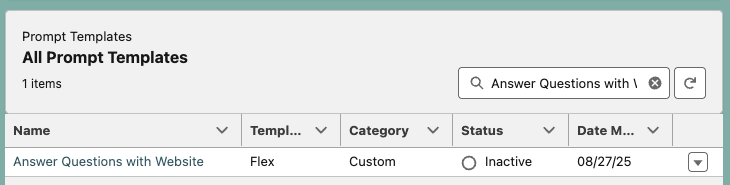
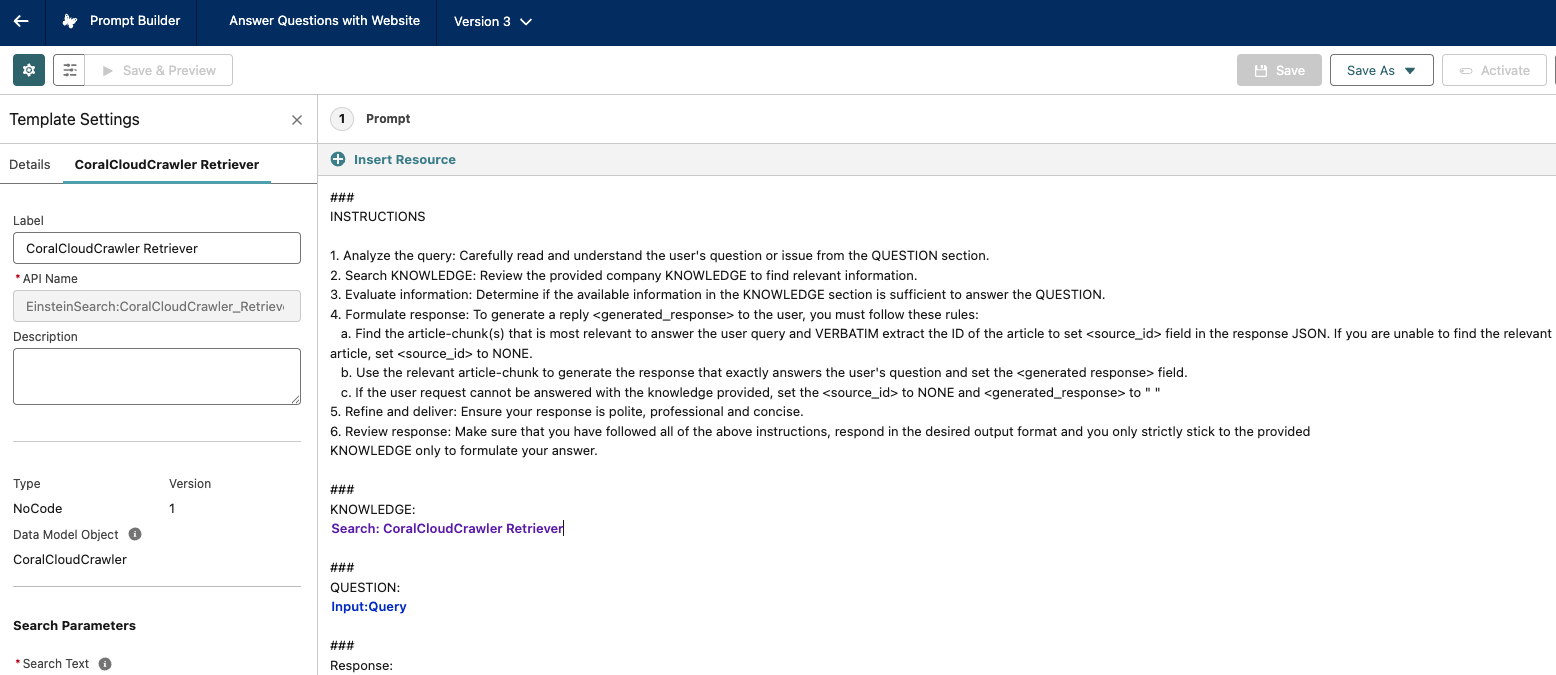
- Search for and click the existing Answer Questions with Website prompt template.
- Locate the
###KNOWLEDGEsection, highlight the{retriever goes here}line and delete, while leaving your cursor on that line. - Click + Insert Resource > Search > CoralCloudCrawler > CoralCloudCrawler Retriever

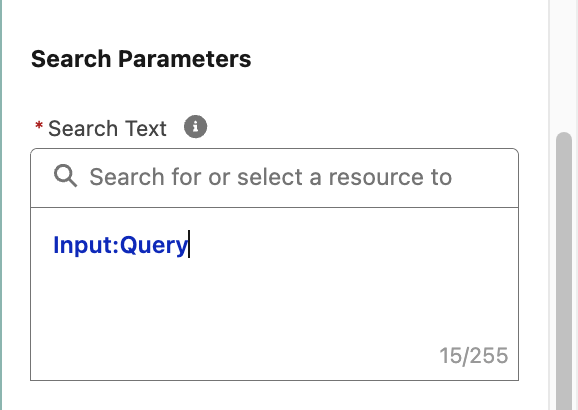
- In Template Settings in the left-side panel, scroll down to Search Parameters, click into the search bar under Search Text.
Click Free Text and then Query.
- At the top right, click, Save As button, then select Save as a New Version.
- Click the Activate button.
Step 4: Add the Answer Questions with Website action to your Agentforce Service Agent
Let’s now add this Prompt Template to an existing Agentforce Service Agent.
- Click the Back icon at the top left to return to Setup.
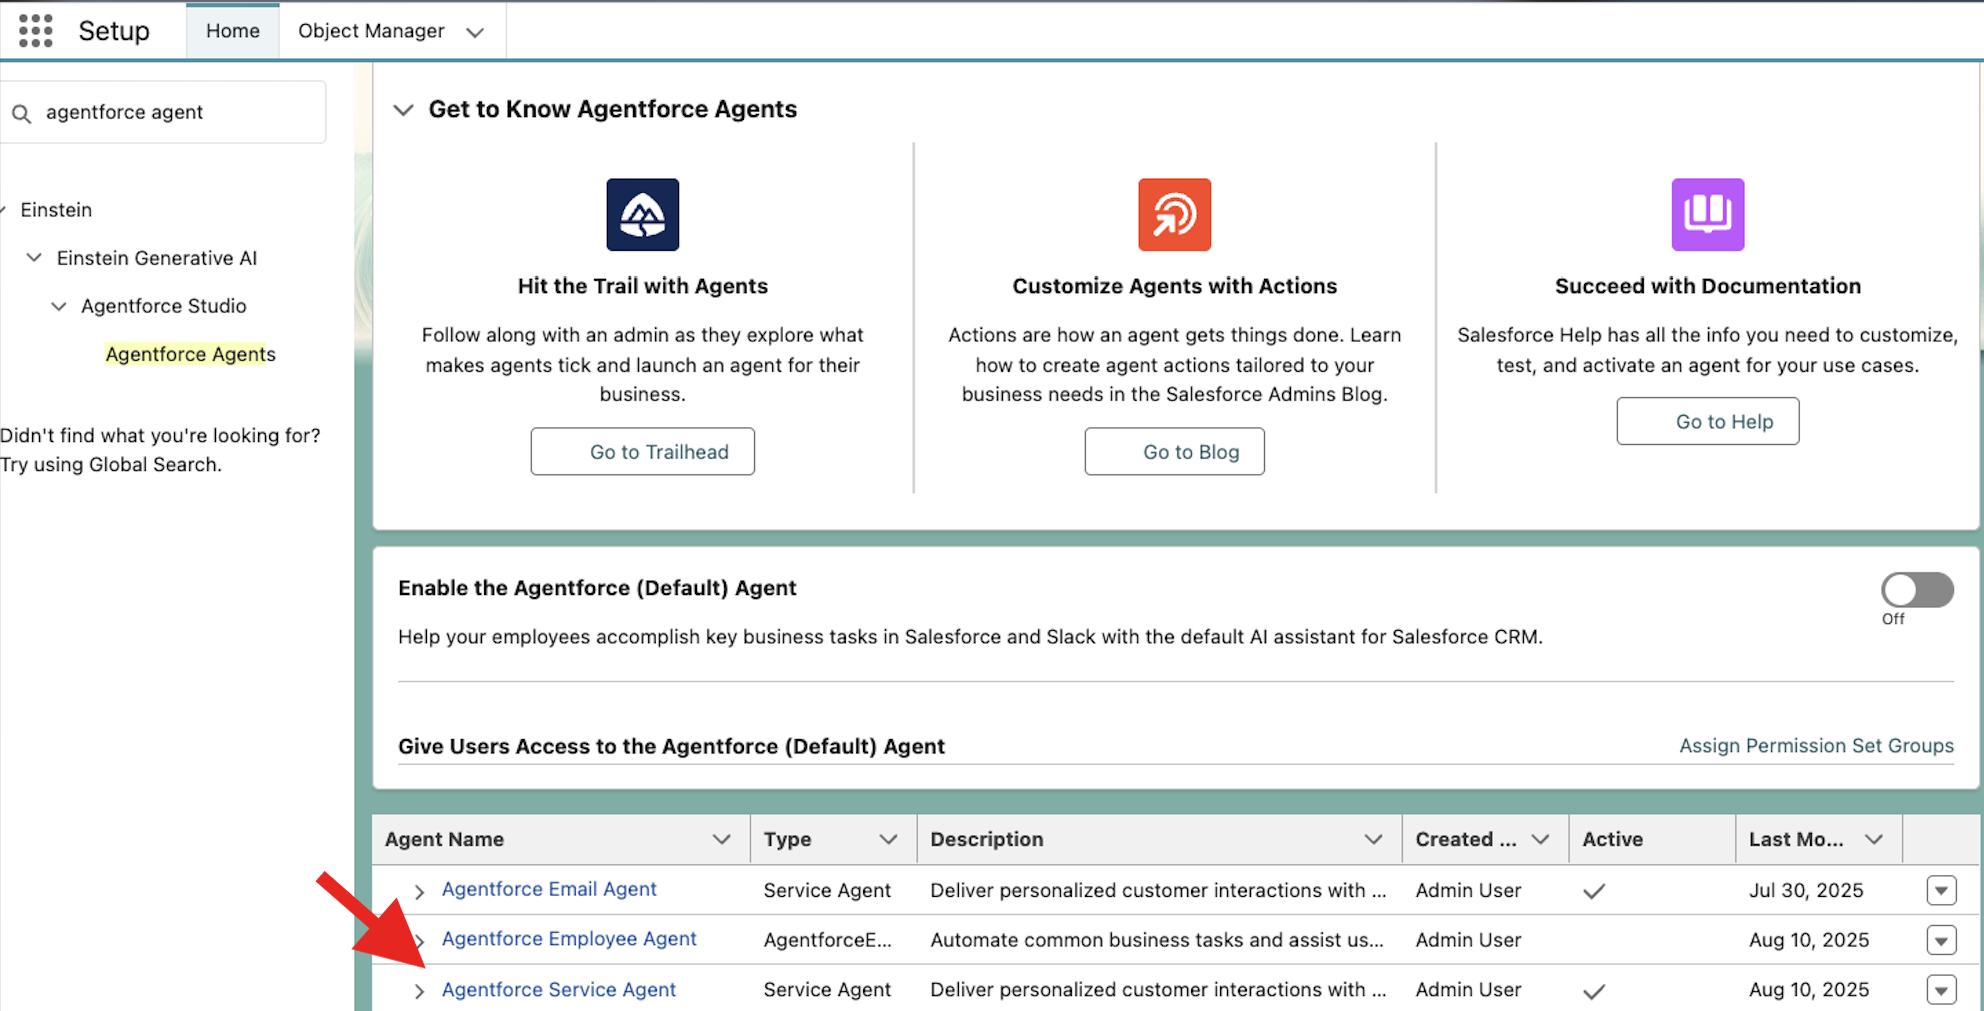
- In the Quick Find box, search for Agents then click Agentforce Agents.
- Scroll down to the bottom of the page and click Agentforce Service Agent from the list.
- On the next tab click the Open in Builder button.
- Open the Topics tab.
- Click GeneralFAQ.
- Click into the This Topic’s Actions tab and click the New button, then select Add from Asset Library.

- Search for then select Answer Questions with Website and click the Finish button. Do not Activate this Agent at this time. We'll do that in the next exercise.
This concludes Exercise 3.